
Achieving that perfectly white, museum-quality European mount for your deer skull doesn’t have to be a mystery. The primary agent you’ll use to whiten a deer skull effectively and safely is hydrogen peroxide. This common chemical brightens bone without causing damage, ensuring your trophy looks its best for years to come.

Beyond just whitening, getting a pristine skull involves several crucial steps. This guide will walk you through the essential supplies needed, proper cleaning and degreasing techniques, and safe application methods. You’ll learn how to transform a raw skull into a stunning display piece, all while prioritizing safety at home.
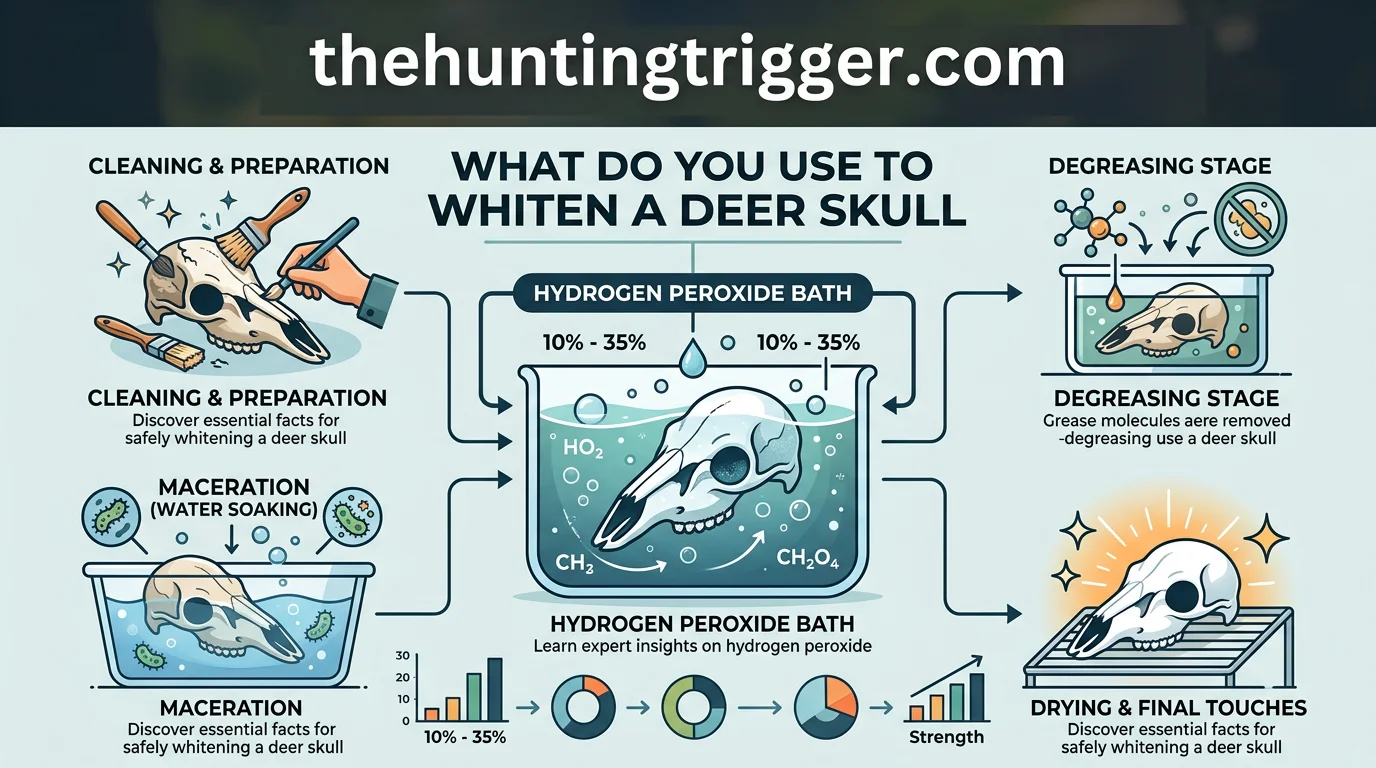
What Do You Use to Whiten a Deer Skull: The Essential Overview
When aiming to achieve a pristine, bright white deer skull, often referred to as a “European Mount,” the singular recommended chemical you should use is hydrogen peroxide. It stands out as the safest and most effective agent for transforming a cleaned skull into a lasting, aesthetically pleasing display piece.
It is crucial to understand that whitening is the final stage in preparing a deer skull. Before any whitening agent is applied, the skull must undergo meticulous cleaning to remove all tissue, followed by a comprehensive degreasing process. These preparatory steps are absolutely essential for successful whitening.
The ultimate goal is a uniform, bright white appearance, characteristic of a high-quality European Mount. Without proper whitening using hydrogen peroxide, a skull can appear dull, stained, or even develop a yellowed, greasy look over time. A correctly whitened skull offers a stark, clean contrast to these undesirable outcomes.
Therefore, while the journey to a perfect European Mount involves several critical steps, hydrogen peroxide is the indispensable chemical for achieving that coveted bright white finish. Its proper application ensures your deer skull will be a clean, museum-quality display for years to come.
Hydrogen Peroxide: The Safest Chemical for Whitening (Avoid Bleach!)
Why Hydrogen Peroxide is the Go-To for Bone Whitening
Hydrogen peroxide (H2O2) is the recommended and safest chemical for whitening animal skulls. It acts as a powerful oxidizing agent, which means it reacts with and breaks down residual organic materials still clinging to the bone after cleaning and degreasing.
This oxidative process effectively removes stubborn stains and discoloration caused by fat, tissue, or blood. Crucially, the whitening action of hydrogen peroxide primarily oxidizes these organic impurities; it doesn’t truly ‘bleach’ the bone itself in a damaging way.
The result is a clean, natural white finish that preserves the bone’s structural integrity and aesthetic quality for years to come. Various concentrations of hydrogen peroxide are available, with 3% to 12% being common for skull whitening.
The Dangers of Chlorine Bleach: What to Never Use
Chlorine bleach (household bleach) should never be used on skulls. Its destructive effects far outweigh any perceived whitening benefit, leading to irreversible damage.
Unlike hydrogen peroxide, chlorine bleach causes severe, irreparable damage to bone structure. It aggressively degrades the organic matrix of the bone, resulting in a significantly weakened and brittle skull.
Bleach-treated skulls often become chalky, developing a powdery, flaking surface that crumbles easily. Furthermore, chlorine bleach causes permanent discoloration, leading to an unnatural, often yellowish tint that cannot be removed. This destructive action contrasts sharply with the gentle, effective oxidation provided by hydrogen peroxide.
What Else Do You Use to Whiten a Deer Skull: Essential Supplies &
Key Chemicals and Compounds for Whitening Success
Beyond the primary whitening agent, hydrogen peroxide, several other chemicals contribute to a successful deer skull whitening process. A good degreaser is paramount for removing residual fats and oils, which can cause yellowing later. Household dish soap, such as Dawn, is an effective and readily available option.
Hydrogen peroxide comes in various forms. Liquid hydrogen peroxide, typically 3% to 12% solutions, is ideal for soaking the entire skull. Cream peroxide, often marketed as hair developer (e.g., 20 or 40 volume), offers a thicker consistency. This cream is perfect for brushing directly onto the skull, especially for localized application or if you prefer a paste.
If you are using liquid hydrogen peroxide and wish to create a thicker paste for direct application, an inert thickening agent can be added. Common examples include baking soda or powdered laundry detergent (without colorants). Water is also essential for diluting solutions, rinsing, and initial cleaning stages.
Tools and Containers for Safe Application
Proper tools and containers are vital for safe and effective whitening. For soaking, you will need a non-reactive container large enough to fully submerge the skull. Plastic buckets, storage totes, or even a large plastic tub work well. Ensure it has a lid to minimize evaporation and keep out contaminants.
When applying cream peroxide or a paste, a sturdy brush (like a paint brush or old toothbrush) is necessary. A stirring stick or spatula helps mix components thoroughly. A well-ventilated workspace is also crucial for safety, although not a physical “tool.”
Personal Protective Equipment (PPE) Essentials
Personal protective equipment (PPE) is non-negotiable when handling chemicals like hydrogen peroxide. Always wear chemical-resistant gloves, such as nitrile or thick rubber gloves, to protect your skin from irritation and chemical burns. Prolonged contact can be harmful.
Eye protection, like safety glasses or goggles, is equally critical to prevent splashes from entering your eyes. Personal protective equipment (gloves, eye protection) should always be used when handling hydrogen peroxide. Consider wearing an apron and long sleeves to protect your clothing and exposed skin.
Beyond Whitening: Thorough Cleaning and Degreasing for Your Deer Skull
Why Proper Cleaning is Non-Negotiable
Before any whitening agents are applied, the deer skull must undergo meticulous cleaning. This initial phase involves removing all remaining flesh, tissue, and brain matter from the bone. Incomplete cleaning will hinder the whitening process and can lead to unpleasant odors and decay over time.
Various methods are employed for this crucial step, including maceration (allowing bacteria to naturally consume tissue), boiling (though often discouraged due to potential bone damage and grease setting), or utilizing dermestid beetles in a controlled environment. Whichever method you choose, the goal is a bone-dry, impeccably clean skull.
The Critical Step: Fully Degreasing Your Deer Skull
Thorough cleaning and degreasing of the skull are absolutely essential before whitening to ensure a bright, lasting white finish and prevent future yellowing. The skull bones contain natural oils and fats that, if not removed, will eventually seep out and cause unsightly yellow discoloration, even after whitening.
Degreasing typically involves soaking the skull in a solution that breaks down these fats. Common degreasing agents include household dish soap (like Dawn) or ammonia diluted in warm water. The skull may need to soak for several days to several weeks, depending on its greasiness, with regular changes of the degreasing solution.
You can tell a skull is adequately degreased when the water in the soaking container remains clear and free of an oily film, and the skull itself feels clean and non-greasy to the touch. A good test is to observe if water sheets evenly across the bone rather than beading up.
Skipping or rushing this vital step will almost certainly result in disappointment. Inadequately degreased skulls will inevitably develop greasy yellow spots and a dull finish, undermining all subsequent whitening efforts. A truly pristine, museum-quality white requires patience during both cleaning and degreasing.
Application Methods: What Do You Use to Whiten a Deer Skull – Soaking
Method 1: Soaking Your Deer Skull in Peroxide Solution
📋
Step-by-Step Guide
To begin, select your hydrogen peroxide. Standard 3% drugstore peroxide is effective, though higher concentrations like 6% or 12% can accelerate the process. For stronger solutions, consider diluting them. For instance, a 12% peroxide can be mixed 1:1 with water to create a safer 6% working solution.
Select a non-reactive plastic container, such as a sturdy tub or bucket, large enough to fully submerge the deer skull. Ensure the container can be sealed or covered to prevent evaporation, maintain peroxide potency, and minimize light exposure during the soaking process.
Carefully place the cleaned and degreased deer skull into the prepared solution. Ensure the entire bone structure is completely immersed. If you wish to preserve the natural color of the antlers, ensure they remain above the liquid level throughout the soaking duration.
Allow the skull to soak for 24-48 hours with 3% peroxide, or 6-12 hours for stronger, diluted solutions. Periodically check the skull’s whiteness. Once the desired shade is achieved, remove the skull and rinse it thoroughly under running water to eliminate all peroxide residue. Finally, let it air dry completely in a well-ventilated area.
Method 2: Applying a Peroxide Paste for Targeted Whitening
📋
Step-by-Step Guide
For a paste application, combine a higher concentration of hydrogen peroxide, such as a 20-volume (6%) or 40-volume (12%) cream developer, with a thickening agent. Magnesium Carbonate is ideal for this, but cornstarch or plain flour can also work. Mix until you achieve a thick, spreadable consistency similar to toothpaste or frosting.
Using an old paintbrush or a disposable brush, apply a generous, even layer of this peroxide paste over all bone surfaces of the skull. Pay close attention to crevices and around the teeth, ensuring thorough coverage. Again, avoid applying paste directly to the antlers if you intend to keep their natural color.
Let the applied paste dry completely on the skull. This process can take several hours, or even a full day, depending on the thickness of the paste and ambient humidity. As the paste dries, the hydrogen peroxide continues its whitening action, and the paste may crack or become crumbly.
Once the paste is fully dry and the skull has reached its desired white appearance, gently scrape off the dried material. A stiff brush or a plastic scraper works well for this. Afterwards, rinse the skull thoroughly under clean running water to remove any remaining paste or peroxide. Allow it to air dry completely.
Understanding Peroxide Strengths: Concentration and Volume
Hydrogen peroxide is available in various concentrations for whitening. Common household peroxide is typically 3%. However, higher strengths like 6%, 9%, or even 12% (often labeled as 20 or 40 ‘volume’ cream developer, respectively, used in hair bleaching) are also available and work faster.
While higher concentrations accelerate the whitening process, they also demand greater caution. They are more corrosive and can cause skin irritation or burns upon contact. Always wear appropriate personal protective equipment when handling stronger peroxide solutions.
Diluting stronger peroxide can offer a safer, more controlled whitening experience, allowing for a gradual lightening of the bone. For instance, diluting a 12% solution 1:1 with water yields a 6% concentration, which is effective yet less aggressive for whitening deer skulls.
Achieving a Pristine European Mount: Insights for Deer Skull Whitening
Leveraging Sunlight for Enhanced Whitening
Sunlight plays a beneficial role in accelerating the whitening process when using hydrogen peroxide. Its ultraviolet (UV) rays act as a catalyst, enhancing the peroxide’s ability to break down residual organic matter and achieve a brighter, uniform white finish on the bone.
After applying your peroxide solution, place the skull in a well-ventilated area receiving direct sunlight. This exposure can significantly reduce the time needed for optimal whitening compared to skulls left solely indoors, increasing efficiency.
Troubleshooting Common Whitening Challenges
Stubborn yellow spots on a skull often indicate deeply embedded grease not fully removed during degreasing. A small area that remains yellow clearly signals a need for more aggressive treatment to achieve an evenly whitened mount.
To address these, re-degrease the specific area, or the entire skull, using an appropriate degreasing agent. Once thoroughly degreased, reapply your hydrogen peroxide solution. This two-step approach is crucial for a pristine result.
Uneven whitening or a chalky appearance usually stems from poor initial preparation or, unfortunately, the use of chlorine bleach. Bleach can degrade bone structure, leading to a dull, porous texture rather than a vibrant white. There is no good fix for bleach damage.
Final Touches for Lasting Bone Preservation
After whitening is complete and the desired brightness achieved, thoroughly rinse the skull with clean, cool water. This critical step removes any residual peroxide or cleaning agents that could otherwise continue to affect the bone over time.
Following rinsing, allow the skull to dry completely in a well-ventilated area, away from direct heat. Ensuring it is bone-dry prevents mold or mildew growth, preserving the structural integrity and pristine appearance of your European mount for years.
Crucial Safety Measures When Whitening a Deer Skull at Home
Always Wear Your Personal Protective Equipment
Personal protective equipment (PPE) should always be used when handling hydrogen peroxide. This chemical can cause skin irritation and serious eye damage upon contact. Protect yourself by wearing chemical-resistant nitrile or latex gloves, along with safety glasses or goggles.
Proper ventilation is also paramount to avoid inhaling fumes. Work outdoors if possible, or ensure your workspace has excellent airflow. Open windows wide and use fans to circulate fresh air and dissipate any chemical vapors.
Safe Handling and Storage of Hydrogen Peroxide
When handling hydrogen peroxide, pour it carefully and directly from its original container. Avoid transferring it to unmarked bottles, which can lead to accidental misuse. Always keep the bottle securely capped when not in use.
Store hydrogen peroxide in a cool, dark place, away from direct sunlight, heat sources, and combustible materials. It must be kept out of the reach of children and pets to prevent accidental ingestion or exposure. Follow local guidelines for chemical disposal, typically involving dilution and flushing down a drain.
Avoiding Common Safety Pitfalls
Never attempt to heat hydrogen peroxide, such as by boiling, to speed up the whitening process. This can cause rapid decomposition, leading to dangerous fumes or even an explosive reaction. Hydrogen peroxide works effectively at room temperature.
In case of accidental skin contact, immediately rinse the affected area with plenty of water for 15-20 minutes. If hydrogen peroxide splashes into your eyes, flush them thoroughly with water for at least 15-20 minutes and seek immediate medical attention.
If accidentally ingested, do NOT induce vomiting. Drink a glass of water to dilute the chemical and seek immediate emergency medical care. Furthermore, never mix hydrogen peroxide with other household chemicals, as this can create hazardous and unpredictable reactions.
Key Takeaways
-
✓
Hydrogen peroxide is the safest and most effective chemical for whitening deer skulls, avoiding the damaging effects of bleach. -
✓
Thorough cleaning and degreasing are absolutely essential steps before attempting any whitening for optimal results. -
✓
Gather crucial supplies including protective gear, degreasing agents, and various application tools for a successful process. -
✓
Soaking the skull in a controlled hydrogen peroxide solution is a primary and effective application method. -
✓
Strict adherence to safety measures, including ventilation and personal protective equipment, is vital when handling chemicals.
❓ Frequently Asked Questions
1
What is a European mount?
A European mount is a method of preserving a deer or other animal’s skull, typically with the antlers attached, by cleaning and whitening the bone to create a natural, skeletal display piece. It focuses on the bone structure itself.
2
Why whiten a deer skull?
Whitening a deer skull serves to clean and sanitize it, remove any remaining tissue or discoloration, and achieve an aesthetically pleasing, bright white finish that highlights the natural bone structure for display.
3
Is bleach safe for deer skulls?
No, bleach is not safe for deer skulls. It contains chlorine that aggressively breaks down the bone’s organic structure, leading to a chalky, brittle texture that will deteriorate over time. Always use hydrogen peroxide instead.
4
How long does skull whitening take?
The entire process, including cleaning, degreasing, and whitening, can take several days to a few weeks, depending on the skull’s initial condition, the degreasing method used, and the strength of your peroxide solution.
5
What concentration of hydrogen peroxide should I use?
For soaking, a standard 3% hydrogen peroxide solution (available at pharmacies) is effective. For a thicker paste or more stubborn stains, a higher concentration like 10% (30-40 volume) peroxide cream developer from beauty supply stores works well.
6
What is the best way to whiten a deer skull?
The best way is using hydrogen peroxide after thorough cleaning and degreasing. Either soak the skull in a diluted solution or apply a paste, ensuring even coverage and adequate time for oxidation. Always avoid chlorine bleach.


Leave a Reply