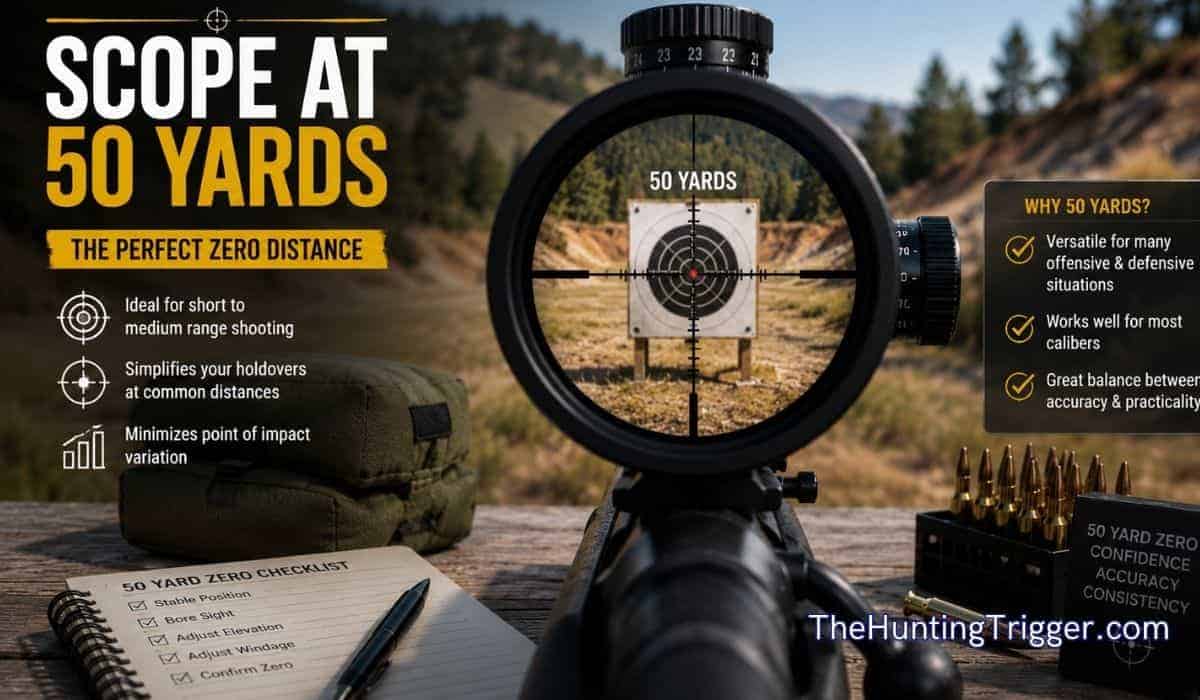
Sight in a scope at 50 yards is a skill every shooter needs. Whether you use a rifle for hunting, sport, or target practice, having your scope set correctly makes all the difference. Many people miss shots because their scope isn’t adjusted well.
This guide will help you set up your scope at 50 yards so your shots land where you aim. Each step matters, so paying attention to every detail will increase your accuracy.
Table of Contents
Preparing For Sight-in
Before adjusting your scope, make sure you have the right environment and tools. A stable shooting area and proper equipment are essential for good results.
1. Choose A Safe Range
Pick a range that allows shooting at 50 yards. Check for clear lines of sight, strong backstops, and safety rules.
2. Set Up A Solid Shooting Bench
Use a bench or table that doesn’t move. Wobbly surfaces can cause errors in your adjustments.
3. Use Sandbags Or A Shooting Rest
Support your rifle with sandbags or a shooting rest. This keeps your gun steady while you adjust the scope.
4. Check Lighting Conditions
Good lighting helps you see your target and crosshairs clearly. Avoid dark or shadowy spots.
5. Wear Eye And Ear Protection
Always use safety glasses and earmuffs. Protecting your senses keeps shooting enjoyable and safe.
Preparing Your Rifle And Scope
Setting up your gear properly avoids common mistakes. Small errors here can affect your whole sight-in process.
6. Inspect Your Rifle
Check for loose parts, clean the barrel, and make sure your rifle is in good condition.
7. Mount Your Scope Correctly
The scope should be tightly attached. Loose mounts cause shifting and poor accuracy.
8. Level The Scope
Make sure the scope is straight with the rifle. Crooked scopes make aiming harder.
9. Adjust Eye Relief
Set the scope distance so you see the whole field without dark circles. This avoids discomfort and injury.
10. Set Magnification To Medium
For most scopes, a medium setting (3–6x) is clear at 50 yards. Too much zoom is unnecessary.
Choosing The Right Ammunition
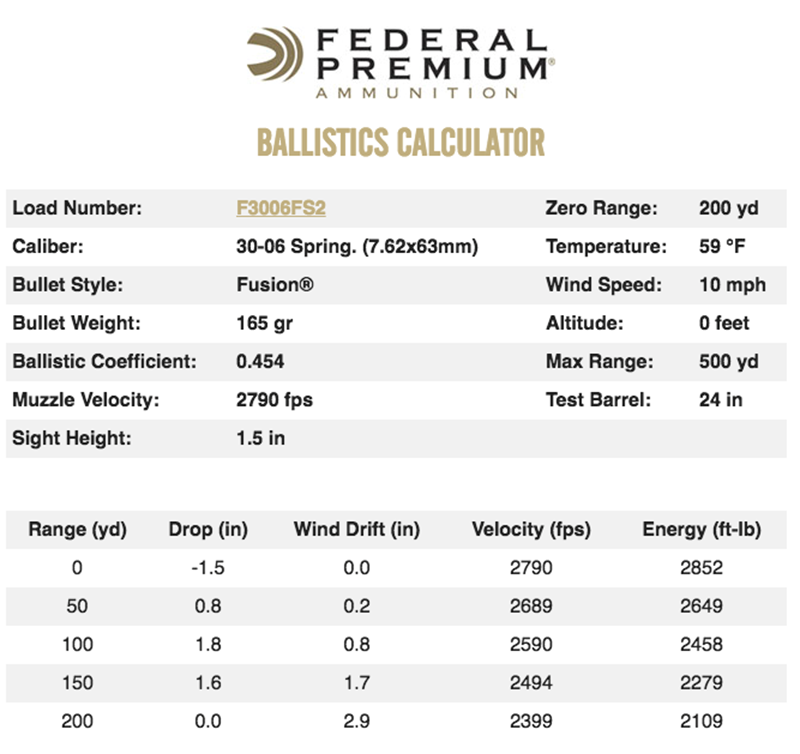
The ammunition you use affects your groupings and adjustments.
11. Pick Consistent Ammo
Use the same brand and type for all shots during sight-in. Changing ammo changes your results.
12. Check Bullet Weight
Use the recommended bullet weight for your rifle and scope. Different weights hit differently.
13. Avoid Damaged Rounds
Inspect each round for dents or damage. Faulty ammo can cause wild shots.
14. Bring Enough Ammo
Carry at least 20–30 rounds. You may need extra for testing and corrections.
15. Store Ammo Properly
Keep your ammo dry and clean. Moisture or dirt affects performance.
Setting Up Your Target
A clear target helps you see results and make precise adjustments.
16. Use A Large Paper Target
Large targets are easier to see at 50 yards. They also show misses clearly.
17. Mark Center Point
Draw a clear dot or cross at the target’s center. This helps with aim.
18. Add Grid Lines
Grid lines (1-inch squares) make measuring shot groups easier.
19. Secure Target Firmly
Attach the target so it doesn’t flap in the wind. Movement confuses results.
20. Check Target Distance
Measure exactly 50 yards from your shooting spot to the target.
First Shots And Initial Adjustments
Start with test shots to see where your scope is aiming.
21. Fire A 3-shot Group
Shoot three rounds, aiming at the center each time. This shows your initial point of impact.
22. Observe Shot Placement
Check where the group hits compared to the center. Don’t adjust after just one shot.
23. Measure Distance From Center
Use grid lines to see how far your shots are from the target’s center.
24. Record Results
Write down the position of your shots. Keeping track helps later.
25. Check For Pattern Consistency
If shots are spread widely, check your rifle and ammo for problems.
Adjusting Windage And Elevation
Use your scope’s turrets to move the point of impact.
26. Adjust Windage (left/right)
If shots are left or right, turn the windage turret. Clockwise usually moves shots right; counterclockwise left.
27. Adjust Elevation (up/down)
If shots are high or low, turn the elevation turret. Clockwise moves shots down; counterclockwise up.
28. Know Your Scope’s Click Value
Most scopes move the point of impact ¼ MOA per click (about 1/8 inch at 50 yards).
29. Make Small Adjustments
Change turrets a few clicks at a time. Over-adjusting causes new errors.
30. Reshoot After Adjusting
Fire another 3-shot group to see the effect of your adjustments.
Fine-tuning For Accuracy
Once you’re close, refine your scope for perfect aim.
31. Shoot Multiple Groups
Try several 3-shot groups to confirm your scope’s accuracy.
32. Adjust For Consistent Results
If groups stay off-center, adjust again. Aim for repeatable results.
33. Check For Scope Shift
Sometimes scopes shift after firing. Recheck your mounts and tighten if needed.
34. Allow Barrel To Cool
Hot barrels can change shot placement. Let your rifle cool between groups.
35. Clean Barrel Regularly
Dirty barrels affect accuracy. Clean every 10–15 shots.
Data Table: Windage And Elevation Adjustments
Here’s how typical scopes respond to turret adjustments at 50 yards:
| Adjustment Type | Direction | MOA per Click | Inches at 50 Yards |
|---|---|---|---|
| Windage | Right/Left | 1/4 | 0.125 |
| Elevation | Up/Down | 1/4 | 0.125 |
Checking Your Scope Settings
After getting close to the target center, confirm your settings.
36. Double-check Turret Settings
Review your windage and elevation positions. Mistakes here cause confusion later.
37. Test At Different Times
Try shooting at different hours. Lighting and weather can affect results.
38. Switch Shooters
Let a friend try your rifle. If groups stay centered, your scope is well-adjusted.
39. Test With Different Ammo
Once your scope is set, see if other brands hit close to center.
40. Record Final Settings
Write down your scope’s settings for future reference.
Comparing Common Scope Types
Different scopes offer unique features. Here’s a quick comparison:
| Scope Type | Magnification | Best Use | Ease of Adjustment |
|---|---|---|---|
| Fixed | 4x | Plinking, short-range | Easy |
| Variable | 3–9x | Hunting, target | Moderate |
| Red Dot | 1x | Fast target, close-range | Very easy |
Common Mistakes And How To Avoid Them
Even experienced shooters can make errors while sighting in.
41. Over-adjusting Turrets
Making big changes can throw off your aim. Use small, careful adjustments.
42. Ignoring Barrel Heat
Hot barrels cause shots to drift. Allow cooling time.
43. Using Different Ammo Mid-session
Always use the same ammo until your scope is set.
44. Loose Scope Mounts
Check mounts after each group. Loose scopes shift under recoil.
45. Shooting From Unstable Positions
Always use a rest or sandbags for sight-in. Avoid offhand shooting.
Final Confirmation And Practical Tips
Finish your sight-in session with confidence.
46. Fire A Last Group
Shoot one last group at the center. Confirm your scope holds zero.
47. Mark Your Scope’s Zero
Some scopes have marks or dials for zero. Set these for easy future reference.
48. Check Zero Regularly
Scopes can shift after bumps or rough handling. Test your zero before every use.
49. Keep A Sight-in Log
Tracking your adjustments and results helps next time.
50. Store Your Rifle Safely
Good storage keeps your rifle and scope in top shape. Use a case or safe, and avoid moisture.

Comparison Table: 50-yard Vs 100-yard Sight-in
| Feature | 50 Yards | 100 Yards |
|---|---|---|
| Setup Time | Shorter | Longer |
| Visibility | Easy for beginners | Requires stronger optics |
| Adjustment Sensitivity | Higher | Lower |
| Ammo Needed | Fewer rounds | More rounds |
| Typical Use | Short-range hunting, plinking | Long-range target, hunting |
Getting your scope sighted at 50 yards takes patience and care. Each step helps you reach better accuracy, from choosing the right bench to making fine turret adjustments. Some shooters rush the process, but steady work leads to reliable results. Many beginners forget to check for barrel heat or use different ammo—these small errors can ruin your session. Keep notes, watch for loose mounts, and test your zero often.
Frequently Asked Questions
How Many Shots Should I Fire To Sight In A Scope?
Start with 3-shot groups. You may need 15–20 shots total to reach a good zero.
Can I Use Any Ammo To Sight In?
No. Always use the same ammo type for sight-in. Changing brands or weights changes your point of impact.
What Does “zero” Mean For A Scope?
“Zero” means your scope is aligned with your rifle so shots hit the target’s center at your chosen distance.
Why Is My Scope Still Off After Adjustments?
If shots stay off-center, check for loose mounts, damaged ammo, or scope shift. Repeat the process slowly.
How Often Should I Check My Scope’s Zero?
Test your scope’s zero before every shooting session. Bumps or rough handling can shift your settings.
Last Word
Sight in your scope at 50 yards with care, and you’ll enjoy more accurate shots every time. Keeping records and staying patient will help you improve with every range trip.

Leave a Reply