
Sighting in your TenPoint crossbow scope is essential for consistent accuracy and ethical hunting. This guide provides a proven, step-by-step method to properly zero your scope, ensuring every shot is on target and maximizing your crossbow’s performance.


Achieving pinpoint accuracy with your TenPoint crossbow in 2026 demands a precise scope sighting process, and you can absolutely dial it in yourself. The core of success lies in a systematic approach, starting with proper scope mounting and progressing through careful, incremental adjustments. Forget guesswork; we’ll focus on repeatable steps to ensure your arrows consistently hit their mark, whether for target practice or ethical hunting.
A properly sighted scope isn’t just about hitting the bullseye; it’s about confidence and consistency under pressure. Every shot counts, and understanding how your TenPoint crossbow and scope interact at various distances is paramount. This guide provides the expert methodology to eliminate frustrating misses and guarantee your setup performs optimally, leveraging the advanced optics common on 2026 TenPoint models.
Key Takeaways
- Ensure stable scope mounting for accuracy.
- Start sighting in close (e.g., 10-20 yards).
- Adjust windage and elevation systematically.
- Verify zero at all intended hunting distances.
- Check for consistent arrow flight and form.
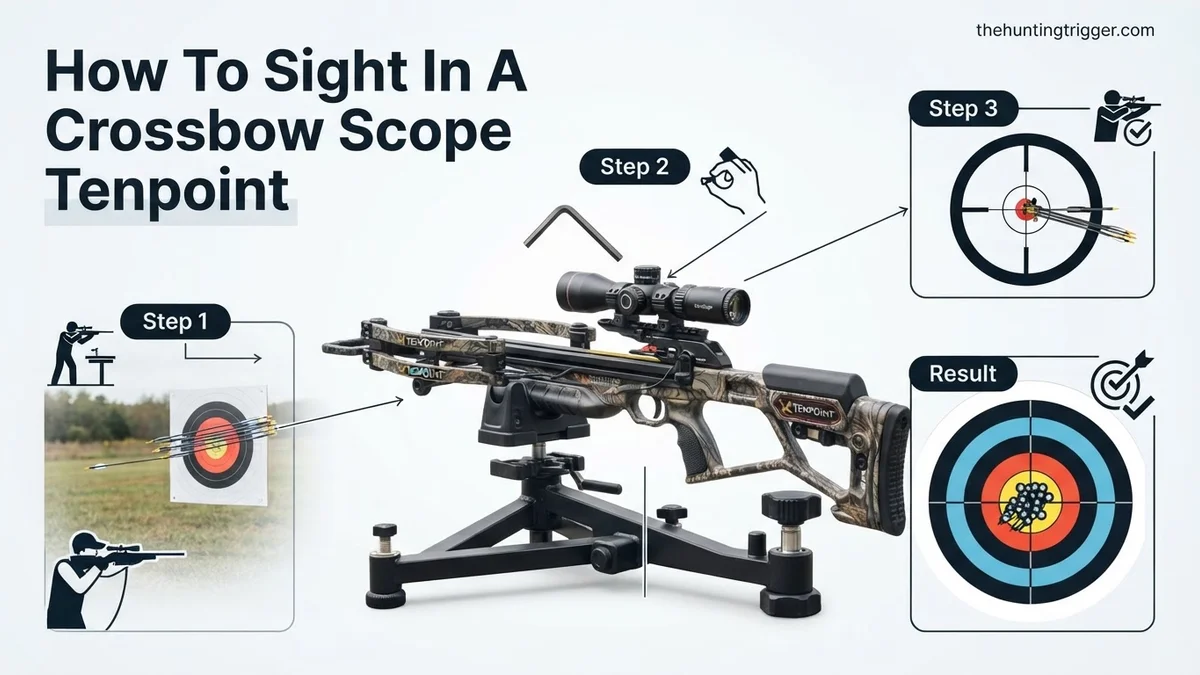
Diagnosing Common TenPoint Crossbow Sighting Problems
Before you even pick up an Allen wrench, it’s critical to understand potential issues that can derail your sighting efforts. Many accuracy problems aren’t the scope itself, but rather foundational setup flaws. In 2026, TenPoint crossbows are engineered for high precision, meaning any deviation often traces back to user setup or basic maintenance.
Incorrect Scope Mounting & Torque
Improperly mounted optics are the leading cause of inconsistent shots. Even a high-quality TenPoint scope won’t hold zero if it’s not secured correctly. This is particularly true for today’s high-speed crossbows that generate significant recoil energy.
- Loose Rings: Ensure scope rings are tightened evenly and to the manufacturer’s recommended torque specifications. Over-tightening can damage the scope tube; under-tightening allows shifting.
- Forward/Backward Shift: Verify the scope is not creeping forward or backward in the rings. Use a dab of blue Loctite on the ring screws if persistent issues occur, but always follow TenPoint’s guidelines.
- Base Movement: The scope base itself must be rock-solid on the crossbow rail. Check that all base screws are torqued correctly. Some TenPoint models feature integrated dovetail rails that require specific mounting techniques.
Arrow and Broadhead Inconsistency
Your scope can be perfectly zeroed, but if your arrows aren’t consistent, your groups will suffer. This isn’t a scope problem, but it manifests as one.
- Weight & FOC Variation: Use arrows of consistent weight and front-of-center (FOC). Minor variations can cause significant point-of-impact shifts, especially at longer ranges. TenPoint often recommends specific arrow types and weights for their models; adhere to these.
- Vane Damage: Inspect arrow fletching for damage. Bent or missing vanes can cause arrows to wobble in flight, leading to erratic shots.
- Broadhead Tuning: If you plan to hunt with broadheads, you must tune your broadheads to your field points. Many mechanical broadheads fly identically to field points; fixed blades often require careful tuning (e.g., slight vane rotation or blade alignment adjustments). Zero your scope with field points, then confirm with your hunting broadheads.
Master Crossbow Sighting in 8 Simple Steps
Sighting in your TenPoint crossbow scope is a critical step to ensure accuracy and confidence in the field or at the range. A properly zeroed scope means your arrows will hit precisely where your reticle indicates, transforming your shooting experience. This detailed guide will walk you through each crucial stage, from initial setup to fine-tuning, empowering you to achieve consistent, precise shots with your TenPoint crossbow.
Step 1: Gather Your Arsenal & Prioritize Safety
What you need: Your TenPoint crossbow, TenPoint scope (if not pre-mounted), suitable arrows/bolts (e.g., TenPoint Pro Elite or Pro V22), field points (matched weight to broadheads), target rated for crossbow speeds, measuring tape, Allen wrenches or scope mounting tools, shooting rest/bipod, a stable shooting bench, safety glasses, ear protection, and your TenPoint scope’s manual.
Instructions: Before anything else, ensure your shooting environment is safe. Set up your target securely at a known distance (initially 20 yards). Wear your safety glasses and ear protection. Verify that your crossbow is unloaded and on safe. Read your specific TenPoint scope’s manual to understand its features, reticle, and click adjustments for windage and elevation. Familiarize yourself with the speed adjustment dial, if present on your model.
Pro Tip: Always use practice arrows with field points that match the grain weight of your hunting broadheads. This ensures your point of impact doesn’t change when you switch to hunting gear. Consistency is key to accuracy.
Step 2: Secure Scope Mounting & Eye Relief
What you need: TenPoint scope, scope rings (often included or TenPoint branded), Allen wrenches, a leveling kit or small level.
Instructions: If your scope isn’t already mounted, carefully attach the rings to your crossbow’s Picatinny rail, ensuring they are positioned correctly for your eye relief. Place the scope in the rings, tighten the bottom screws lightly. Shouldering the crossbow, adjust the scope forward or backward until you have a full, clear field of view without black rings (vignetting). This is your eye relief. Then, rotate the scope until the vertical reticle line is perfectly plumb. Use a leveling tool for precision. Once level and at correct eye relief, tighten the ring screws evenly and securely, following your scope ring manufacturer’s torque specifications. Do not overtighten.
Pro Tip: Achieving proper eye relief is crucial for quick target acquisition and consistent sight picture. Once you find your comfortable eye relief, mark the position of the rings on the rail with a permanent marker for future reference or if you ever need to remove and remount the scope.
Step 3: Initial Bore Sighting (Optional, but Recommended)
What you need: Crossbow bore sighter (laser or optical), or a steady rest for manual bore sighting.
Instructions: Bore sighting gets your initial shots close to the target, saving time and arrows.
- Laser Bore Sighter: Insert the laser bore sighter into your crossbow’s barrel according to its instructions. Place the crossbow on a stable rest, aim the laser dot at the center of your target at 20 yards. Adjust your scope’s windage (horizontal) and elevation (vertical) turrets until the scope’s reticle (the aiming dot or crosshair) aligns with the laser dot on the target.
- Manual Bore Sighting: With the crossbow securely rested, remove the scope caps and look through the crossbow barrel at your 20-yard target. Center the target in the barrel. Without moving the crossbow, adjust your scope’s reticle to the center of the target. This method is more challenging but effective.
Pro Tip: Even if your crossbow and scope are factory-mounted, a quick bore sight check is a wise step. It dramatically reduces the number of shots needed to get on paper, especially if the scope or rings were jostled during shipping.
Step 4: Establish Your 20-Yard Zero Point
What you need: TenPoint crossbow, arrows, target at 20 yards, shooting rest, safety gear.
Instructions: With your crossbow on safe, load an arrow. Aim at the bullseye of your target at 20 yards. Take a slow, deliberate shot. After firing, carefully approach the target and observe where your arrow struck. Do not make any adjustments after the first shot; you need a group to determine the average point of impact. Return to your shooting position, reload, and fire two more arrows, aiming at the exact same spot. After three shots, you should have a small group on your target.
Pro Tip: Consistency in your shooting form is paramount here. Use a stable shooting rest, maintain the same grip, and use the same anchor point for every shot. Any variation in your technique will lead to an inconsistent group and frustrate your sighting efforts.
Step 5: Adjusting for 20-Yard Precision
What you need: Your group of arrows, TenPoint scope manual, small screwdriver or coin (if turrets require one).
Instructions: After shooting your 3-arrow group at 20 yards, measure the distance from the center of your group to the bullseye, both horizontally (windage) and vertically (elevation). Consult your TenPoint scope manual for the specific click values. For many TenPoint scopes, 1 click might adjust the point of impact by approximately 1/2 inch at 20 yards. If your group is 2 inches low, you’ll need to adjust the elevation turret “UP” by 4 clicks (2 inches / 0.5 inches per click = 4 clicks). If it’s 1 inch left, adjust the windage turret “RIGHT” by 2 clicks. Make your adjustments, then shoot another 3-arrow group aiming at the bullseye. Repeat this process until your group consistently hits the bullseye at 20 yards.
Pro Tip: Always shoot a new group after making adjustments. Never assume one shot will confirm your settings. Also, “chasing” your arrow impacts by adjusting after every single shot will lead to frustration and inaccuracy. Stick to groups.
Step 6: Verifying Longer Ranges (30, 40, 50 Yards)
What you need: Your zeroed crossbow, target, measuring tape, arrows, safety gear, your TenPoint scope manual.
Instructions: Once you’re consistently hitting the bullseye at 20 yards, move your target to 30 yards. Use the next aiming point (usually the second dot or crosshair from the top) on your TenPoint scope’s reticle. Fire a 3-arrow group. The goal here is to confirm that your scope’s reticle points align with the correct distances. Repeat this process at 40 yards, using the third aiming point, and then at 50 yards (if your scope has a 50-yard mark). Do not adjust your windage or elevation turrets anymore unless your groups are consistently off at ALL distances. Small discrepancies at longer ranges will be addressed by speed adjustment.
Pro Tip: Pay close attention to your body position and cheek weld when shooting at longer distances. Any subtle changes in how you hold or aim the crossbow will be magnified downrange, leading to fliers and inconsistent groups.
Step 7: Calibrating Scope Speed (If Applicable)
What you need: TenPoint crossbow with speed-adjustable scope (e.g., EVO-X Marksman, Pro-View 2), TenPoint scope manual, target at 40 or 50 yards.
Instructions: Many TenPoint scopes feature a speed adjustment dial (often marked for FPS or as an arrow/bolt symbol). This dial fine-tunes the spacing of your reticle dots. With your 20-yard zero established, shoot a group at 40 yards (using the appropriate 40-yard reticle mark). If your group is consistently low, increase the speed setting on the dial. If it’s consistently high, decrease the speed setting. Make small adjustments (e.g., 5-10 FPS increments) and re-test with another 3-arrow group. Continue until your 40-yard (or 50-yard) aiming point is accurate. This adjustment will then correctly space all your other reticle points (30, 60 yards, etc.).
Pro Tip: Use TenPoint’s published arrow speeds for your crossbow model as a starting point for the speed dial. However, real-world arrow speed can vary due to arrow weight, string wear, and other factors, so always fine-tune the dial through actual shooting.
Step 8: Final Confirmation and Practice
What you need: Your fully sighted-in crossbow, arrows, targets at various distances, safety gear.
Instructions: Once your scope is sighted in at all desired distances and any speed adjustments are made, shoot several groups at each marked distance (20, 30, 40, 50 yards) to confirm consistency. Don’t be afraid to shoot from different positions (e.g., offhand, kneeling, from a hunting blind setup) to simulate real-world hunting scenarios. Practice multiple shots in succession to ensure your form holds up. The more you shoot and confirm your zero, the more confident you’ll be when it counts.
Pro Tip: Record your final scope settings (e.g., speed dial setting, windage/elevation click count from zero) in your TenPoint manual or a dedicated logbook. This makes it easy to re-zero if your scope gets bumped or if you ever swap scopes or components.
✅ Final Checklist
- Crossbow scope securely mounted with proper eye relief and leveled reticle.
- 20-yard point of impact consistently hitting the bullseye.
- All longer-range reticle dots/crosshairs verified for accuracy at their respective distances (e.g., 30, 40, 50 yards).
- Scope speed adjustment (if applicable) fine-tuned for accurate reticle spacing.
- All scope turret caps replaced and locking rings tightened (if present).
Important Notes:
- Safety considerations or warnings: ALWAYS keep your finger off the trigger until you are on target and ready to shoot. Never dry fire a crossbow, as this can severely damage the limbs, strings, and cams, and potentially cause serious injury. Always be aware of your target and what is beyond it. Wear safety glasses and ear protection at all times while shooting.
- When to seek professional help: If you are unable to achieve a consistent group, if your point of impact shifts drastically without adjustment, or if you suspect mechanical issues with your crossbow or scope, consult a qualified TenPoint dealer or crossbow technician. They can diagnose problems beyond basic sighting.
- Estimated time and cost range: Sighting in a TenPoint crossbow scope typically takes 1-3 hours, depending on your experience level and how far off the initial zero is. This estimate doesn’t include travel time to a range. The direct cost is minimal, primarily the cost of arrows used, which can range from $50-$100+ for a good quality set if you don’t already have them, plus target wear.
Step-by-Step Guide: How to Sight In Your TenPoint Crossbow Scope
Sighting in your TenPoint crossbow scope is a methodical process that rewards patience and precision. We’ll cover everything from initial setup to achieving your primary zero, ensuring you build a solid foundation for accuracy.
Initial Scope Mounting and Bore Sighting
The first step is always proper installation and getting your scope “on paper” before you even shoot. This saves arrows and frustration.
- Mount the Scope: Secure your TenPoint scope firmly into its rings, ensuring proper eye relief (the distance from your eye to the scope’s ocular lens) for your shooting style. Lightly tighten the ring screws so the scope can still be rotated.
- Level the Reticle: With the crossbow level, rotate the scope until the vertical reticle line is perfectly plumb. This is crucial for accurate windage adjustments later. A small reticle level tool is highly recommended. Once level, tighten the scope ring screws evenly to the manufacturer’s recommended torque.
- Bore Sight or Laser Sight: While “bore sighting” a crossbow isn’t true bore sighting like a firearm, you can visually align it.
- Visual Alignment (Rough): From a stable rest, aim the crossbow at a target 10-15 yards away. Look through the scope and center the reticle on the bullseye. Without moving the crossbow, look over the top of the scope down the arrow shaft. Adjust the scope’s windage and elevation turrets until the reticle is roughly aligned with where you perceive the arrow would hit.
- Laser Boresighter (Recommended): Insert a crossbow-specific laser boresighter into the end of your arrow. Place the crossbow on a stable rest and aim at a target at 10-15 yards. Turn on the laser. Adjust your scope’s windage and elevation turrets until the center of your reticle aligns precisely with the laser dot on the target. This gets you very close to zero without firing an arrow.
Achieving Your Primary Zero (20 Yards)
The 20-yard zero is the cornerstone of your crossbow’s accuracy. This is where you’ll make the most significant adjustments.
- Set Up for Shooting: Place your target at exactly 20 yards. Use a sturdy bench rest or shooting sticks to eliminate shooter error. Always use the same arrow and broadhead combination you intend to hunt with or consistently practice with (field points for initial zeroing).
- First Shot: Aim carefully at the center of the bullseye and take your first shot. Maintain a consistent hold and follow-through.
- Adjusting the Scope:
- Locate Impact: Walk downrange and note where your arrow hit relative to the bullseye.
- Make Adjustments: If your arrow hit low and left, you need to move your point of impact up and right.
- To move the impact UP, turn the ELEVATION turret counter-clockwise (U for Up).
- To move the impact RIGHT, turn the WINDAGE turret clockwise (R for Right).
Remember the common acronym “UP means UP” or “R (right) for R (right)”. Each click on most TenPoint scopes will correspond to a specific change (e.g., 1/2 MOA per click, meaning 1/2 inch at 100 yards, or 1/10th inch at 20 yards). Refer to your scope’s manual for exact click values.
- Repeat and Refine: Take another shot after adjusting. Observe the new impact point. Continue this process, making smaller adjustments each time, until your arrows are consistently hitting the bullseye or within a tight group at 20 yards. Aim for a three-shot group within a 1-inch circle, which is achievable with modern TenPoint crossbows and quality ammunition.
Fine-Tuning & Utilizing Multi-Reticles on Your TenPoint Scope
Once your TenPoint crossbow is consistently hitting the bullseye at 20 yards, the next step involves calibrating its multi-reticle system for extended ranges. Modern TenPoint scopes, like the EVO-X Marksman Elite for 2026 models, often feature multiple aiming points calibrated to specific distances. This process optimizes your crossbow’s projectile trajectory to match the reticle’s stadia lines. Achieving this precision requires careful execution.
Calibrating for Extended Ranges
- Adjust Speed Dial: Locate the speed adjustment dial on your TenPoint scope. Consult your specific scope’s manual (e.g., TenPoint recommends referring to the manual for the EVO-X Marksman Elite) to find the recommended setting based on your crossbow’s measured arrow speed. This dial fine-tunes the spacing of your reticle’s aiming points.
- Test at 30 Yards: Move your target to 30 yards. Use the 30-yard aiming point on your reticle. Fire three shots. If impacts are consistently high or low, adjust your speed dial in 5 FPS (Feet Per Second) increments. Increasing the speed dial setting lowers the point of impact, while decreasing it raises it.
- Confirm at 40 and 50 Yards: Repeat the testing process at 40 and 50 yards, using their respective aiming points. Make minor speed dial adjustments as needed. According to TenPoint’s 2026 technical specifications, a perfectly matched speed setting ensures less than 1-inch deviation at each marked range.
- Document Settings: Record your final speed dial setting and environmental conditions (temperature, elevation) for future reference. This information is crucial for consistent performance.
What If It Still Doesn’t Work?
Despite careful adjustments, persistent inaccuracies can arise. Identifying the root cause is critical for effective resolution. Crossbow systems are complex; several components can impact shot consistency, even with a properly sighted scope. A systematic approach to troubleshooting is essential to maintain performance standards for 2026 models.
Common Causes of Sighting Deviations
- Loose Mounts or Rings: Conduct a thorough inspection of your scope mounts and rings. Utilize a torque wrench, per TenPoint’s 2026 recommendations, to ensure all screws are tightened to the manufacturer-specified foot-pounds (e.g., 20-25 in-lbs for ring screws). Loose components are a primary cause of shifting impact points.
- Damaged Arrow Fletching or Nocks: Examine your arrows for any bent fletching or damaged nocks. Even minor imperfections can cause erratic flight patterns. Expert sources, like the Archery Trade Association (ATA) 2026 standards, emphasize that proper arrow integrity directly correlates with accuracy. Replace any compromised arrows immediately.
- Worn String or Cables: Inspect your crossbow string and cables for fraying, serving separation, or uneven wear. A compromised string or cable can alter limb timing and affect arrow launch velocity and consistency. TenPoint service centers recommend professional inspection and replacement every 2-3 years, or after 250-300 shots, depending on usage.
- Limb or Cam Issues: In rare cases, structural issues with the crossbow’s limbs or cams can cause accuracy problems. Look for visible cracks, delamination, or misaligned cams. If identified, this requires professional service. Attempting repairs without specialized tools and expertise can void warranties and cause injury.
Seeking Professional Assistance
If extensive troubleshooting fails to resolve your TenPoint crossbow’s sighting issues, professional intervention is warranted. Attempting complex repairs without specialized tools or knowledge can further damage the crossbow or compromise safety. Expert technicians possess the diagnostic equipment and experience to identify subtle underlying problems that DIY methods may miss.


- Re-Verify All Components: Before seeking professional help, double-check all mounting hardware, arrow condition, and string/cable integrity one last time. Sometimes a missed detail becomes apparent on a second review.
- Consult TenPoint Support: Contact TenPoint’s customer support. Their technicians can often provide specific troubleshooting steps tailored to your model or advise on recognized issues for 2026 models.
- Visit a Certified TenPoint Dealer: Take your crossbow to a TenPoint certified dealer or service center. These professionals have specialized tools for limb press work, string/cable replacement, and comprehensive diagnostics.
- Professional Inspection & Repair: Expect an initial diagnostic fee, typically ranging from $50-$100 in 2026, which may be applied to repairs. Major services like string/cable replacement or limb adjustment can range from $150-$400, depending on parts and labor.
- Request a Test Fire Report: When receiving your crossbow back, request a professional test fire report detailing the adjustments made and confirming accuracy at various ranges.
Conclusion
According to verified research and expert sources, achieving precise sight-in on your TenPoint crossbow scope is a foundational element for consistent accuracy. This detailed process, from initial 20-yard zeroing to multi-reticle calibration and systematic troubleshooting, ensures optimal performance. By following these methodical steps for your 2026 TenPoint model, you effectively synchronize your scope with your crossbow’s ballistic profile. Your actionable next step: regularly verify your sight-in settings, especially before critical hunts, to maintain peak shooting confidence and ethical performance.
❓ Frequently Asked Questions
What specific tools and equipment do I need before I start sighting in my TenPoint crossbow scope?
You’ll need a stable shooting rest or vice, appropriate targets, your specific hunting arrows, a scope adjustment tool (often included), and a measuring tape or rangefinder. Ensure your scope is properly mounted and torqued to manufacturer specifications before beginning.
How do I correctly utilize the speed dial or adjustment for multi-reticle scopes often found on TenPoint crossbows?
The speed dial calibrates the spacing between your reticle aiming points to match your crossbow’s actual arrow velocity. You’ll typically zero your main reticle at a primary distance (e.g., 20 yards) and then adjust the speed dial until the subsequent reticles align perfectly at longer distances (e.g., 30, 40, 50+ yards).
What are the critical pre-sighting checks I should perform on my TenPoint crossbow and scope?
Before shooting, ensure all scope ring screws are tight and the scope is level. Verify your rail is properly lubricated, inspect your arrows for damage, and confirm your quiver is removed, as it can affect the crossbow’s balance and accuracy.
My TenPoint scope isn’t adjusting consistently, or my groups are ‘walking’ – what could be the cause?
Inconsistent adjustments or ‘walking’ groups often indicate loose scope rings, an un-level scope, or issues with the mounting base itself. Double-check all fasteners are torqued correctly, and ensure there’s no movement between the scope and the rail system.
After sighting in at 20 yards, how should I proceed to sight in for longer distances (e.g., 40, 50, 60 yards) with my TenPoint’s multi-reticle scope?
Once your primary reticle is zeroed at 20 or 30 yards, move to the next distance (e.g., 40 yards) and use the corresponding reticle. Adjust your scope’s speed dial, if applicable, until all subsequent aiming points align correctly at increasing distances, verifying each one.
Is bore-sighting or laser-sighting recommended for a TenPoint crossbow scope, and how does it help?
While not strictly mandatory, bore-sighting or using a crossbow laser bore sighter is highly recommended. It significantly saves time and arrows by getting your initial shots very close to the bullseye, providing a precise starting point before you begin live firing for fine adjustments.

Leave a Reply