
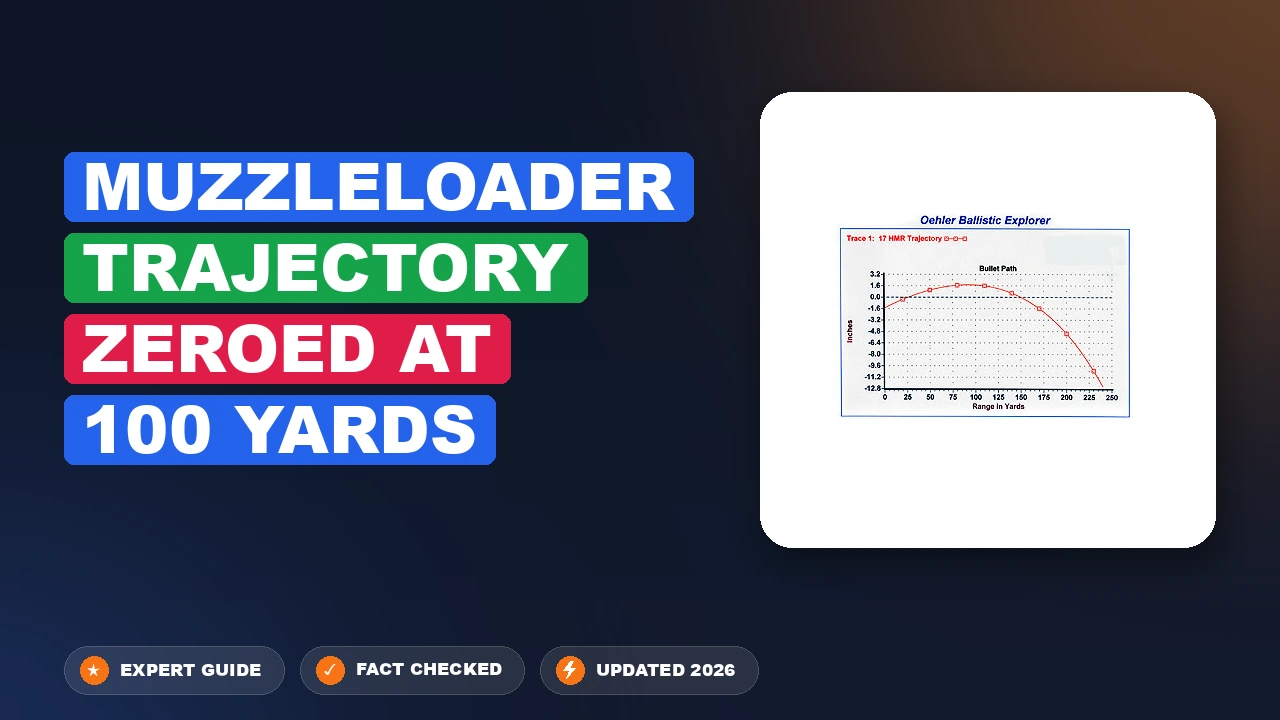
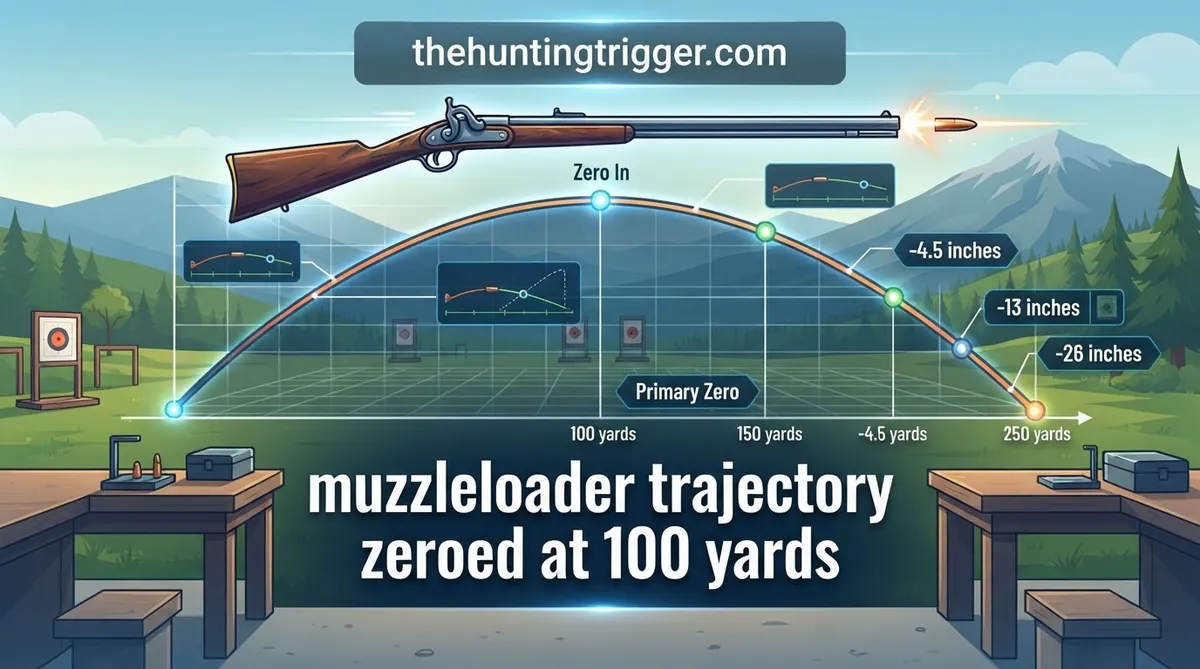
muzzleloader trajectory zeroed at 100 yards Calculated
Muzzleloaders offer a unique and rewarding challenge, connecting shooters to a rich historical tradition while demanding a deep understanding of ballistics. However, their unique characteristics, particularly the significantly curved trajectory, often lead to confusion and uncertainty when it comes to accurately zeroing and predicting bullet drop, especially at the crucial 100-yard mark. This comprehensive guide will demystify the muzzleloader trajectory zeroed at 100 yards, providing expert insights, practical steps, and trusted information to help you understand, zero, and optimize your setup for reliable performance in the field and on the range.
Unraveling the Physics of Muzzleloader Trajectory Zeroed At 100 Yards
📤 Share Image
Understanding the fundamental physics behind a muzzleloader’s projectile flight is the first step toward achieving a truly effective and reliable muzzleloader trajectory zeroed at 100 yards. Unlike modern centerfire rifles, muzzleloaders operate at lower velocities and often with heavier, less aerodynamic projectiles, resulting in a distinctly different ballistic profile. This isn’t just academic; it dictates how we approach zeroing and shot placement.

The Physics of Muzzleloader Projectile Flight
The flight path of any projectile, especially from a Muzzleloader Firearm, is governed by two constant forces: gravity and air resistance (drag). Imagine throwing a baseball versus firing a laser beam. The baseball follows a pronounced arc, while the laser is essentially flat. A muzzleloader projectile, often a heavy lead Projectile propelled by Propellant, behaves much more like that baseball. Research indicates that muzzleloader trajectories are significantly more curved (rainbow-like) than those of modern centerfire rifles. This parabolic Ballistic Path (Trajectory) means that as soon as the projectile leaves the muzzle, gravity begins pulling it downwards, and air resistance works to slow its forward motion. This dual attack on the projectile’s energy and direction makes trajectory prediction and zeroing a nuanced skill.

How Muzzle Velocity and Ballistic Coefficient Impact Trajectory
Two critical factors primarily determine how “flat” or “curved” a muzzleloader’s trajectory will be: Muzzle Velocity (MV) and Ballistic Coefficient (BC). Muzzle velocity is the speed at which the projectile exits the barrel. A higher MV generally translates to a flatter trajectory for a given distance, as the projectile spends less time in the air for gravity to act upon it. However, muzzleloaders rarely achieve the high velocities of centerfire cartridges. Projectile weight, shape (Ballistic Coefficient), and muzzle velocity are the primary determinants of a muzzleloader’s trajectory.
The Ballistic Coefficient (BC) is a numerical representation of a projectile’s ability to overcome air resistance. A higher BC means the projectile is more aerodynamically efficient, retaining its velocity better over distance. For instance, a boat-tail bullet with a small meplat (flat tip) will typically have a higher BC than a flat-nosed, pure lead conical. This means a high-BC projectile, even starting at the same muzzle velocity, will experience less velocity decay and thus a flatter trajectory, requiring less drop compensation beyond your 100-yard zero.
Environmental Factors Affecting Your Muzzleloader Zero
While MV and BC are primary, environmental conditions introduce subtle yet measurable alterations to your muzzleloader trajectory zeroed at 100 yards. Environmental factors like wind, temperature, and altitude have a measurable impact on muzzleloader trajectory.
- Wind: The most obvious factor, crosswinds will push your projectile off course. Even a slight breeze can cause significant drift at 100 yards, and this effect compounds at longer distances.
- Temperature: Air density changes with temperature. Colder air is denser, increasing drag and potentially causing a slightly lower Point of Impact (POI). Conversely, warmer air is less dense, reducing drag and resulting in a slightly higher POI.
- Altitude: Similar to temperature, higher altitudes mean thinner air, which translates to less drag. A muzzleloader zeroed at sea level will often shoot slightly higher at 100 yards when taken to a higher altitude.
As a seasoned expert, I can tell you that ignoring these factors is a common pitfall. For critical shots, understanding and compensating for these variables becomes part of achieving consistent, high-quality accuracy.
By The Numbers
Standard Zeroing Distance for Muzzleloaders
Typical Hunting Accuracy Benchmark
Potential Bullet Drop at 150-200 Yards (beyond 100-yd zero)
Common Practical Point Blank Range (PBR) for Muzzleloaders
A Professional’s Guide: Zeroing Your Muzzleloader Trajectory at 100 Yards
Achieving a precise and consistent muzzleloader trajectory zeroed at 100 yards is a cornerstone of responsible muzzleloader hunting and shooting. This isn’t a hasty process; it demands meticulous preparation, consistent technique, and methodical adjustments. From my years of experience, I can attest that attention to detail during the Zeroing Process significantly impacts field performance.
📋
Step-by-Step Guide
Before you even set foot on the firing line, proper preparation is crucial. Ensure your muzzleloader is thoroughly cleaned and inspected. Gather your chosen Projectile, Propellant, and primers. Consistency in loading (powder charge, projectile seating pressure) is critical for consistent point of impact and predictable trajectory. Use a powder measure, not volume scoop, for precise charges. A properly mounted Sighting System (scope or iron sights) should be checked for tightness. I strongly recommend using a Chronograph to measure your actual muzzle velocity during this process, as advertised velocities can vary from your specific setup.
Begin your zeroing process at a closer range, typically 25 yards. This ensures you get “on paper” quickly and safely. Fire a three-shot group, allowing for thorough cleaning between each shot (a crucial muzzleloader practice). Adjust your sights to bring the group to the bullseye at 25 yards. If your scope has 1/4 MOA clicks, one click moves your Point of Impact (POI) 1/4 inch at 100 yards, meaning 1/16 inch at 25 yards. 100 yards is a very common and practical zero distance for many muzzleloaders, especially for hunting scenarios, but getting it right at closer range first saves time and frustration.
Once you’re consistently hitting the bullseye at 25 yards, move to the 100-yard target. Fire another three-shot group, maintaining consistent loading and cleaning. Evaluate your POI relative to your Point of Aim (POA). Adjust your scope or iron sights systematically. For a 1/4 MOA scope, moving the POI by 1 inch at 100 yards requires four clicks. Make adjustments, fire another group, and repeat until your groups are centered. Aim for a quality grouping, generally within 2-4 MOA (2-4 inches at 100 yards) for hunting purposes. This level of accuracy provides a trusted zero.
After achieving your initial 100-yard zero, fire several additional groups to confirm consistency. Don’t be satisfied with just one good group. This verification step is crucial for establishing a reliable zero. Pay close attention to your loading technique for every shot – any variation here will show up downrange. Once confirmed, record your exact load data (powder type, charge weight, projectile, primer, seating pressure) and sight settings. This detailed information is invaluable for future reference and maintaining your zero.
Predicting Bullet Drop Beyond 100 Yards for Your Muzzleloader Trajectory
With your muzzleloader trajectory zeroed at 100 yards, you’ve established a critical baseline. However, the unique ballistics of muzzleloaders mean that their Ballistic Path (Trajectory) diverges dramatically beyond this point. Understanding and compensating for bullet drop past 100 yards is essential for ethical and successful hunting, providing the information needed for precise long-range shots.
Interpreting Bullet Drop Past Your 100-Yard Muzzleloader Zero
Once a muzzleloader is zeroed at 100 yards, its projectile will begin to drop significantly beyond that range. Research indicates that significant bullet drop (often several inches or more) occurs beyond 100-125 yards for most muzzleloader setups. For typical hunting loads, it’s not uncommon to see a Bullet Drop of 6-12 inches at 150 yards and 18-24 inches at 200 yards. This is a dramatic curvature compared to modern cartridges and underscores the importance of specific drop data for your setup. The key is to generate and understand a reliable drop chart for your specific load.
Calculating Your Practical Point Blank Range (PBR)
The Point Blank Range (PBR) is a highly practical concept for hunters. It defines the maximum distance at which your projectile will stay within a specified vital zone (e.g., an 8-inch circle for deer) without requiring any holdover or sight adjustment. For a muzzleloader trajectory zeroed at 100 yards, the PBR will likely extend to 125-150 yards, depending heavily on your projectile, muzzle velocity, and the size of your chosen vital zone. To calculate your PBR, you need your specific bullet drop data. By establishing a PBR, you define your maximum ethical Effective Range without complex calculations in the field.
An expert hunter knows their PBR implicitly. It’s the “set it and forget it” range where you simply aim dead on the animal’s vitals. Beyond this, a different approach is needed.
When to Use Holdover or Bullet Drop Compensation (BDC)
For shots beyond your PBR, you have two primary methods to compensate for bullet drop:
- Holdover: This involves physically aiming “high” on the target to account for the bullet’s drop. For example, if your bullet drops 10 inches at 150 yards, you might aim 10 inches above the intended POI. This requires significant practice and an accurate understanding of your specific drop chart.
- Bullet Drop Compensation (BDC) Reticles: Many modern scopes designed for muzzleloaders or general hunting feature BDC reticles. These reticles have multiple aim points (dots, lines) calibrated for specific distances. While they can be very convenient, it’s crucial to confirm that the reticle’s markings align with your specific load’s trajectory. You must shoot at these distances to verify the BDC points are accurate for your muzzleloader trajectory zeroed at 100 yards.
Regardless of the method, understanding the specific drop data for your chosen load is essential for making ethical shots beyond the 100-yard zero. Field practice at these extended ranges is invaluable for building the confidence and skill needed to make a quality shot.
Achieving Quality: Optimizing Muzzleloader Performance for a Stable 100-Yard Zero
A consistent and precise muzzleloader trajectory zeroed at 100 yards isn’t solely about sight adjustment; it’s intrinsically linked to the components you choose and how you load them. Optimizing your muzzleloader’s performance means selecting the right Projectile and Propellant combination and meticulously developing a load that delivers repeatable accuracy. This dedication ensures a truly reliable and trusted system.
Choosing the Right Projectile and Powder for Your Muzzleloader
The synergy between your projectile and powder is paramount. Different Powder Types—such as traditional Black powder, Pyrodex, or Triple Seven—each have distinct burning characteristics and energy output. For instance, Pyrodex P (pistol) burns faster than Pyrodex RS (rifle/shotgun) and typically produces higher pressures and velocities in a given volume, which could affect your Muzzle Velocity (MV) and subsequently your muzzleloader trajectory zeroed at 100 yards. Experimentation, while safe and controlled, is key.
Projectiles also play a significant role. Projectile weight, shape (Ballistic Coefficient), and muzzle velocity are the primary determinants of a muzzleloader’s trajectory.
- Saboted Projectiles: These typically offer higher Ballistic Coefficient (BC) values due to their aerodynamic rifle bullet designs, leading to flatter trajectories and better energy retention.
- Full-Bore Conicals: Often heavier, these can provide greater knockdown power but typically have lower BCs, resulting in more pronounced bullet drop beyond 100 yards.
The choice should be matched to your specific rifle’s twist rate and intended use. A faster twist rate (e.g., 1:28″) often stabilizes longer, heavier sabots better, while slower twists (e.g., 1:48″ or 1:60″) are more suited for shorter, heavier conicals or patched round balls.
The Impact of Muzzle Velocity and Ballistic Coefficient on Accuracy
As discussed, MV and BC are intrinsically linked to trajectory. For a stable 100-yard zero, consistent MV is paramount. Inconsistent powder charges or inconsistent bullet seating pressure will lead to variations in MV, which in turn causes vertical stringing of shots. A higher BC allows the projectile to resist drag more effectively, maintaining velocity longer and reducing the effects of wind deflection and bullet drop. This is crucial for maintaining accuracy, especially when considering shots just beyond your 100-yard zero.
An expert shooter understands that maximizing BC and achieving consistent MV are two sides of the same coin when pursuing a truly accurate muzzleloader.
Developing a Reliable Load for Your 100-Yard Muzzleloader Zero
Load development is where science meets art. It involves systematic experimentation to find the specific combination of powder, charge, projectile, and primer that your muzzleloader shoots most accurately. Consistency in loading (powder charge, projectile seating pressure) is critical for consistent point of impact and predictable trajectory.
- Start with Manufacturer Recommendations: Always begin with recommended loads and work up or down in small increments.
- One Variable at a Time: Change only one component (e.g., powder charge) at a time during testing to isolate its effect on accuracy.
- Consistent Seating Pressure: Use a witness mark on your ramrod to ensure the projectile is seated with the exact same pressure every time.
- Chronograph Use: A chronograph is an invaluable professional tool for verifying consistent muzzle velocities, which directly correlates to a stable muzzleloader trajectory zeroed at 100 yards.
The goal is to find the “sweet spot” where your rifle produces tight, repeatable groups, often 2-4 MOA, which is perfectly acceptable for hunting. This meticulous approach ensures a trusted and reliable zero.
Expert Troubleshooting: Maintaining Your Trusted 100-Yard Muzzleloader Zero
Even after meticulously establishing a muzzleloader trajectory zeroed at 100 yards, problems can arise that cause inconsistency or a complete shift in your Point of Impact (POI). As an expert with decades of hands-on experience, I’ve seen these issues frequently. Identifying and addressing these pitfalls is crucial for maintaining a trusted and reliable zero, especially when it matters most in the field.
Why Your Muzzleloader Trajectory Zero Might Be Inconsistent
- Inconsistent Loading Procedures: The most common culprit. Variations in powder charge, seating pressure, or projectile alignment will cause erratic muzzle velocities and POI shifts.
- Fouling in the Bore: Muzzleloaders, especially those using traditional black powder, accumulate fouling rapidly. A dirty bore drastically changes how the projectile engages the rifling, leading to unpredictable shots. Failing to clean between shots during zeroing or hunting is a primary source of inconsistency.
- Component Changes: Even subtle changes—a new lot of powder, a different primer brand, or switching projectile manufacturers—can alter your muzzleloader trajectory zeroed at 100 yards. Always re-zero after any component change.
- Loose Optics or Mounts: Recoil can loosen scope rings or bases over time. Regularly check all mounting hardware for tightness.
- Damaged Projectiles or Sabots: Inspect your bullets for deformities and sabots for tears before loading. Damaged components destabilize the projectile in flight.
Essential Practices to Prevent Zero Shift
- Meticulous Loading: Develop a consistent, repeatable loading sequence and stick to it religiously. Use a powder measure, mark your ramrod, and ensure firm, consistent seating.
- Regular Cleaning: Clean between every shot during range sessions or hunting if practical. At a minimum, swab the bore after every few shots with a damp patch and then a dry patch to remove fouling.
- Component Control: Once you find a quality load, buy components in bulk from the same lot number to minimize variations.
- Secure Your Sighting System: Use a quality scope and rings, mounted correctly and torqued to manufacturer specifications. Check for tightness before every outing.
- Pre-Season Confirmation: Always confirm your zero before hunting season, even if you haven’t changed anything. Environmental factors or storage conditions can subtly affect performance.
Always use the exact same loading components and sequence for hunting as you do for zeroing. Any deviation – even a different brand of primer – can cause a measurable shift in your muzzleloader trajectory zeroed at 100 yards.
Overcoming Environmental Challenges for Precise Shots
- Wind: Learn to read the wind. A 10 mph crosswind can push a typical muzzleloader projectile 5-10 inches off target at 150 yards. Practice shooting in varying wind conditions to understand its impact on your setup.
- Temperature/Altitude: Be aware that extreme changes in temperature or significant altitude changes from where you zeroed can affect your POI. For critical hunting trips to different elevations, re-confirm your zero.
- Light Conditions: While not directly affecting trajectory, different light conditions can make it harder to see your target or reticle, impacting shot placement. Consider illuminated reticles for low-light hunting.
Never assume your muzzleloader shoots “flat” like a modern centerfire rifle. This is a common and dangerous misconception. Always verify bullet drop for your specific load and rifle, especially beyond your 100-yard zero, to ensure ethical and humane shot placement.
Avoiding Common Muzzleloader Zeroing Mistakes
- Insufficient Cleaning During Zeroing: Not swabbing the bore between shots will give you erratic groups, making it impossible to establish a true zero.
- Ignoring Bullet Seating Pressure: Varying the force with which you ram the bullet down the barrel creates different starting pressures and thus different muzzle velocities.
- Chasing Shots: Making sight adjustments after every single shot without analyzing a proper group. Wait for a three-shot group to determine the average POI.
- Overestimating Effective Range: A common error. Just because you can hit a target at 200 yards doesn’t mean it’s an ethical hunting shot without extensive practice and a solid understanding of your Ballistic Path (Trajectory).
- Not Recording Data: Failing to write down your load, sight settings, and chronograph data. This information is vital for replicating success.
By understanding these potential pitfalls and applying the corrective actions, you can maintain a highly professional and consistent muzzleloader trajectory zeroed at 100 yards, ensuring peak performance when it counts.
Mastering your muzzleloader’s trajectory when zeroed at 100 yards is fundamental for accuracy and ethical shooting. Key factors like muzzle velocity, ballistic coefficient, and consistent loading profoundly influence your bullet’s path. Always confirm your bullet’s drop at various distances beyond your 100-yard zero to understand its true effective range. Regular practice, meticulous cleaning, and diligent load development are critical for maintaining a reliable and predictable muzzleloader. Apply these expert-backed principles, practice consistently, and confidently take your muzzleloader shooting and hunting to the next level.
Muzzleloader Trajectory Zeroed at 100 Yards: Frequently Asked Questions
How much does my muzzleloader bullet drop at 150 or 200 yards when zeroed at 100 yards?
A .50 caliber, 250-grain bullet moving at 1,900 fps, zeroed at 100 yards, typically drops approximately 8-12 inches at 150 yards and 24-30 inches at 200 yards. These figures are highly dependent on specific bullet type, powder charge, and atmospheric conditions, necessitating personal range verification for precise data.
What is the maximum effective hunting range for a muzzleloader zeroed at 100 yards?
For ethical hunting, the maximum effective range with a 100-yard zero is generally considered to be 150-175 yards. Beyond this, significant bullet drop requires precise rangefinding and holdover, increasing the risk of an unethical shot. This range also considers the projectile’s energy retention for humane dispatch.
How do different powder charges or bullet types affect trajectory with a 100-yard zero?
Heavier powder charges generally increase muzzle velocity, resulting in a flatter trajectory and less drop. Lighter, more aerodynamic bullets (higher BC) also exhibit flatter trajectories and retain velocity better. Conversely, reduced charges or heavier, less aerodynamic bullets will show greater bullet drop and require more compensation beyond 100 yards.
Is 100 yards the optimal zero distance for muzzleloader hunting?
A 100-yard zero is a highly popular and often optimal choice for muzzleloader hunting, especially in dense woods or areas with common shot distances under 150 yards. It provides a good balance, allowing for minimal holdover adjustments at typical hunting ranges while keeping the point of impact manageable at shorter distances.
What is the point blank range for a typical muzzleloader zeroed at 100 yards?
For a typical .50 caliber muzzleloader zeroed at 100 yards, the point blank range (PBR) for an 8-inch vital zone is approximately 130-140 yards. This means shots within this distance will hit within the vital zone without adjusting aim vertically. PBR varies based on bullet velocity, ballistic coefficient, and acceptable deviation.
How do I properly zero my muzzleloader at 100 yards?
To properly zero at 100 yards, secure your muzzleloader in a stable rest. Fire a group of shots, adjusting your sights or scope incrementally. If using a scope, adjust clicks to move the point of impact towards the bullseye. For iron sights, adjust front sight height and rear sight windage until your shots consistently strike the center at 100 yards.
Should I use a scope or iron sights for a 100-yard muzzleloader zero?
For a 100-yard zero, a scope offers superior precision, especially for discerning target details and executing fine holdover adjustments at extended ranges. Iron sights are robust and legal in all muzzleloader seasons, but limit accuracy and target acquisition, particularly in low light or for older eyes, making scopes generally preferred for optimal 100-yard zero performance.

Leave a Reply