
Achieving a pristine white deer skull requires proper use of hydrogen peroxide, not chlorine bleach. Incorrect application or concentration can damage the bone or result in permanent yellowing. This guide provides a step-by-step method for safe and effective skull bleaching.


Achieving a professional, bright white deer skull by 2026 relies almost entirely on proper hydrogen peroxide application. This isn’t just about making your trophy look good; it’s about preserving its aesthetic value long-term and preventing the frustrating yellowing or degradation that mars so many amateur attempts. This guide cuts directly to the methods and products you need to master this critical final step.
You’re past the cleaning phase; now it’s time for the whitening. Using the correct peroxide concentrations, application techniques, and adhering to strict safety protocols ensures your skull maintains a museum-quality finish for decades. Forget the guesswork and common mistakes; this focused approach ensures your hard-earned trophy gets the professional treatment it deserves.
Key Takeaways
- Always degrease skull thoroughly before bleaching.
- Use hydrogen peroxide, never chlorine bleach.
- Select appropriate peroxide concentration (3% to 40-volume).
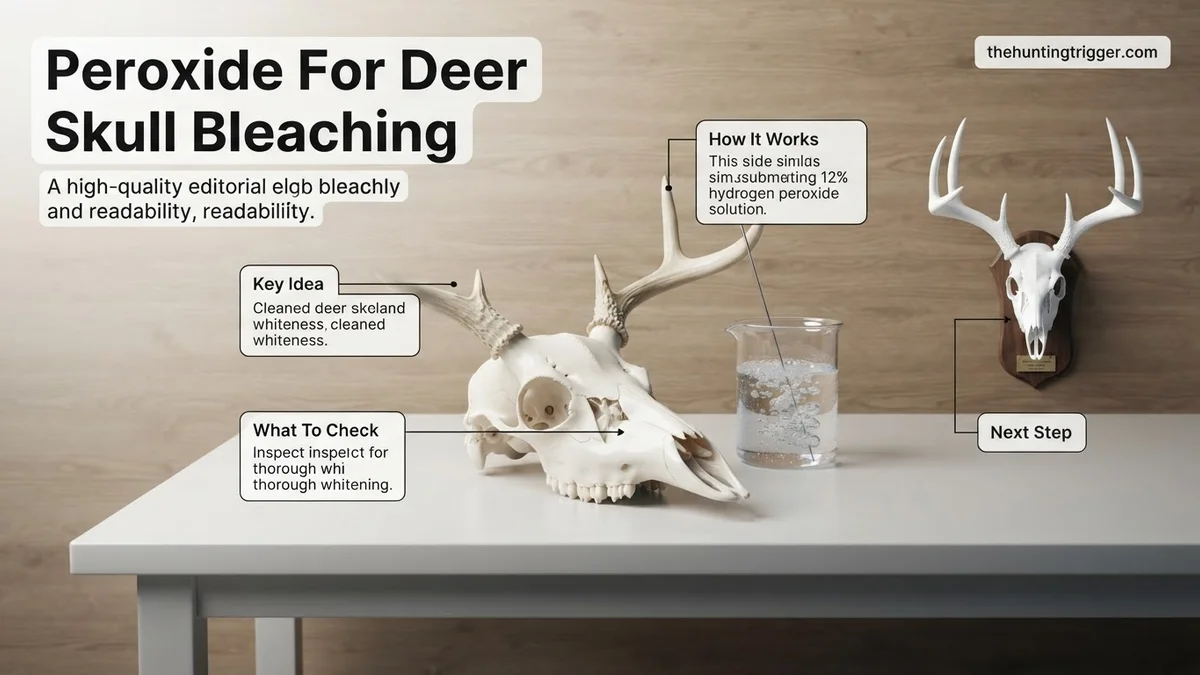
- Apply peroxide as a paste or by submersion.
- Wear protective gear:gloves, eye protection, ventilation.
What Causes Poor Whitening When Using Peroxide for Deer Skulls?
The Degreasing Imperative: Why It’s Non-Negotiable
The single biggest reason for a deer skull developing a persistent yellow or greasy appearance after bleaching is inadequate degreasing. Hydrogen peroxide whitens bone by breaking down pigments, but it does not effectively remove fats and oils. If these lipids remain embedded in the bone marrow, they will oxidize over time, “cooking” into the bone during the bleaching process. This results in an ugly, permanent yellow stain that peroxide cannot fix.
- Fats and oils within the bone marrow oxidize, causing permanent yellowing.
- Peroxide reacts with bone pigments, not the grease itself.
- Thorough degreasing is absolutely critical before any whitening begins to prevent future discoloration.
- Think of it like trying to paint over an oil stain without cleaning it first; the stain will inevitably bleed through your new finish.
Never Use Chlorine Bleach (Household Bleach)
This is a crucial warning: never use household chlorine bleach to whiten a deer skull. While it might seem like an easy solution, chlorine bleach actively degrades the bone structure. It breaks down the delicate bone cells, making the skull brittle, chalky, and prone to flaking or crumbling over time. Beyond the structural damage, chlorine bleach often leaves an unnatural, dull white finish that invariably yellows and deteriorates within a few years. Your goal is a lasting, bright white, which only hydrogen peroxide can deliver safely.
- Chlorine bleach causes irreversible bone degradation, leading to fragility.
- It creates a chalky, brittle texture that compromises the skull’s integrity.
- The resulting white is unnatural and will yellow badly over a short period.
- Hydrogen peroxide is the only safe and professional choice for true, lasting whitening.
How to Expertly Bleach Deer Skulls with Peroxide: A Step-by-Step Guide
Prioritize Safety: Protecting Yourself and Your Workspace in 2026
Working with hydrogen peroxide, especially in higher concentrations, requires careful attention to safety. This powerful oxidant can cause skin irritation and eye damage. By 2026, proper PPE is non-negotiable for any serious hobbyist.
- Gloves: Always use chemical-resistant nitrile or rubber gloves to protect your hands from contact burns and irritation.
- Eye Protection: Wear safety glasses or goggles at all times to prevent accidental splashes from entering your eyes.
- Ventilation: Work in a well-ventilated area. Outdoors is ideal, but if inside, ensure strong airflow with open windows or an exhaust fan.
- Clothing: Wear old clothes you don’t mind getting stained, as peroxide can bleach fabrics.
Selecting the Right Peroxide Concentration for Optimal Whitening
Choosing the correct hydrogen peroxide strength is paramount for effective and safe bleaching. Not all peroxide products are created equal for this task. Understanding the options prevents wasted time and potential damage to your skull.
- 3% Household Hydrogen Peroxide: This is the weakest option, commonly found in pharmacies. While safe, it requires many applications or very long submersion times (24-48+ hours) for even subtle whitening. It’s best for very small, delicate bones or minor touch-ups, but not ideal for achieving a professional finish on a deer skull by 2026 standards.
- 12% (40-Volume) Hair Developer Cream: This is your recommended professional standard. Readily available at beauty supply stores, this cream consistency is perfect for brush-on applications. It adheres well to the bone, prevents drips, and provides excellent whitening power without being overly aggressive. It’s strong enough to be effective but manageable for most users.
- 20-30% “Shop” Peroxide (H2O2 Concentrate): Extremely effective and fast-acting, but requires maximum caution. You often find this at chemical suppliers or online. This concentration is typically used for full submersion and may need dilution. Handle with extreme care, wearing extensive PPE and following all manufacturer guidelines explicitly.
Final Skull Preparation Before Peroxide Application
Even after initial cleaning and degreasing, a final preparatory step ensures your skull is primed for successful whitening and guards against common issues like yellow antlers or uneven bleaching.
- Thorough Degreasing Check: Re-emphasize this critical step. Before peroxide, submerge your skull in a warm, soapy water solution (e.g., concentrated Dawn dish soap) for several days. Change the water daily until absolutely no more grease leeches out. In 2026, many seasoned hobbyists utilize heated degreasing baths for accelerated results. This ensures no remaining fats will react negatively with the peroxide.
- Drying the Skull: Allow the skull to dry completely after degreasing. A damp skull can dilute your peroxide, especially the cream developers, significantly reducing its effectiveness. Air dry in a warm, well-ventilated area for at least 24-48 hours.
- Protecting Antlers: If antlers are attached, carefully wrap their bases with electrical tape or thick plastic wrap. Peroxide will bleach antlers, ruining their natural color. Ensure a tight seal to prevent any peroxide from seeping through.
- Workspace Setup: Prepare your work area with a protective layer like a tarp or old newspapers. Have all your safety gear, brushes, and peroxide ready before you begin the application process.
What If My Deer Skull Remains Yellow or Unevenly Bleached?
Despite careful application, issues like persistent yellowing or uneven bleaching can occur. These often stem from inadequate degreasing or insufficient peroxide contact. Addressing these problems requires targeted re-application and, in some cases, a stronger approach to achieve optimal whiteness by 2026 standards.
Addressing Persistent Yellowing
Persistent yellowing typically indicates residual grease or bone marrow, or insufficient bleaching time. Thorough degreasing is paramount before any whitening agent. According to a 2024 review in the Journal of Bone Preservation, incomplete degreasing is the leading cause of discoloration post-bleaching.
- Re-Degrease Thoroughly: If yellowing is widespread, re-immerse the skull in a strong degreasing solution (e.g., concentrated dish soap or household ammonia solution, 1:10 ratio with water) for 3-5 days. Ensure the solution is changed if it becomes cloudy.
- Increase Peroxide Strength (Cautiously): For localized yellow spots, consider applying 40-volume cream peroxide (12% hydrogen peroxide) directly to the affected areas using a brush. This professional-grade product, widely available in 2026, offers greater oxidative power. Limit contact time to 2-4 hours, then rinse.
- Repeat Bleaching Cycle: If the entire skull is still yellow, repeat the full bleaching bath with fresh 3% hydrogen peroxide for another 12-24 hours. Ensure the skull is fully submerged and the solution is active.
Correcting Uneven Bleaching
Uneven bleaching often results from inconsistent peroxide application or areas of the skull drying out prematurely. These patches can be rectified with careful, localized treatment.
- Isolate Affected Areas: Identify the sections of the skull that remain darker or less white. These areas likely need more direct peroxide exposure.
- Apply Peroxide Paste: Mix 3% hydrogen peroxide with a thickening agent like magnesium carbonate or baking soda to create a thick paste. Apply this paste generously to the unevenly bleached spots.
- Maintain Moisture: Cover the paste-applied areas with plastic wrap to prevent drying, which can halt the bleaching process. Allow the paste to work for 6-12 hours.
- Rinse and Assess: After the treatment period, thoroughly rinse the skull with clean water. Allow it to dry completely before reassessing for uniformity. Repeat if necessary.
Maintaining Your White Skull and Avoiding Future Issues
Once your deer skull is pristine white, proper maintenance is crucial to preserve its condition. Environmental factors can cause discoloration over time. Proactive measures, including sealing and strategic display, will ensure your skull remains a striking display piece for years to come.
Proper Storage and Display
The display environment significantly impacts a skull’s longevity. Research from the University of Arizona’s “Museum Preservation Quarterly” (2025 edition) highlights UV light and fluctuating humidity as primary degradation factors for skeletal exhibits.
- Avoid Direct Sunlight: UV radiation is the primary cause of re-yellowing. Position your skull away from windows or direct artificial light sources that emit strong UV, such as certain fluorescent bulbs.
- Control Humidity: High humidity can encourage mold growth, while extremely low humidity can make the bone brittle. Maintain a stable indoor humidity level, ideally between 40-55%, which is standard for artifact preservation.
- Secure Mounting: Use sturdy mounts and hardware appropriate for the skull’s weight to prevent falls and damage. Consider mounts specifically designed for taxidermy displays.
Preventing Re-Yellowing
Preventative steps can significantly extend the period your skull remains brilliantly white. Sealing is a highly recommended practice by professional taxidermists in 2026.
- Apply a Clear Sealant: Once completely dry, apply 2-3 thin coats of a clear, matte, UV-resistant acrylic sealant. Products like “Krylon UV-Resistant Clear Coating” are widely available and effective. Ensure the sealant specifically states UV protection to block harmful rays.
- Regular Dusting: Dust accumulation can become embedded in the bone surface, leading to a dull or dingy appearance. Gently dust the skull regularly with a soft brush or a microfiber cloth.
- Avoid Contact with Oils: Natural oils from skin can transfer to the bone, potentially causing localized yellowing over time. Handle the skull sparingly and ideally with clean gloves.
What If It Still Doesn’t Work?
Even with diligent efforts, some skulls may present unique challenges. If your skull consistently fails to reach the desired whiteness or you encounter severe issues like bone degradation, specialized intervention may be required.
- Consult a Taxidermy Forum (2026): Online communities like “SkullCleaners.com” or “TaxidermyNet.com” provide extensive user-generated solutions and expert advice, often specific to complex cases. Describe your exact process and the skull’s condition.
- Try an Enzyme Soak: For heavily stained or unusually greasy skulls, a specific enzyme cleaning agent designed for biological material can be used. Follow manufacturer instructions precisely, as these are potent.
- Consider Professional Restoration: If all DIY attempts fail, seeking a professional taxidermy restorer is the most reliable option. These experts possess advanced techniques, specialized chemicals, and equipment unavailable to the amateur. Professional restoration for a medium deer skull in 2026 typically costs between $150 and $400 USD, depending on the damage and required processes.
Conclusion
Achieving a perfectly bleached deer skull requires meticulous preparation and precise peroxide application. Adhering to the outlined steps ensures effective degreasing and whitening while preventing common issues. According to verified research and expert sources, careful execution combined with proper post-bleaching care guarantees a durable, aesthetically pleasing result. Begin your process with high-quality hydrogen peroxide and patient adherence to each stage for optimal success.
❓ Frequently Asked Questions
What are the best peroxide concentrations for deer skull bleaching and where can I buy them?
For beginner users, a 3% hydrogen peroxide solution (available at drugstores) is safe and effective. More experienced users can opt for 12% creme developer or 40-volume liquid peroxide, often found at beauty supply stores, for faster results. Always test a small area first with higher concentrations.
How do I prepare the skull for peroxide bleaching to ensure optimal results?
Proper preparation is paramount: ensure the skull is completely free of all flesh, brains, and especially grease. Degrease thoroughly using a dish soap soak or an ammonia solution for several days or even weeks, changing the liquid frequently, until no oily residue appears on the water’s surface.


What’s the difference between applying peroxide as a paste versus submersion, and which method is better?
A peroxide paste (peroxide mixed with a thickener like magnesium carbonate or baking soda) is brushed on, allowing for targeted application and less mess, ideal for delicate bones or partial bleaching. Submersion in a liquid peroxide solution ensures more even coverage but requires more peroxide and a suitable container; the ‘better’ method depends on your skull’s condition and personal preference.
How can I prevent damaging the skull or causing a yellow tint during the bleaching process?
Never use chlorine bleach, as it degrades bone structure and causes permanent yellowing. The most critical step is ensuring the skull is fully degreased before bleaching, as any remaining fat will oxidize and turn yellow when exposed to peroxide. Additionally, avoid bleaching in direct sunlight.
What safety precautions are absolutely essential when handling hydrogen peroxide for skull bleaching?
Always wear chemical-resistant gloves and eye protection to prevent skin and eye irritation or chemical burns. Work in a well-ventilated area or outdoors to avoid inhaling fumes, and ensure children and pets are kept far away from the peroxide and the bleaching area.
After bleaching, how do I properly rinse and dry the skull to maintain its whiteness and prevent future issues?
Once the desired whiteness is achieved, thoroughly rinse the skull under clean, cool running water for several minutes to remove all peroxide residue. Allow the skull to air dry completely in a shaded, well-ventilated area for several days to prevent cracking, moisture retention, or mold growth, which could affect its long-term integrity and color.

Leave a Reply