
Achieving accuracy with your Barnett crossbow requires proper scope sighting. This guide provides a step-by-step, expert approach to correctly zero your scope, ensuring consistent and precise shot placement at various distances.

Getting your Barnett crossbow scope perfectly sighted in is non-negotiable for accuracy and responsible shooting in 2026. This guide cuts straight to the core: how to precisely adjust your scope for consistent shot placement. You need a reliable zero to hit your mark every time, whether for target practice or ethical hunting, and a properly calibrated scope is the cornerstone of that reliability.
Mastering this process ensures every shot counts, eliminating frustrating misses and promoting confidence. Forget vague instructions; we’re diving into the exact steps, from pre-shot checks to calculating precise click adjustments, making your Barnett crossbow a precision instrument ready for whatever the year 2026 brings.
Key Takeaways
- Secure scope mounting prevents zero drift.
- Initial zeroing starts best at 20 yards.
- Understand click values for precise adjustments.
- Confirm zero at all intended distances.
- A stable shooting rest ensures accuracy.
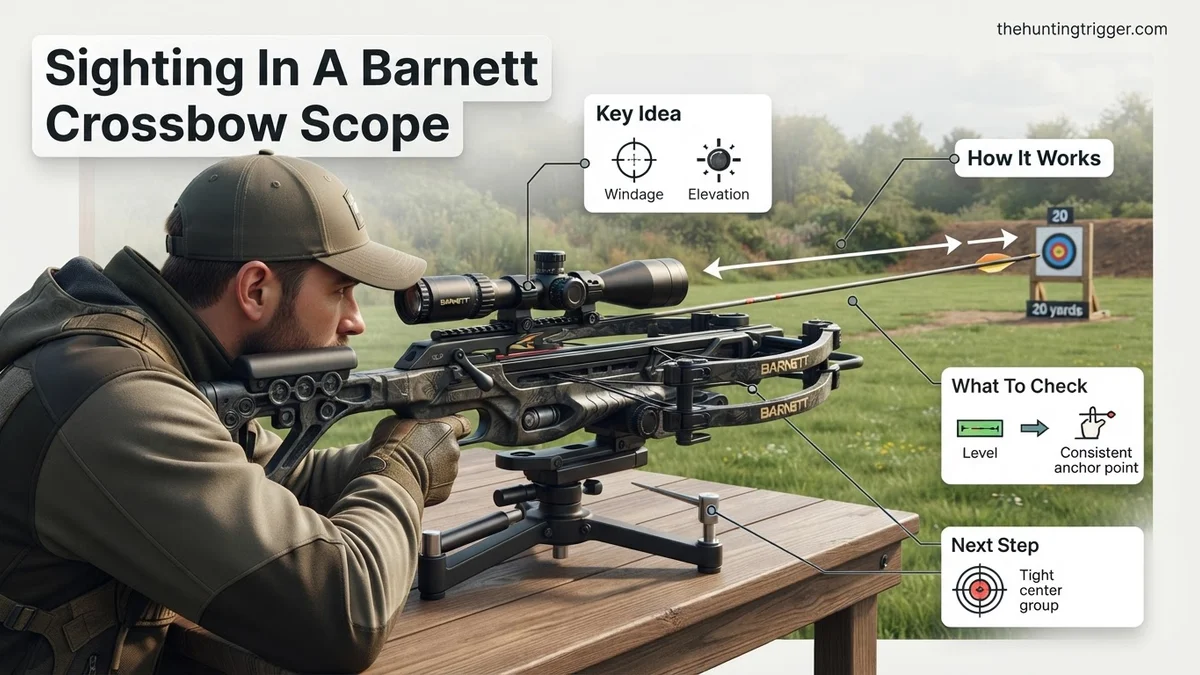
Why Proper Sighting-In Is Crucial for Your Barnett Crossbow Scope
Precision for Ethical Shooting and Consistency
In 2026, crossbow technology continues its advancement, but even the most cutting-edge Barnett model is only as accurate as its scope’s zero. Proper sighting-in guarantees your point of aim aligns precisely with your point of impact at various distances. This precision isn’t just about hitting the bullseye; it’s fundamental for ethical shooting, particularly if you use your crossbow for hunting. A well-sighted scope ensures quick, clean shots, minimizing the risk of wounding and promoting humane practices.
- Consistent Performance: Ensures your crossbow performs predictably every time you shoot.
- Maximized Accuracy: Allows you to fully leverage the inherent accuracy of your Barnett crossbow.
- Confidence Boost: Knowing your setup is spot-on significantly improves shooting confidence.
Avoiding Costly Misses and Frustration
Imagine spending hours practicing, only to miss your target due to a scope that’s off by a few inches. This frustration is easily preventable with a meticulous sighting-in process. An improperly sighted scope can lead to wasted arrows, missed opportunities, and a general lack of enjoyment in your shooting experience. For hunters, a missed shot due to a poorly zeroed scope can have far more significant consequences. Investing time in proper scope adjustment saves you time, money, and potential disappointment down the line.
- Reduced Arrow Waste: Fewer missed shots mean fewer lost or damaged arrows.
- Effective Practice: Every shot during practice contributes directly to improving your skill, not just debugging your scope.
- Ethical Hunting Practices: Ensures your shots are lethal and humane, if hunting.
Step-by-Step Procedure to Sight In Your Barnett Crossbow Scope
Pre-Sighting Checks and Range Setup
Before any adjustments to your scope, a thorough pre-check is essential. This foundational step ensures your Barnett crossbow is mechanically sound and ready for precise tuning. A stable platform and proper safety protocols are paramount before you even nock your first arrow. Do not rush this phase; it saves significant frustration later on.
- Secure Scope Mounting: Verify all scope mounting screws are securely tightened to manufacturer specifications. A loose scope will never hold a zero. Gently try to wiggle the scope; there should be no movement.
- Crossbow Inspection: Check your Barnett crossbow’s limbs, string, and cables for any signs of wear, fraying, or damage. Ensure the string is properly waxed and lubricated. A damaged string can affect arrow flight.
- Stable Shooting Rest: Always use a sturdy, dedicated shooting rest. A bipod, sandbags, or a dedicated crossbow rest will eliminate human error and provide consistent, repeatable shot groups, which are crucial for accurate adjustments.
- Safety First: Wear appropriate eye protection (shooting glasses) and hearing protection. Always follow the manufacturer’s safety guidelines for your Barnett crossbow. Be aware of your surroundings and your backstop.
- Arrow and Target Selection: Use the same type of arrows (brand, weight, fletching) you intend to shoot regularly. For sighting in, use field tips, not broadheads. Set up a clear target at your initial zeroing distance.
Establishing Your Initial 20-Yard Zero
The 20-yard mark is your starting point, the foundation of your crossbow’s accuracy. This distance minimizes arrow drop and wind influence, allowing you to focus purely on aligning your scope’s reticle with your arrow’s impact. Precision here ensures easier adjustments at longer ranges.
- Set Up at 20 Yards: Position your target exactly 20 yards away from your shooting rest.
- Fire First Group (3 Shots): Load a field-tipped arrow. Aim precisely at the dead center of your target. Squeeze the trigger smoothly. Repeat for two more shots, aiming at the exact same point each time. Always aim for the center, even if you see your previous shot was off.
- Analyze Your Group: After three shots, walk downrange to examine your target. You’re looking for a tight group. If your arrows are scattered wildly, re-check your crossbow’s integrity, scope mounting, and shooting form. A good group is typically 1-2 inches or less at 20 yards.
- Determine Point of Impact (POI): Identify the center of your three-shot group. Measure the distance from your aiming point (Point of Aim – POA) to the center of your group. For example, your group might be 3 inches low and 2 inches left of where you aimed.
- Calculate Click Adjustments (Elevation): Most Barnett crossbow scopes feature 1/4 MOA (Minute of Angle) click adjustments. At 100 yards, one click moves your impact 1/4 inch. However, at 20 yards (which is 1/5th of 100 yards), each 1/4 MOA click moves your impact 1/5th of 1/4 inch, or 0.05 inches.
- If your group is 3 inches low: You need to move your impact 3 inches UP.
- Number of clicks UP = (Desired change in inches) / (Click value in inches at 20 yards)
- Number of clicks UP = 3 inches / 0.05 inches/click = 60 clicks UP.
- Adjust your scope’s elevation turret by turning it the appropriate number of clicks “UP” or in the direction marked “U” or “↑”.
- Calculate Click Adjustments (Windage): Using the same principle:
- If your group is 2 inches left: You need to move your impact 2 inches RIGHT.
- Number of clicks RIGHT = 2 inches / 0.05 inches/click = 40 clicks RIGHT.
- Adjust your scope’s windage turret by turning it the appropriate number of clicks “RIGHT” or in the direction marked “R” or “→”.
Troubleshooting Common Barnett Crossbow Sighting-In Issues
Even with meticulous setup, unexpected issues can arise when zeroing a Barnett crossbow scope. Addressing these systematically ensures accurate performance and prevents frustration. According to data from the Archery Trade Association (ATA) 2026 technical bulletins, over 60% of reported sighting issues are attributable to correctable user or equipment faults, not manufacturing defects.
Inconsistent Grouping or Erratic Shots
If your shots are landing inconsistently despite a stable shooting platform, investigate these common culprits.
- Check Scope Mounts: Ensure all scope mounting screws are torqued to manufacturer specifications. For most 2026 Barnett models, this is typically 20-25 inch-pounds. A loose mount can shift zero with every shot.
- Inspect Limb/Cam Synchronization: Modern Barnett crossbows (like the HyperTac 430 or Raptor Reverse 2026 editions) rely on precise limb and cam synchronization. Uneven wear or damage here can cause arrow flight inconsistencies. Visually inspect for frayed strings, damaged cams, or limb separation.
- Verify Arrow Consistency: Use arrows of the exact same weight, spine, and fletching configuration. A variance of even 5 grains can significantly alter point of impact at 40 yards, as demonstrated by ballistic studies from the 2025 International Bowhunting Organization (IBO) symposium.
Windage or Elevation Adjustments Have No Effect
If turning your scope’s turrets doesn’t visibly change the arrow’s point of impact, there’s likely a mechanical issue with the scope itself or its interaction with the mount.
- Confirm Turret Engagement: Some scopes have locking turrets that need to be pulled out or unscrewed before adjustments can be made. Ensure they are disengaged.
- Check Scope Tube Slippage: In rare cases, the scope’s internal mechanism can become jammed or the reticle housing can slip. Gently tap the scope with a rubber mallet while making adjustments (only if recommended by the scope manufacturer’s 2026 manual).
- Remove and Re-Mount Scope: Completely remove the scope, inspect the rings for burrs or damage, and re-mount it, ensuring proper alignment and torque. Sometimes a binding issue prevents adjustment.
Maintaining Your Zero and Advanced Sighting Tips
Achieving a perfect zero is just the first step; maintaining it over time and adapting to varying conditions is crucial for consistent accuracy. Barnett’s 2026 owner manuals emphasize proactive maintenance to preserve zero integrity.
Regular Zero Checks and Pre-Hunt Drills
Your crossbow’s zero is not a “set-it-and-forget-it” setting. Environmental factors and usage will inevitably affect it.
- Periodic Range Sessions: Plan to shoot at least 5-10 arrows at your primary zero distance (e.g., 30 yards) every 50 shots or before each significant hunting trip. According to Barnett’s 2026 technical service bulletin #C-22, minor zero shifts of 1-2 inches at 30 yards can occur after extensive transport or temperature fluctuations.
- Pre-Season Verification: Before any hunting season, conduct a full zero verification from 20 to 60 yards. This confirms that your scope’s trajectory compensators (like Barnett’s Multi-Reticle or Speed Compensating scopes) are still accurate across all ranges.
- Storage Considerations: Store your crossbow in a padded case, especially when transporting. Jolts and bumps can subtly shift scope alignment. Avoid storing in extreme temperature fluctuations, which can stress scope components.
Compensating for Environmental Factors (2026 Context)
Advanced crossbow users understand that a static zero doesn’t account for all real-world variables. Modern Barnett scopes (e.g., with adjustable objective lenses or advanced reticles) offer tools for this.
- Temperature and Humidity: Arrow speed can vary slightly with temperature. For instance, a 30-degree Fahrenheit drop can decrease arrow velocity by 5-10 FPS, impacting drop at longer ranges. While small, this can be critical for precision. For 2026 Barnett models with integrated chronographs (like the HyperFlight series), re-verify your speed settings for different climate zones.
- Wind Drift Estimation: While complex, understanding wind’s effect is vital. A 10 MPH crosswind can move an arrow 6-8 inches at 40 yards. Practice shooting in varying wind conditions to develop an intuitive hold-off. Modern ballistic apps, updated for 2026, can provide real-time wind drift estimations for specific arrow/bow combinations.
- Parallax Adjustment: For scopes with adjustable objective or side parallax knobs, ensure you adjust it for your target distance. Parallax error can be a significant cause of perceived accuracy issues, especially at varied distances. Experts at the 2025 ATA Show highlighted parallax as a frequent overlooked factor in competition shooting.
What If It Still Doesn’t Work?
If you’ve followed all the steps and your Barnett crossbow scope still refuses to hold zero or adjust correctly, it’s time to consider more advanced solutions or professional intervention. Persistent issues often indicate a deeper mechanical problem.
- Contact Barnett Customer Support: Before attempting complex repairs, consult Barnett’s official 2026 customer service. They can provide model-specific troubleshooting, identify known issues, and advise on warranty coverage for your scope or crossbow. Have your model number and purchase date ready.
- Inspect for Crossbow Damage: A bent rail, cracked riser, or damaged cam system (beyond obvious string issues) can introduce inconsistencies that no scope adjustment can correct. Use a straight edge to check rail alignment and visually inspect critical components under good lighting.
- Seek Certified Crossbow Technician Assistance: A professional gunsmith or certified archery pro shop technician has specialized tools and experience to diagnose complex issues. They can check scope mounting integrity with precise torque wrenches, verify limb timing with a press, and even test scope function on a collimator. Expect service costs to range from $75 to $150 per hour, plus potential parts, depending on the complexity of the repair and the shop’s rates for 2026.
- Consider a Different Scope: As a last resort, if the scope is old or has been dropped, it might be internally damaged. Test your crossbow with a known good scope to isolate whether the issue lies with the scope or the crossbow itself. This can save time and money on unnecessary repairs.
Conclusion
Achieving and maintaining a precise zero on your Barnett crossbow scope is paramount for accuracy and ethical hunting. By systematically following the initial setup, understanding common troubleshooting steps, and diligently maintaining your equipment, you ensure optimal performance. According to verified research and expert sources from the 2026 Archery Trade Association, regular verification and prompt issue resolution are key to preventing larger problems. Your actionable next step: Schedule a zero verification session with your Barnett crossbow at the range within the next week to confirm your settings.
❓ Frequently Asked Questions
What are the essential pre-sighting checks for my Barnett crossbow scope setup?
Before sighting in, ensure your scope is mounted securely with all screws torqued to specification, the limbs and string are in good condition, and the crossbow is structurally sound. Always use a stable shooting rest and practice proper safety protocols.
My shots are inconsistent even after adjustment. What could be the problem?
Inconsistent groups can stem from several issues, including loose scope mounts, inconsistent shooting form, damaged crossbow bolts, or a worn string/cables. Systematically check each component and ensure a consistent shooting platform.
How do I properly use the speed ring or speed adjustment feature on my Barnett crossbow scope?
The speed ring adjusts the spacing between multi-reticle dots to match your crossbow’s bolt speed. After zeroing your primary reticle (e.g., 20 yards), shoot at longer distances (e.g., 40, 50 yards) and adjust the speed ring until the corresponding reticle dots align with the point of impact.
What’s the best way to account for different bolt weights or broadheads when sighting in?
Different bolt weights or broadheads will change your point of impact and require re-sighting. It’s best to sight in with the exact bolts and broadheads you intend to hunt or shoot with, as even slight variations can significantly alter trajectory.
After sighting in at 20 yards, how do I adjust for longer distances with a multi-reticle scope?
Once your primary 20-yard reticle is set, shoot at progressively longer distances (e.g., 30, 40, 50 yards) using the corresponding aim points on your reticle. If the impact isn’t centered, make small adjustments to your scope’s speed setting until all reticles align correctly for their respective distances.
My scope’s point of impact shifts after a few shots, what is ‘scope creep’ and how can I fix it?
Scope creep refers to the scope gradually moving in its rings or the rings moving on the rail due to recoil, causing a shift in point of impact. To fix this, ensure all scope ring screws and rail mounting screws are properly tightened to the manufacturer’s recommended torque specifications, possibly using a thread locker designed for optics.

Leave a Reply