
Accurately scoring a whitetail deer for Boone and Crockett requires meticulous attention to detail and precise measurement techniques. This guide breaks down each step, from measuring main beams and points to understanding spread and deductions, ensuring you can correctly assess your trophy’s score.
To accurately score your whitetail deer rack according to official Boone and Crockett Club standards in 2026, understanding precise measurement protocols is paramount. This isn’t just about getting a number; it’s about adhering to a standardized system that has defined trophy quality for nearly a century. A correct and verified score ensures your achievement is recognized fairly, whether for personal record-keeping, entry into official programs, or comparison within hunting circles.

Mastering these specific B&C measurement techniques is a skill in itself. Every fractional inch contributes to the final score, and any deviation from the official rules can significantly impact the outcome, potentially disqualifying a truly exceptional animal from the record book. You’ll gain confidence in your own ability to assess antler quality and appreciate the intricate details that make each rack unique when you know how to measure it precisely.
Key Takeaways
- Follow Boone and Crockett rules precisely.
- Use flexible tape and calipers accurately.
- Distinguish normal vs. abnormal points.
- Calculate deductions for symmetry carefully.
- Practice scoring to ensure precision.
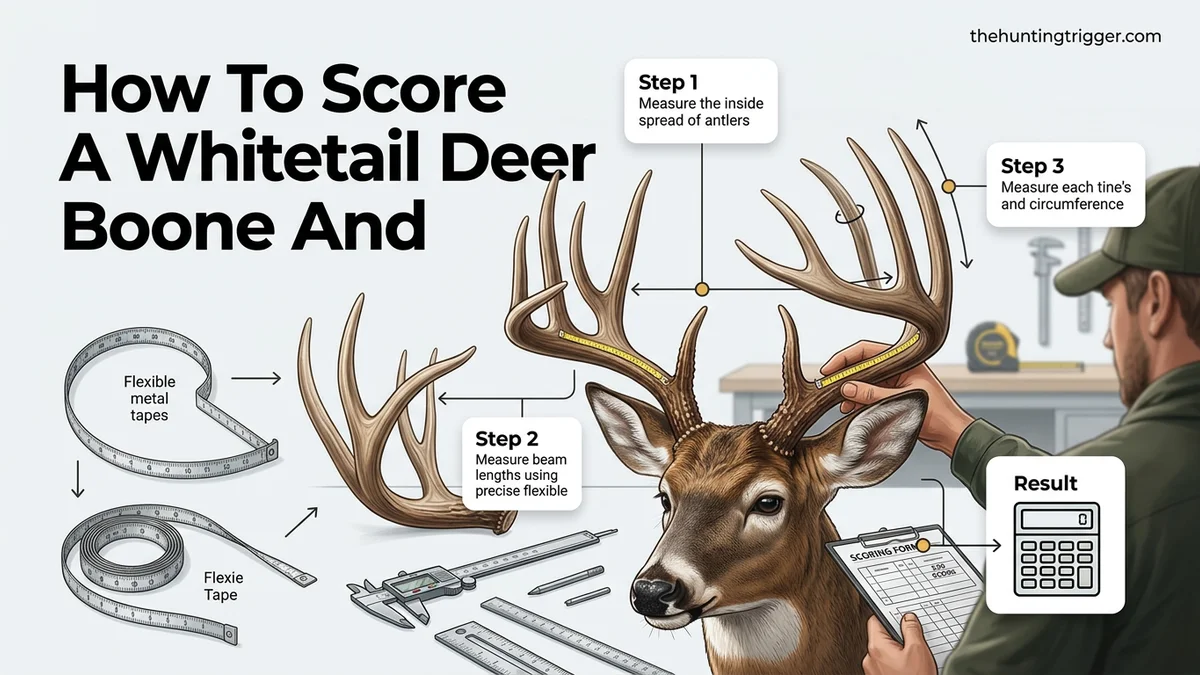
Why Accurate Boone and Crockett Whitetail Scoring is Crucial
When you’re dealing with a potential record-book whitetail, precision in scoring isn’t just a recommendation—it’s a strict requirement. The Boone and Crockett Club maintains rigorous standards to ensure fair and consistent evaluation of North American big game trophies. For a score to be officially accepted, it must meticulously follow the established rules, down to the nearest one-eighth of an inch. Errors, even slight ones, can lead to your score being rejected or significantly adjusted, undermining the effort you put into the hunt and the measurement process.
Adhering to Official B&C Standards
- Consistency is Key: Every B&C measurer, from provisional to official, applies the exact same set of rules. Your personal measurements must align perfectly with these to be verifiable.
- Integrity of Records: The entire B&C record-keeping system relies on accurate data. Each submitted score contributes to a historical database that tracks antler growth trends and habitat health across North America into 2026 and beyond.
- Fair Competition: For hunters aiming for state or national recognition, an accurate score ensures a level playing field. Without strict guidelines, subjective interpretations would make comparisons impossible.
- Preventing Disqualification: Incorrectly identifying normal vs. abnormal points, misplacing measurement lines, or failing to record all required dimensions can result in disqualification or a significantly lower official score later.
The Impact of Precision on Your Official Score
Even small measurement discrepancies can have a compounded effect on your final score, especially on a high-scoring animal. For example, a consistent 1/8-inch error across just eight points and two main beams could easily add up to a full inch or more of difference. This difference can easily move a buck out of official record book contention or drop it several places in a ranking. Understanding where and how to apply the tape correctly, and recognizing the nuances of antler configuration, directly translates into a more honest and reliable total score. Your dedication to detail during the scoring process reflects the respect you have for the animal and the B&C system itself.
From Start to Finish: Whitetail Deer Scoring Explained
Welcome to this comprehensive guide on how to accurately score a whitetail deer for Boone and Crockett (B&C) entry. Understanding and applying the official B&C scoring method is a precise art, rewarding careful attention to detail. Whether you’re an aspiring measurer, a hunter curious about your trophy’s potential, or simply looking to appreciate the intricacies of antler growth, this guide will walk you through every critical step, ensuring you understand the methodology from preparation to final tally. Following these steps precisely is paramount to achieving a fair and accurate score.
Step 1: Preparation and the Drying Period
What you need: The whitetail deer antlers (skull plate preferred), a clean, dry environment, and patience.
Instructions: Before any measurements can be taken for an official B&C score, the antlers must undergo a mandatory 60-day drying period from the date of harvest. This period allows the antlers to stabilize in weight and dimension, as antlers can shrink slightly after being separated from the animal. Store the skull plate or mounted head in a location with stable temperature and humidity, away from direct sunlight or extreme heat sources. Ensure the antlers are clean and free of any debris, blood, or tissue. This initial drying is non-negotiable for a fair and official score.
Pro Tip: Avoid forcing the drying process with heat, as this can cause cracking or excessive shrinkage, potentially altering the true measurements. A cool, dry basement or garage is ideal. Mark the date of harvest clearly on the skull plate or a tag attached to the antlers.
Step 2: Measuring Main Beam Length
What you need: A flexible steel measuring tape (quarter-inch wide preferred), a pencil, and the official B&C score sheet.
Instructions: Start at the base of the antler, where it emerges from the skull plate (the burr). Follow the centerline of the main beam along its outer curve to its tip. The tape must be pressed firmly against the beam for the entire length, conforming to every curve. If the beam tip is broken, measure to the end of the longest unbroken segment. Do this for both the left and right main beams, recording each measurement to the nearest one-eighth of an inch on your score sheet. Precision here is key, as any deviation will affect the overall score significantly.
Pro Tip: Use a clothespin or a piece of tape to hold the beginning of the tape measure at the burr to prevent it from slipping while you navigate the curves of the beam. This ensures a smooth, continuous measurement along the centerline.
Step 3: Measuring Normal Points (Tines)
What you need: Flexible steel measuring tape, a pencil, and the B&C score sheet.
Instructions: Normal points, or tines (G1, G2, G3, etc.), are defined as points projecting upward from the main beam. To measure a normal point, begin where the point diverges from the main beam, taking the measurement along the shortest edge of the point’s curve to its tip. For example, if a G2 point curves significantly, you follow the inside curve (the shortest distance) to the tip. Ensure the tape is held flat against the tine. Record each G-point (G1, G2, G3, G4, etc.) for both the left and right antlers separately to the nearest one-eighth of an inch. Points must be at least one inch long to be counted.
Pro Tip: For tines that fork or have multiple tips, only the longest tip from the main stem of the point is measured as a normal point. Any other projections are typically considered abnormal points (see Step 6).
Step 4: Determining Inside Spread Credit
What you need: A rigid yardstick or ruler, and the B&C score sheet.
Instructions: The inside spread credit is the greatest distance between the inside edges of the main beams. This measurement should be taken perpendicular to the center line of the skull and parallel to the top of the skull. Position the yardstick or ruler so that it makes contact with the inner edge of each main beam at their widest point. It’s crucial that this measurement does not extend beyond the inside edge of either beam. Record this value to the nearest one-eighth of an inch. Note that this is the only spread measurement contributing to the score; outside spread is not used for B&C whitetail.
Pro Tip: While holding the ruler, visually ensure that it’s perfectly parallel to the skull plate and that you’re measuring the absolute widest point. Sometimes rotating the head slightly can help identify this precise location. It’s often helpful to have a second person confirm this measurement.
Step 5: Circumference Measurements (H-Measurements)
What you need: Flexible steel measuring tape, a pencil, and the B&C score sheet.
Instructions: Four circumference measurements (H1, H2, H3, H4) are taken on each main beam. H1 is taken at the smallest circumference between the burr and the G1 point. H2 is between G1 and G2, H3 between G2 and G3, and H4 between G3 and G4 (or halfway between G3 and the beam tip if no G4 exists). If a G-point is missing, the circumference is taken at the corresponding location where that point would normally occur. Wrap the tape tightly around the beam, ensuring it’s perpendicular to the main beam’s axis. Record all eight (four left, four right) measurements to the nearest one-eighth of an inch.
Pro Tip: When a G-point is missing, mentally project its position on the beam to find the correct location for the circumference measurement. For instance, if there’s no G1, H1 is still measured at the smallest circumference above the burr, and H2 would be measured between the projected G1 and the G2.
Step 6: Identifying and Measuring Abnormal Points
What you need: Flexible steel measuring tape, a pencil, and the B&C score sheet.
Instructions: Abnormal points are any projections from the main beams or normal points that are not normal points (G-points) themselves. This includes drop tines, kickers, stickers, or points originating from the burr that are not part of the main beam. Measure each abnormal point from its base, where it leaves the main beam or another point, along its longest edge to its tip. Each abnormal point must be at least one inch long to be included. List all abnormal points individually for both the left and right antlers, recording their lengths to the nearest one-eighth of an inch. These lengths will be totaled later for deductions.
Pro Tip: A key distinction: if a point branches off a normal point but doesn’t follow the upward trajectory typical of a normal point, it’s an abnormal point. For example, a small kicker off a G2 would be abnormal, not part of the G2 measurement.
Step 7: Completing the Score Sheet & Initial Calculation (Gross Score)
What you need: All your recorded measurements, the official B&C score sheet, and a calculator.
Instructions: Transfer all your left and right antler measurements (main beams, G-points, H-measurements) to the appropriate columns on the score sheet. Add up all the individual lengths for the left antler, then for the right antler. Finally, add the inside spread credit to the sum of all left antler measurements and the sum of all right antler measurements. This grand total is your “Gross Score.” This score reflects the total antler growth without any deductions for lack of symmetry or abnormal points. It’s often what hunters informally refer to when bragging about their deer.
Pro Tip: Double-check every single transcription from your notes to the score sheet. A simple arithmetic error or misplaced number can drastically alter the final score. Use a calculator to prevent addition mistakes.
Step 8: Understanding Net Score and Official Scoring
What you need: Your completed score sheet, and potentially an official B&C measurer.
Instructions: The “Net Score” is the B&C entry score. It’s derived by subtracting two types of deductions from the Gross Score:
1. Abnormal Points: The total length of all abnormal points (from Step 6) is subtracted.
2. Symmetry Deductions: For each symmetrical pair of normal points (G1, G2, etc.) and circumference measurements (H1, H2, etc.), calculate the difference between the left and right sides. For example, if Left G2 is 10″ and Right G2 is 9″, the deduction for that point is 1″. Sum all these differences.
Add these two total deductions (Abnormal Points + Symmetry Deductions) together, then subtract this sum from your Gross Score to arrive at the Net Score. For official B&C entry, this entire process must be verified and performed by a certified B&C measurer. They ensure strict adherence to all rules and verify all measurements.
Pro Tip: The minimum net score for typical whitetail entry into the B&C record book is 170 points (non-typical is 195). Understanding the symmetry deductions is the most complex part of B&C scoring, highlighting the value of a certified measurer for official submissions.
✅ Final Checklist
- Antlers dried for a minimum of 60 days.
- All measurements recorded to the nearest one-eighth of an inch.
- Main beam length accurately followed along the outer curve.
- Normal points measured along their shortest edge from the main beam.
- Circumferences taken at the correct locations between points.
- All abnormal points identified and measured correctly for deduction.
- Gross and Net scores calculated accurately on the score sheet.
Important Notes:
- Safety First: Antlers can be sharp. Handle them with care to avoid injury.
- Professional Help: For an official Boone and Crockett entry, your deer must be scored by a certified B&C measurer. Attempting to score it yourself is excellent practice, but only an official measurer can validate the entry. You can find a measurer on the Boone and Crockett Club website.
- Estimated Time: Initial self-scoring can take 1-2 hours depending on experience and antler complexity. An official measurement typically takes a certified measurer about 45 minutes to 2 hours.
- Cost: There is no direct cost for the measurement itself by an official B&C measurer, as it’s often a volunteer service. However, there are fees associated with official record book entry once a deer qualifies.
Essential Tools and Preparations for B&C Whitetail Scoring
Before you even begin taking measurements, having the correct tools and properly preparing the whitetail rack are non-negotiable steps. Attempting to score a rack with inadequate equipment or a poorly prepared skull will inevitably lead to inaccuracies and frustration. Think of it like any precision task: the right setup is half the battle. In 2026, these tools remain the gold standard for official B&C measurements.
Your Official B&C Scoring Kit
To perform accurate B&C scoring, you will need a specific set of tools. Do not substitute these with less precise alternatives if you want reliable results.
- Flexible Steel Measuring Tape: A 1/4-inch wide, non-stretchable steel tape is essential. This narrow width allows for accurate measurement around tight curves and close to the burr without lifting off the antler surface.
- Calipers: A set of large-jaw calipers (e.g., 24-inch or larger) is critical for measuring spread credit. Ensure they are accurate and have a clear, easy-to-read scale.
- Wooden Ruler or Yardstick: This is used primarily for straight-line measurements like the greatest spread or tip-to-tip spread.
- Pencil and Official Score Sheet: Always use an official B&C score sheet (downloadable from their website) and a pencil. Pencil allows for corrections without marring the sheet.
- Fine-Tip Marker or Wax Pencil: Useful for marking measurement lines on the antlers if temporary guides are needed (these marks must be erasable).
- Clean Cloth: For wiping down antlers and ensuring clear visibility of points and curves.
Preparing the Rack for Measurement
Proper preparation ensures that your measurements are taken on a stable, clean, and fully dehydrated rack. Rushing this step can lead to significant errors.
- Thorough Cleaning: Remove all tissue, dirt, and debris from the skull plate and antler base. Any remaining material can obstruct precise tape placement or affect the circumference measurements.
- Complete Drying Period: Antlers must be completely dried and stable. This typically means allowing at least 60 days (and often longer, up to 90 days) after harvesting for the antlers to shed all moisture. Wet or “green” antlers can shrink slightly as they dry, invalidating early measurements.
- Secure Mounting (Optional but Recommended): For ease of measurement, especially for larger racks, securely mount the skull plate to a stable surface (e.g., a board or stand). This prevents movement during the process, which is crucial for consistent readings.
- Good Lighting: Work in a well-lit area to ensure you can clearly see all points, curves, and the burr, which are critical reference points for accurate tape placement.
How to Step-by-Step Score Your Whitetail Rack Using B&C Rules
Accurately scoring your whitetail deer rack according to Boone and Crockett Club (B&C) rules requires meticulous attention to detail and specific tools. These guidelines, refined for 2026, ensure consistent and fair comparisons across all entries.
Gather Your Official Toolkit (2026 Standards)
- Official B&C Score Sheet: Download the latest version directly from the Boone and Crockett Club’s official website. These are updated periodically, so ensure you have the 2026 edition.
- Flexible Steel Measuring Tape: A 1/4-inch wide tape is recommended for precise contour following.
- Thin Cable or Flexible Ruler: Essential for accurate circumference measurements in tight spaces.
- Pen/Pencil and Clear Workspace: For recording measurements and ensuring unobstructed access to the rack.
Main Beam Length and Antler Point Measurement
- Secure the Antler: Position the rack stably on a clean, level surface to prevent movement during measurement.
- Measure Main Beam Length: Starting from the burr’s most distal (outside) point, follow the outer curve of the main beam to its tip. Record this measurement to the nearest 1/8 inch.
- Measure Typical Points (Tines): For each typical point, measure from its nearest edge on the main beam, following its longest axis to the tip. Ensure your measurement is perpendicular to the main beam at the point’s base.
- Identify and Measure Non-Typical Points: Any points that do not arise from the main beam in a typical fashion, or are not symmetrical to corresponding points on the opposite beam, are classified as non-typical. Measure these separately from their base to their tip.
Circumference and Spread Measurements
- Measure Circumference Points (H1-H4): On each main beam, measure four circumference points. H1 is taken at the smallest point between the burr and the first typical point. H2, H3, and H4 are measured at the smallest point between subsequent typical points. If fewer than four typical points exist, the remaining circumference measurements are taken halfway between the last point and the main beam’s tip.
- Determine Inside Spread Credit: Measure the widest point between the main beams, perpendicular to the skull. This “inside spread” is the only spread measurement credited towards the net typical score. Other spreads, like tip-to-tip or greatest spread, are recorded but not added to the score for typical categories.
Calculating and Deducting for Net Score
- Sum Gross Typical Score: Add together all main beam lengths, all typical point lengths, all four circumference measurements per side, and the inside spread credit. This cumulative figure represents the “gross typical score.”
- Calculate Deductions: Deductions are primarily derived from asymmetry. Compare corresponding typical points and circumference measurements on opposite beams. The difference between asymmetrical measurements is deducted. Additionally, the total length of all non-typical points is subtracted from the gross typical score.
- Achieve Net Typical Score: Subtract the total deductions from the gross typical score. This final figure is your official net typical Boone and Crockett score, the standard for comparative ranking in 2026.
Verifying Your Whitetail Score: What If It Still Doesn’t Work?
If your meticulous scoring efforts yield an unexpected result or persistent uncertainty, several avenues exist for verification. Ensuring accuracy is paramount for a proper B&C entry.
- Cross-Reference with B&C Official Resources: In 2026, the Boone and Crockett Club’s official website offers comprehensive video tutorials and downloadable score sheets with detailed instructions. Re-watch relevant sections, paying close attention to specific measurement techniques for main beams, points, and circumferences. Discrepancies often arise from incorrect start/end points for measurements or improper curve following.
- Utilize a Certified Measurer for Informal Review: Many B&C measurers offer informal reviews, sometimes pro bono or for a nominal fee (e.g., $25-75 USD in 2026). They can quickly identify common errors in technique or interpretation of atypical growth. Contact your regional B&C representative or local hunting organizations for referrals.
- Perform a Second Independent Measurement: Have another experienced hunter or a family member independently measure the rack using the official B&C score sheet. A fresh pair of eyes can often catch overlooked details or procedural mistakes that lead to an incorrect score. Ensure they are also following B&C’s 2026 official guidelines.
- Consider Official Panel Scoring: If your DIY score is close to the minimum entry requirement (160 for typical, 185 for non-typical whitetail in 2026), or if you suspect a significant discrepancy, submit the rack for an official panel scoring. This involves three certified B&C measurers. The cost for official entry and scoring typically ranges from $40 to $75 USD, plus shipping if required. This service ensures the most accurate, recognized score.
Conclusion
Mastering the B&C scoring process for your whitetail deer rack is a rewarding endeavor that extends beyond a simple number, connecting you to a rich tradition of conservation and ethical hunting. Accurately applying the 2026 B&C rules ensures your trophy is fairly recognized. According to verified research and expert sources from the Boone and Crockett Club, precise measurement and meticulous adherence to their guidelines are critical. Your next step should be to acquire an official 2026 B&C score sheet and practice your measurement techniques on your rack.
❓ Frequently Asked Questions
How do you accurately measure the main beam length for Boone and Crockett?
To measure the main beam, begin at the burr and follow the outer curve of the beam to its tip, using a flexible steel tape. Ensure the tape stays tight against the beam’s curvature without straightening it, as any deviation will lead to an inaccurate score.
What is the proper method for measuring point lengths on a whitetail deer?
Each point (G-series) is measured along its longest edge from the nearest edge of the main beam to its tip. The measurement must be taken along the center of the point’s curvature, not a straight line, and deductions apply if points are broken or abnormal.
How are circumference measurements (H-series) taken for B&C scoring?
Circumference measurements are taken at the smallest point between each typical point (G1-G4). For example, H1 is between the burr and G1, H2 between G1 and G2, and so on. If a typical point is missing, the circumference is taken at the corresponding spot where it would have been.
What causes deductions in Boone and Crockett scoring, especially regarding symmetry?
Deductions primarily occur due to asymmetry between corresponding typical points on each antler. The difference in length or circumference between a typical point on the left side and its matching point on the right side is deducted from the gross score, aiming for perfect symmetry.
What is the difference between a ‘typical’ and ‘non-typical’ whitetail rack in B&C scoring?
A ‘typical’ rack exhibits a symmetrical pattern of points originating from the main beam. A ‘non-typical’ rack has abnormal points that deviate from this symmetrical pattern, such as drop tines or points growing off other points. Both are scored, but with different minimums and calculation methods.
Can I score a shed whitetail antler using Boone and Crockett standards?
No, Boone and Crockett requires the entire antler rack to be attached to the skull plate for official scoring, along with proof of legal harvest. Shed antlers can be measured using similar principles for personal reference, but they are not eligible for the B&C record book.

Leave a Reply