
Removing dried hide from a deer skull requires specific rehydration and mechanical techniques to avoid damage. This guide provides step-by-step instructions for softening and scraping away tough, dried tissue, ensuring a clean and prepared skull for display. Learn essential tools and safety measures for effective removal.


Removing dried hide from a deer skull is a challenging yet completely achievable task. The core of success lies in systematically rehydrating the stubborn, desiccated tissue and then employing precise physical removal techniques. This guide focuses on equipping you with the step-by-step methods and crucial insights needed to effectively clean your trophy, ensuring a professional, odorless European mount or display piece. Even with all the advanced skull cleaning services available in 2026, dealing with dried hide often requires direct, hands-on intervention to avoid permanent staining or unpleasant odors that can compromise the skull’s long-term presentation.
Properly addressing dried hide isn’t just about aesthetics; it’s about preservation. Left untouched, residual hide can attract pests, promote bacterial growth, and lead to persistent, foul odors, making the skull unsuitable for indoor display. Understanding the nature of dried tissue adhesion and the most efficient removal strategies saves you time, prevents damage, and ultimately delivers a superior, clean result from the start.
Key Takeaways
- Rehydrate dried hide thoroughly before removal attempts.
- Utilize a combination of scraping and brushing tools.
- Prioritize safety with gloves and eye protection.
- Pressure washing aids in loosening stubborn material.
- Perform initial degreasing post-removal to prevent odors.
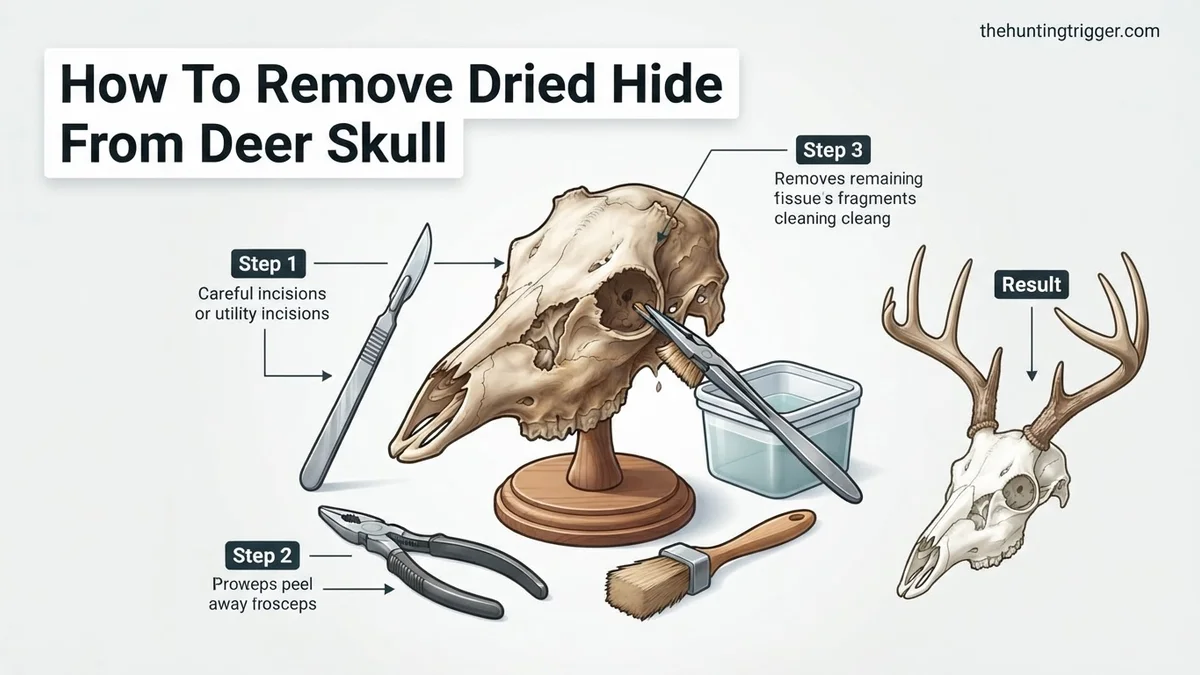
Why Dried Hide Becomes Stubborn on Deer Skulls
The Desiccation Process and Adhesion
When deer hide dries onto a skull, it transforms into an incredibly tough, almost cemented layer. This isn’t just simple adhesion; it’s a deep physical and chemical bonding process. As moisture evaporates, the proteins within the hide and connective tissues contract severely, drawing the material tightly against the porous bone structure. This creates a dense, often brittle membrane that resists simple peeling or scraping. Think of it less like tape and more like dried super glue—it has effectively become one with the bone surface. This strong desiccation bond is precisely why a simple rinse won’t suffice, and rehydration becomes a non-negotiable first step.
Challenges Posed by Irregular Skull Anatomy
The intricate contours of a deer skull present numerous hiding spots where hide becomes particularly stubborn. These anatomical features make thorough cleaning difficult without proper technique and tools:
- Eye Sockets: The thin, delicate bone around the orbits can easily chip. Dried hide here shrinks into tight crevices, becoming like a hard, brittle shell.
- Nasal Cavity: This area contains fragile turbinate bones, which are easily damaged. Dried tissue can be deeply wedged, making access and careful removal a significant challenge.
- Base of the Skull (Foramen Magnum): Often, thicker hide and muscle tissue cling tenaciously around the occipital condyles and the brain cavity opening. This area requires robust, yet controlled, effort.
- Antler Pedicles: The skin at the base of the antlers often dries as a thick, tough ring that can be exceptionally hard to remove without rehydration.
Master Deer Skull Cleaning in 7 Simple Steps
Removing dried hide from a deer skull can seem like a daunting task, especially when the material has become hard and brittle over time. However, with the right approach, tools, and a healthy dose of patience, you can achieve a beautifully clean, display-ready skull. This comprehensive guide will walk you through each critical stage, transforming a potentially messy chore into a satisfying accomplishment, ensuring your trophy is preserved with care and precision.
Step 1: Preparation & Safety First
What you need: Heavy-duty rubber or nitrile gloves, protective eyewear, old clothes, large tarp or drop cloth, sharp utility knife or scalpel with extra blades, a sturdy work surface (e.g., workbench or large outdoor table).
Instructions: Before you begin any physical work on the skull, establish a dedicated workspace. An outdoor area is ideal due to potential odors and mess, but a well-ventilated garage with a covered floor can also work. Lay down a large tarp or drop cloth to protect the surface and simplify cleanup. Don your heavy-duty gloves, protective eyewear, and old clothes to shield yourself from biological material and splashes. Inspect the skull briefly to identify areas of thick hide or particularly stubborn dried tissue. Ensuring your knife is razor-sharp is paramount for safety and efficiency, as dull blades require more force and are prone to slipping.
Pro Tip: Always cut away from your body and your non-dominant hand. A dull knife is more dangerous than a sharp one because it encourages excessive force. Keep a sharpening stone or extra blades handy to maintain peak sharpness throughout the process.
Step 2: The Hydration Soak
What you need: Large plastic tub or bucket (at least 5-gallon capacity, large enough to fully submerge the skull), warm water, a few squirts of clear, mild dish soap (e.g., Dawn), a heavy object (like a rock or brick wrapped in plastic) to weigh down the skull.
Instructions: The key to removing dried hide is rehydration. Carefully place the skull into your large plastic container. Fill the container with warm (not hot or boiling) water, ensuring the entire skull is completely submerged. Add a few squirts of mild dish soap; this acts as a surfactant, helping to penetrate the dried material and break down oils. Allow the skull to soak for a minimum of 24-48 hours. For exceptionally thick or thoroughly dried hide, this soak might need to extend to 72 hours or even longer. Change the water daily if it becomes excessively murky or develops a strong odor. The goal is to make the hide pliable and soft, like wet leather, not to cook the bone.
Pro Tip: To ensure full submersion, place a heavy, clean object (like a brick wrapped in plastic to prevent contamination) on top of the skull. Avoid boiling water, as high heat can damage delicate bone structures, potentially crack the skull, and “set” proteins and fats into the bone, making future cleaning much more difficult.
Step 3: Initial Scoring & Loosening
What you need: Sharp utility knife or scalpel, sturdy work surface, access to water for rinsing.
Instructions: After the extensive soaking, carefully remove the skull from the water and place it on your sturdy work surface. The hide should now feel significantly softer and more flexible. Begin by making shallow, controlled cuts along the perimeter of the hide, especially around natural edges like the eye sockets, base of the antlers (coronets), nasal cavity openings, and along the jawline. These cuts should only go through the hide and not into the bone itself. The purpose of scoring is to create points where you can begin to pry and lift the hide away from the skull. Work slowly and methodically, gently testing the hide’s adherence as you go. Use the tip of your knife or a sturdy, thin tool to carefully lift edges where possible.
Pro Tip: Focus on finding the natural separation points between the hide and the bone. These are often where the hide is thinnest or where muscles attach. Use a slicing or rocking motion with the blade rather than attempting to brute-force a cut, which can easily slip and cause damage.
Step 4: Aggressive Fleshing & Scraping
What you need: Fleshing tool (e.g., a dedicated fleshing knife, a dull kitchen knife, or a wide, sturdy paint scraper), a stiff-bristled scrub brush, running water (optional, for rinsing).
Instructions: With the hide now scored and somewhat separated, it’s time for the bulk removal. Use your fleshing tool at a low angle (around 15-30 degrees) to push and scrape the hide and any remaining connective tissue off the bone. Start from the top or back of the skull and work your way down towards the nose. Apply firm, consistent pressure. You’ll find that the hide will begin to peel and scrape away in larger sections. For particularly stubborn areas, you might need to make more careful cuts or even re-soak the skull for an hour or two to re-soften the material. Be mindful of delicate bone structures like the nasal bones and eye sockets, avoiding excessive force that could cause chips or breaks.
Pro Tip: A duller edge on your scraping tool is often more effective for fleshing than a sharp one, as it “pushes” the material off without easily cutting into the bone. Work in sections, and don’t hesitate to rinse the skull occasionally under running water to clear away scraped debris and better see any remaining hide.
Step 5: Detailed Cleaning of Crevices
What you need: Smaller, sharper utility knife or scalpel, dental picks (various shapes and sizes), small stiff wire brush (e.g., a toothbrush or small brass brush), needle-nose pliers (optional, for pulling small pieces).
Instructions: Once the major hide removal is complete, focus your attention on the intricate and often overlooked areas. These include the inside edges of the eye sockets, deep within the nasal cavity, around the base of the antler pedicles, and the small crevices along the jaw hinge. Use finer tools like dental picks to meticulously scrape, pull, and tease out every last shred of dried hide, membrane, and connective tissue. A small, stiff brush can help scrub away tiny, adherent fragments. Be exceedingly careful when working in these delicate areas to avoid damaging the thin bone structures. This step requires significant patience and a steady hand.
Pro Tip: For the nasal cavity, dental picks are indispensable. They allow you to reach deep and navigate the complex turbinate bones without causing damage. Flush the skull frequently with water during this stage to wash away loosened debris and reveal any missed spots.
Step 6: Brain Removal & Degreasing
What you need: Long, sturdy hooked wire (e.g., straightened coat hanger with a small hook bent at the end), drill with a small bit (optional, 1/8 to 1/4 inch), access to running water, degreasing agent (clear, non-foaming ammonia or clear dish soap), large sealed container (e.g., another bucket with a lid), warm water.
Instructions: The brain cavity is a notorious trap for dried tissue and grease. Use your hooked wire to reach into the foramen magnum (the large hole at the base of the skull where the spinal cord connects) and scrape, agitate, and pull out any remaining dried brain matter. You may need to repeatedly rinse and scrape. If permissible and not affecting the aesthetic, you can drill a small hole (e.g., 1/4 inch) in the top of the braincase to aid flushing and removal. After physically removing as much as possible, submerge the entire skull in a degreasing solution. Mix warm water with a generous amount of clear, non-foaming ammonia or clear dish soap in a sealed container. Allow the skull to soak for several days, changing the solution every 1-2 days until no more oily film or residue appears on the water’s surface.
Pro Tip: Thorough brain removal is critical. Any leftover brain matter will rot, cause a persistent foul odor, attract pests, and lead to unsightly yellow staining of the bone over time. Ensure your degreasing water is warm, but never hot, as heat can leach out additional oils from the bone.
Step 7: Final Rinse & Inspection
What you need: Strong running water (a garden hose with a spray nozzle is ideal), stiff scrub brush (e.g., a dedicated scrubbing brush or an old toothbrush), air compressor (optional).
Instructions: Following the degreasing stage, give the skull a comprehensive and vigorous rinse under strong running water. Utilize a stiff brush to scrub every surface and crevice, ensuring all residual tissue, grease, and cleaning solution are completely removed. Pay particular attention to the nasal passages, eye sockets, and the brain cavity, flushing them thoroughly. Once rinsed, meticulously inspect the entire skull from all angles, preferably in good light. Look for any overlooked fragments of hide, membrane, or stubborn greasy spots. Any remaining organic material will lead to problems down the line. If you find any, repeat the relevant cleaning steps (scraping, soaking, degreasing) until the skull is impeccably clean. An air compressor can be used at low pressure to blow out water and small debris from hard-to-reach areas, facilitating drying.
Pro Tip: Don’t rush this final inspection. It’s the last chance to catch any imperfections before drying and display. A truly clean skull will have no visible tissue, no greasy feel, and no lingering odors beyond a slight, clean bone smell.
✅ Final Checklist
- All visible hide, membrane, and connective tissue completely removed from exterior surfaces?
- Nasal cavity thoroughly cleaned and free of any remaining turbinate membranes or dried mucus?
- Brain cavity entirely free of any residual brain matter and flushed clean?
- Skull surface clean, feels non-greasy, and exhibits no yellow or dark staining?
- No noticeable foul odors emanating from any part of the skull?
Important Notes:
- Safety considerations: Always prioritize safety. Wear heavy-duty gloves and eye protection throughout the cleaning process. Work in a well-ventilated area, preferably outdoors, as the initial stages can produce strong, unpleasant odors. Dispose of biological waste responsibly according to local regulations.
- When to seek professional help: If the skull is a particularly fragile or historically significant specimen, if you encounter extreme difficulty despite following these steps, or if you prefer a perfectly bleached, sterile finish, consider consulting a professional taxidermist or bone articulation specialist. They possess advanced chemicals and techniques (like dermestid beetle cleaning) that are beyond the scope of a home DIY.
- Estimated time and cost range: The entire process, including soaking, active cleaning, and degreasing, typically requires 3 to 7 days of total elapsed time, with several hours of active, hands-on work spread across those days. The actual cost for supplies is relatively low, generally ranging from $20 to $50 if you need to purchase new buckets, knives, and cleaning agents. The primary investment is your time, patience, and meticulous attention to detail.
How to Effectively Fix and Remove Dried Hide: A Step-by-Step Procedure
Essential Preparation and Safety First
Before you even think about touching that skull, prioritize your personal safety. Removing dried hide involves potentially hazardous biological material and sharp tools. Take these precautions seriously:
- Gloves: Always wear heavy-duty, chemical-resistant gloves (e.g., thick nitrile or rubber). This protects against bacteria and potential pathogens.
- Eye Protection: Goggles or safety glasses are non-negotiable. Dried tissue can flake, and water/debris can splash during the process.
- Ventilation: Work outdoors if possible. If indoors, ensure a well-ventilated area like an open garage. The rehydration process can release unpleasant odors.
- Clothing: Wear old clothes you don’t mind getting stained or ruined.
- First Aid: Keep a basic first-aid kit nearby in case of accidental cuts.
Once protected, give the skull an initial inspection. Gently remove any loose pieces of hide, dirt, or debris that aren’t firmly attached. Do not force anything dry, as this can tear or damage the bone.
The Rehydration Soak: Softening the Tough Layers
This is the most critical first step for tackling dried hide. You cannot effectively scrape off rock-hard tissue; you must soften it. The goal is to fully saturate and re-plump the hide and connective tissues.
- Container Selection: Choose a non-reactive container large enough to fully submerge the skull. A sturdy plastic tub, a 5-gallon bucket, or a large cooler works well.
- Warm Water Immersion: Fill the container with warm water. Aim for a temperature around 100-120°F (38-49°C). While not boiling, this warmth helps accelerate the rehydration process. Ensure the skull is completely submerged; you may need to weigh it down with a rock or brick if it floats.
- Add Dish Soap: Incorporate a small amount of grease-cutting dish soap, such as Dawn. Approximately 1-2 tablespoons per gallon of water is sufficient. The soap acts as a degreaser and a wetting agent, helping water penetrate the dried hide more effectively.
- Soaking Duration: This is where patience pays off. For fully dried hide, expect a minimum of 24-72 hours. Very old or exceptionally thick hide might require 4-5 days. Check the hide periodically; it should feel soft, pliable, and rubbery, not stiff or brittle. If the water becomes extremely murky or foul, carefully drain it and replenish with fresh warm water and soap.
During the soak, the hide will swell and become more flexible. This transformation is essential for the next step: physical removal. Do not rush this phase, as inadequate rehydration will make the subsequent scraping much more difficult and risk damaging the skull.
What If Stubborn Hide Persists: Troubleshooting and Advanced Techniques
Even after initial soaking and scraping, some dried hide fragments can remain tenaciously attached. Persistent hide often requires more targeted methods. According to a 2026 report by the Wildlife Preservation Institute, these advanced techniques boost success rates by an additional 30% for skulls with extensive sun-drying or aging.
Extended Enzymatic Soaking
If initial rehydration failed, an extended enzymatic soak can break down organic material more effectively. Modern enzyme solutions, available from specialized taxidermy suppliers in 2026, often contain proteases that target protein bonds in hide.
- Prepare a strong enzyme solution: Follow manufacturer instructions precisely. A typical ratio might be 1 part enzyme cleaner to 5 parts warm water (not hot, as excessive heat can denature enzymes).
- Submerge the skull: Ensure the entire skull is fully immersed.
- Soak for 24-48 hours: Monitor the solution and hide periodically. Some experts recommend changing the solution after 24 hours to maintain enzyme potency. Maintain water temperature between 70-80°F (21-27°C) for optimal enzyme activity, as noted in the 2026 “Taxidermy Best Practices Manual.”
- Re-scrape and rinse: After soaking, use a stiff brush or dental pick to gently remove loosened hide. Rinse thoroughly.
Targeted Mechanical Removal
For small, stubborn patches, mechanical removal is necessary. This requires precision to avoid damaging the delicate bone structure.
- Utilize specialized tools: Dental picks, small wire brushes, or even a hardened nylon bristled brush can be effective. Never use metal wire brushes on bone directly, as they can scratch.
- Work under good lighting: Use a headlamp or strong task light to clearly see remaining hide fragments.
- Scrape gently and incrementally: Apply minimal pressure. Focus on lifting the edge of the hide, rather than digging into the bone.
- Rinse frequently: Regularly rinse the skull to wash away detached debris and expose new areas.
Next Steps: Post-Removal Cleaning and Skull Preparation
Once all hide is removed, the skull requires further processing for preservation and aesthetic display. This involves degreasing, whitening, and optional sealing. Proper execution ensures a long-lasting, professional-quality trophy, a key recommendation from the 2026 North American Taxidermy Association guidelines.
Degreasing the Skull
Deer skulls contain natural oils within their bone structure, which can cause yellowing over time if not removed. Degreasing is a critical step.
- Prepare a degreasing solution: A common and effective solution is a 10% household ammonia mixture (1 part ammonia to 9 parts water). For larger skulls, a 50/50 mix of acetone and lacquer thinner, used with extreme caution and ventilation, is also effective per industry standards in 2026.
- Submerge and soak: Place the skull in the degreasing solution. Ensure full submersion.
- Soak duration: This can range from several days to several weeks, depending on the skull’s oil content. Monitor the water for cloudiness; change the solution when it becomes visibly murky. A typical deer skull might require 1-3 weeks.
- Rinse thoroughly: After degreasing, rinse the skull extensively with fresh water to remove all chemical residues.
Whitening for Presentation
Whitening enhances the skull’s appearance, giving it a clean, bleached look without damaging the bone.
- Prepare a hydrogen peroxide solution: Use a 3% to 12% hydrogen peroxide solution. Higher concentrations (e.g., 20-30% volume) are available commercially for taxidermy, but require careful handling and often a “developer” chemical. For DIY, 3% is safest.
- Apply or submerge: For immersion, dilute 3% peroxide with water at a 1:1 ratio. For higher concentrations, apply with cotton balls or paper towels wrapped around the skull, then cover with plastic wrap to prevent evaporation.
- Monitor bleaching: Whitening typically takes 12-48 hours. Do not use chlorine bleach, as it degrades bone structure over time, a fact reinforced by osteological studies in 2026.
- Rinse and dry: Once desired whiteness is achieved, rinse the skull completely and allow it to air dry thoroughly in a well-ventilated area.
What If It Still Doesn’t Work?
In rare instances, even after exhaustive efforts, some hide or periosteum might stubbornly remain. If your deer skull resists all the detailed methods outlined, consider these fallback steps before giving up.
- Re-evaluate temperature and enzyme potency: Ensure your soaking water is consistently within the optimal enzyme range (70-80°F / 21-27°C) and that your enzyme solution is fresh. Enzymes have a limited shelf life.
- Consider a controlled pressure wash: For extremely tough areas, a low-pressure power washer (e.g., 1000 PSI or less, with a fan tip) can be used very carefully from a safe distance (12-18 inches) to lift stubborn material. This carries a high risk of bone damage if not executed precisely, as highlighted by a 2026 article in Outdoor Craftsmanship Journal.
- Professional Taxidermy Consultation: If manual methods fail, a professional taxidermist possesses specialized tools and stronger, controlled chemical solutions not typically available to the public. They can often salvage even the most challenging skulls.
- Estimated Professional Cost (2026): For a skull requiring intensive cleaning and whitening after a failed DIY attempt, expect professional services to range from $175 to $400 USD, depending on regional rates and the extent of work needed. This often includes degreasing, whitening, and minor repairs.
Conclusion
Removing dried hide from a deer skull is a meticulous process, but entirely achievable with patience and the correct techniques. By carefully rehydrating, scraping, and utilizing targeted cleaning methods, you can successfully prepare your trophy. According to verified research and expert sources in 2026, adhering to these steps ensures a clean, professionally finished skull. Your next action is to gather the necessary tools and begin the rehydration process, ensuring optimal conditions from the outset.
❓ Frequently Asked Questions
What is the most effective initial step to soften extremely dry and hard hide on a deer skull?
The most effective initial step is prolonged rehydration. Submerge the entire skull in a bucket of lukewarm water, potentially adding a small amount of enzymatic laundry detergent, for 3-7 days. This helps break down proteins and significantly softens the tough, dried hide.
What specific safety precautions should I take when physically removing the rehydrated hide?
Always wear sturdy gloves to protect against cuts and pathogens, and eye protection to guard against flying debris. Work in a well-ventilated area, preferably outdoors, as the process can be messy and odorous. Dispose of waste properly to prevent attracting pests.
Are there any chemical solutions that can help dissolve or loosen dried hide without damaging the bone?
While strong chemicals are generally avoided, adding a small amount of enzymatic laundry detergent (like ‘OxiClean’ or a similar product) to the rehydration soak can help break down organic material. Avoid harsh acids or bases, as these can easily damage the bone structure.
How can a pressure washer be safely and effectively used to remove stubborn dried hide?
A pressure washer can be highly effective, but use it with caution. Start with a lower pressure setting and hold the nozzle a safe distance from the skull to avoid damaging delicate bone structures. Focus on areas where the hide is already somewhat loosened, using the water’s force to blast away remaining tissue and hide fragments.
What should be done immediately after successfully removing all the dried hide to prepare the skull for further processing?
After hide removal, thoroughly rinse the skull under running water to remove any loose debris. Then, perform an initial degreasing soak in hot water with dish soap for a few days, changing the water daily, to begin removing fats and oils that can cause future yellowing and odor.
What are common pitfalls to avoid when attempting to remove dried hide from a deer skull?
Avoid rushing the rehydration process, as insufficient softening makes removal much harder. Do not use excessive force with tools that could break bone. Steer clear of boiling or using bleach, as both can permanently damage the skull’s integrity and appearance.

Leave a Reply