
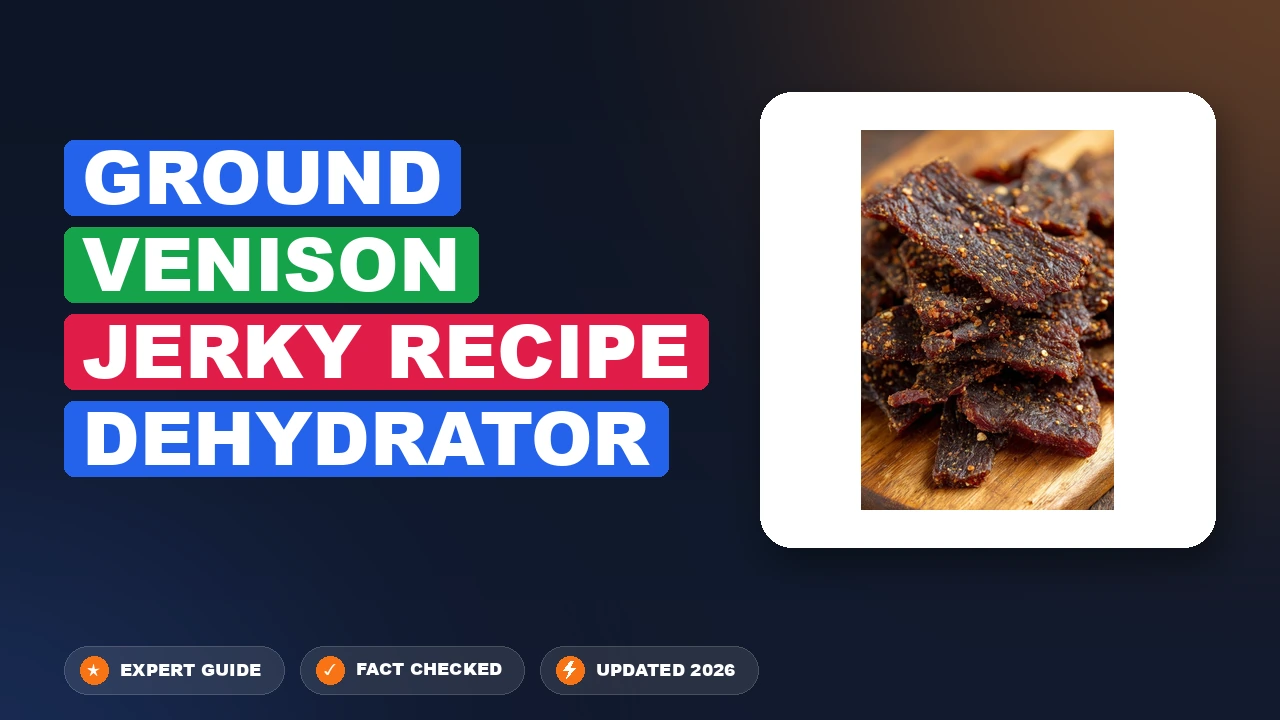


There’s nothing quite like the savory, chewy satisfaction of homemade jerky, and when it comes to lean, flavorful protein, ground venison takes center stage. Forget those expensive, often preservative-laden store-bought options. This recipe unveils the secrets to crafting exceptional ground venison jerky right in your own kitchen using a dehydrator. It’s a game-changer for hunters, outdoor enthusiasts, or anyone seeking a healthy, high-protein snack. With a perfect balance of smoky, sweet, and spicy notes, this jerky will not only tantalize your taste buds but also impress anyone lucky enough to try it. Get ready to transform your ground venison into a delicious, portable feast!
- ⏱️ Prep Time: 20 minutes
- 🍳 Cook Time: 6-12 hours
- 👥 Servings: 10-12 servings
- 📊 Difficulty: Medium
Mastering the Ground Venison Jerky Recipe for Your Dehydrator
Embarking on the journey to make ground venison jerky with a dehydrator is a rewarding experience that yields a delicious, healthy snack. This comprehensive guide ensures you have all the information needed to achieve perfect results every time. Understanding the balance of flavors, the importance of proper meat preparation, and the specific nuances of dehydrator use are key to transforming humble ground venison into a culinary delight. The process is straightforward, but attention to detail will elevate your jerky from good to extraordinary. We’ll dive into selecting the right ingredients, meticulously following the instructions, and even explore how to adjust the cooking time to achieve your desired texture and flavor profile.
Gathering the Perfect Ingredients for Homemade Venison Jerky
The foundation of any great ground venison jerky recipe begins with quality ingredients. Lean ground venison is ideal, as excessive fat can cause spoilage. If your venison has more than 5% fat, it’s advisable to trim as much as possible or mix it with a very lean cut of beef. The marinade, a symphony of flavors, works to tenderize the meat and infuse it with taste, while the curing agent plays a crucial role in both preservation and food safety. This particular recipe calls for a specific blend designed to bring out the best in venison, creating a rich, satisfying, and slightly addictive jerky.
Essential Meat and Basic Components
- 2 lbs (approx. 900g) lean ground venison (or a venison/lean beef mix)
- 1/4 cup (60ml) soy sauce (low sodium preferred)
- 2 tablespoons Worcestershire sauce
- 1 tablespoon liquid smoke (optional, but highly recommended for depth)
- 1 teaspoon curing salt (such as Prague Powder #1 or an equivalent jerky cure, critical for safety and shelf life)
Spices and Flavor Enhancers
- 1 tablespoon brown sugar (packed)
- 1 teaspoon black pepper (freshly ground is best)
- 1 teaspoon garlic powder
- 1 teaspoon onion powder
- 1/2 teaspoon smoked paprika
- 1/2 teaspoon red pepper flakes (adjust to your spice preference)
- 1/4 teaspoon cayenne pepper (optional, for extra heat)
Tools You’ll Need
- Large mixing bowl
- Jerky gun with a flat nozzle (highly recommended for uniform strips)
- Dehydrator with multiple trays
- Parchment paper (for easy cleanup and preventing sticking)
- Airtight containers or vacuum sealer for storage
Step-by-Step Instructions: Dehydrating Ground Venison Jerky
Crafting delicious ground venison jerky with a dehydrator is a methodical process that, when followed diligently, guarantees a mouthwatering result. Each step is designed to ensure maximum flavor infusion, proper texture, and most importantly, food safety. We’ll start with preparing the meat and marinade, then move through the forming and dehydrating process, concluding with crucial steps for cooling and storage. Pay close attention to timing and temperature, as these are vital for successful jerky.
- Prepare the Venison: Ensure your ground venison is as lean as possible. If it contains visible fat, consider trimming it or mixing it with very lean ground beef (93/7 or 96/4) to reduce the overall fat content. Fat can turn rancid during dehydration, shortening the shelf life of your jerky. Place the venison in a large mixing bowl.
- Create the Marinade: In a separate small bowl, whisk together the soy sauce, Worcestershire sauce, liquid smoke (if using), brown sugar, black pepper, garlic powder, onion powder, smoked paprika, red pepper flakes, and cayenne pepper (if desired). Ensure the brown sugar is fully dissolved and all spices are well combined.
- Incorporate Curing Salt: This is a critical step for food safety. Add the measured curing salt (Prague Powder #1 or equivalent) directly to the marinade mixture and stir thoroughly until completely dissolved. Do not skip this ingredient, especially if you plan to store the jerky for extended periods outside of refrigeration. It inhibits bacterial growth and contributes to the characteristic jerky flavor and color.
- Marinate the Meat: Pour the prepared marinade over the ground venison in the large mixing bowl. Using your hands (wearing food-safe gloves is recommended), thoroughly mix the marinade into the meat. Knead the mixture for at least 5-7 minutes, ensuring the marinade is evenly distributed throughout the venison. The goal is to fully incorporate all ingredients and develop some of the meat’s proteins for a better texture. Cover the bowl and refrigerate for a minimum of 8 hours, or preferably overnight (up to 24 hours). This extended marination time allows the flavors to deeply penetrate the meat and the curing salt to work effectively.
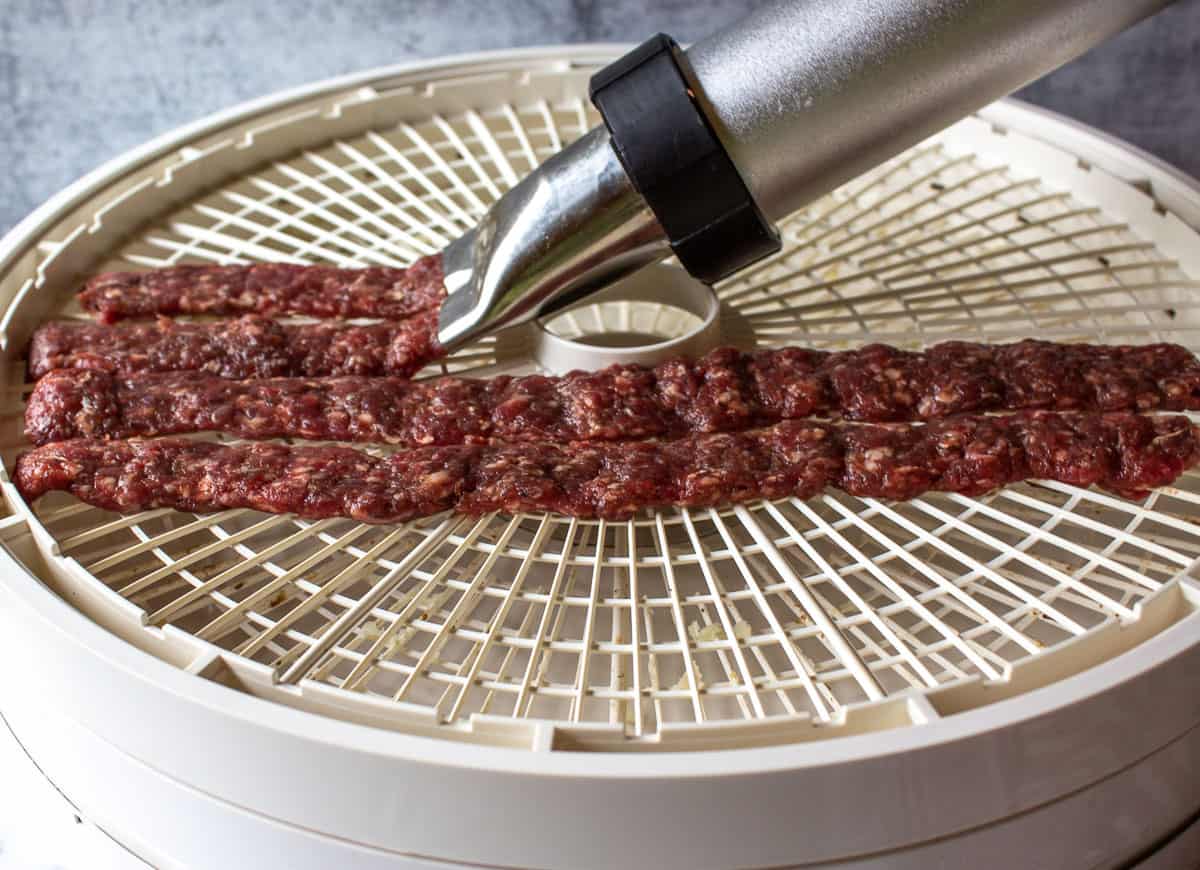
- Form the Jerky Strips: Once marinated, remove the venison mixture from the refrigerator. If using a jerky gun, load it with the seasoned venison. Line your dehydrator trays with parchment paper, leaving a small gap around the edges for air circulation. This prevents sticking and makes cleanup easier. Extrude uniform strips of jerky directly onto the lined trays, ensuring they are not touching each other to allow for even airflow. If you don’t have a jerky gun, you can form thin patties and slice them into strips, or simply roll out the mixture between two sheets of parchment paper and cut into strips. Aim for a thickness of about 1/8 to 1/4 inch.
- Preheat and Load Dehydrator: If your dehydrator has a preheat function, turn it on to 160°F (71°C). Once preheated, carefully arrange the loaded trays into the dehydrator. Make sure there is adequate space between trays for proper air circulation.
- Dehydrate the Jerky: Set your dehydrator to 160°F (71°C). This temperature is crucial for the initial stage to quickly kill any potential bacteria before the meat fully dries. Dehydrate for 2 hours at 160°F. After the initial 2 hours, reduce the temperature to 145°F (63°C) and continue dehydrating for another 4-10 hours, or until the jerky is dry and pliable. The total cooking time can vary significantly based on your dehydrator model, the thickness of your jerky, and ambient humidity.
- Check for Doneness: Begin checking the jerky after about 6 hours of total dehydration time. A properly dehydrated piece of jerky should be firm, dry, and chewy, but still pliable enough to bend without snapping cleanly in half. It should not feel sticky or wet, nor should it be brittle. You should see white fibers when you bend it. If it snaps, it’s over-dried; if it feels soft or moist, it needs more time. Continue checking every 1-2 hours until the desired consistency is reached.
- Cool and Condition: Once done, remove the jerky from the dehydrator and let it cool completely to room temperature on a wire rack for at least 1-2 hours. This “conditioning” step is important; it allows any remaining internal moisture to equalize throughout the jerky, preventing mold and ensuring a consistent texture.
- Store Properly: Once fully cooled and conditioned, store your homemade ground venison jerky in airtight containers or vacuum-sealed bags. Store in a cool, dark place or refrigerate for extended freshness.
For the best texture and longevity, always start with very lean ground venison. If your meat has more than 5% fat, consider adding a binder like non-fat dry milk powder (about 1-2 tablespoons per pound of meat) or mixing with extra-lean ground beef to improve texture and shelf stability. Ensure your jerky gun is clean and well-lubricated for smooth operation. Don’t overcrowd your dehydrator trays; proper air circulation is paramount for even drying. Rotate your trays periodically during the dehydrating process to compensate for any hot spots in your machine. Always use curing salt for food safety, especially if you plan to store your jerky at room temperature. The 160°F initial cook time is crucial for safety, so don’t skip it. When checking for doneness, tear a piece – it should show fibrous strands and feel dry but not brittle. For a spicier kick, increase the red pepper flakes or add a dash of ghost pepper powder. For a sweeter flavor, add another tablespoon of brown sugar or a touch of maple syrup to the marinade. Experiment with different wood chip flavors for liquid smoke if you’re looking to diversify the smoky profile.

Enhancing Your Ground Venison Jerky Recipe: Flavor Variations
One of the joys of making your own ground venison jerky with a dehydrator is the endless possibility for customization. This recipe provides a fantastic base, but don’t hesitate to experiment with different flavor profiles to suit your personal preferences or to cater to various palates. From fiery hot to subtly sweet or intensely smoky, a few simple tweaks to the ingredients can yield dramatically different and equally delicious results.
Spicy Kick Venison Jerky
To elevate the heat, double the red pepper flakes and cayenne pepper. Consider adding 1/2 teaspoon of white pepper or a pinch of ghost pepper powder for an intense, lingering warmth. A dash of hot sauce, like Sriracha, can also be mixed into the marinade.
Sweet & Savory Ground Venison Jerky
For those who prefer a sweeter jerky, increase the brown sugar to 2-3 tablespoons. You can also incorporate 1 tablespoon of real maple syrup or honey into the marinade. A touch of pineapple juice (1-2 tablespoons) can add a subtle fruitiness and help tenderize the meat further.
Smoky Mesquite or Hickory Jerky
If you crave a deeper smoke flavor, use 2 tablespoons of liquid smoke (hickory or mesquite variant) instead of 1. You can also try adding 1/2 teaspoon of smoked salt in addition to the curing salt, being mindful of overall sodium content.
Teriyaki Ground Venison Jerky
Substitute half of the soy sauce with a good quality teriyaki sauce. Add 1 teaspoon of grated fresh ginger and 1 teaspoon of sesame oil to the marinade for an Asian-inspired flavor profile. A sprinkle of sesame seeds can be added to the jerky strips before dehydrating.
Herb-Infused Venison Jerky
For a more earthy, herbaceous flavor, add 1 teaspoon each of dried rosemary and thyme to the marinade. These herbs pair wonderfully with venison and can create a truly unique jerky. A small amount of juniper berries, crushed, can also be used.
Gluten-Free Modification
Ensure your soy sauce is certified gluten-free. Most Worcestershire sauces are gluten-free, but always double-check the label if dietary restrictions are a concern. All other ingredients in this ground venison jerky recipe are typically gluten-free.
Storing Your Dehydrated Ground Venison Jerky: Freshness Tips
Proper storage is paramount for maintaining the quality, flavor, and safety of your homemade ground venison jerky. After dedicating your time to preparing this delicious snack using your dehydrator, you want to ensure it lasts as long as possible. The goal is to keep moisture out and prevent spoilage, preserving that perfect chewy texture and robust taste.
Cooling and Conditioning
Before storing, always allow your jerky to cool completely to room temperature on a wire rack for at least 1-2 hours. This crucial “conditioning” step lets any residual internal moisture equalize throughout the jerky, preventing condensation inside your storage container which could lead to mold.
Short-Term Storage (Room Temperature)
For jerky that will be consumed within 1-2 weeks, an airtight container (like a glass jar with a tight-fitting lid or a heavy-duty plastic container) stored in a cool, dark pantry is generally sufficient. Ensure the container is clean and completely dry.
Medium-Term Storage (Refrigeration)
To extend the shelf life to 1-2 months, store your ground venison jerky in an airtight container or a resealable freezer bag in the refrigerator. The cooler temperatures further slow down any potential spoilage.
Long-Term Storage (Freezing)
For maximum longevity, ground venison jerky freezes exceptionally well. Place fully cooled jerky in vacuum-sealed bags or heavy-duty freezer bags, removing as much air as possible before sealing. Frozen jerky can last up to 6-12 months without significant loss of quality. Thaw in the refrigerator or at room temperature as needed.
Vacuum Sealing for Optimal Freshness
A vacuum sealer is highly recommended for all storage methods. Removing air from the package significantly extends shelf life by preventing oxidation and moisture absorption, preserving the jerky’s texture and flavor for much longer periods, whether at room temperature, refrigerated, or frozen. Always store jerky in individual serving sizes if possible, to minimize exposure to air when opening.
Understanding Ground Venison Jerky: Prep, Cook, Servings, and Calories
Delving into the practical aspects of making ground venison jerky with a dehydrator involves understanding key metrics like prep time, cook time, servings, and even the nutritional breakdown. These details not only help in planning your jerky-making session but also provide insight into the benefits of this homemade snack. Knowing what to expect regarding the time commitment and the yield, alongside the health advantages, makes the entire process more manageable and rewarding.
Prep Time: A Quick Start
The stated prep time of approximately 20 minutes primarily covers the active mixing of ingredients and loading the jerky gun or forming the strips. This doesn’t include the essential marination time, which is a passive, hands-off period crucial for flavor development and the curing process. While the active preparation is swift, remember to account for that 8-24 hour refrigeration period when planning your jerky production. This allows the meat to fully absorb the marinade and for the curing salts to properly penetrate the venison, ensuring both taste and food safety are maximized.
Cook Time: Patience is a Virtue
The cook time for ground venison jerky in a dehydrator, ranging from 6 to 12 hours, is a variable factor. It depends on several elements: the thickness of your jerky strips, the efficiency and temperature consistency of your specific dehydrator model, and even the ambient humidity in your environment. Thicker strips will naturally take longer to dry, while a higher dehydrator temperature (within safe limits) can speed up the process. It’s an art more than a precise science, requiring periodic checks for doneness to achieve that perfect pliable yet dry texture. Resist the urge to rush the process; slow and steady drying leads to superior jerky.
Servings: Fueling Your Adventures
This ground venison jerky recipe yields 10-12 servings, based on a typical snack portion. With 2 lbs of raw ground venison, you can expect to produce a substantial amount of jerky, which, once dehydrated, will be significantly lighter in weight but packed with concentrated flavor and nutrition. This makes it an excellent option for meal prepping healthy snacks for hiking trips, gym sessions, or simply for convenient protein boosts throughout the week. The high yield means you’ll have plenty to share or to stock up for your own enjoyment over several weeks.
Calories and Nutrition: A Healthy Choice
While precise calorie counts depend on the specific cut of venison and exact ingredients used, homemade ground venison jerky is generally a highly nutritious snack. Venison is known for being extremely lean and rich in protein, making it an excellent choice for muscle building and satiety. A typical serving (e.g., 1 ounce or about 28 grams of dried jerky) can contain roughly 80-100 calories, primarily from protein, with very little fat and carbohydrates. This makes it a fantastic option for those following low-carb, high-protein, or keto diets. Furthermore, by making it yourself, you control the sodium content and avoid artificial preservatives often found in commercial jerky products, ensuring a cleaner, healthier snack. You’re consuming pure, wholesome venison, expertly flavored and preserved, without unnecessary additives.
Please note that these values are estimates and can vary based on specific ingredients and preparation methods.
- Calories: 80-100 kcal
- Protein: 15-20g
- Total Fat: 1-3g
- Saturated Fat: 0.5-1g
- Carbohydrates: 2-4g
- Sugars: 1-3g
- Sodium: 250-350mg (can be reduced with low-sodium soy sauce)
Ground venison jerky offers a lean, high-protein snack that is relatively low in fat and carbohydrates, making it an excellent choice for active lifestyles.
The journey of creating your own ground venison jerky with a dehydrator is a rewarding one, culminating in a snack that is not only delicious but also deeply satisfying on a primal level. From selecting the leanest venison to carefully crafting the marinade and patiently watching the dehydrator work its magic, every step contributes to a product far superior to anything store-bought. You’ve gained the knowledge to produce a healthy, high-protein treat that’s perfect for any occasion, proving that the best snacks often come from your own kitchen. Enjoy your handcrafted ground venison jerky!
❓ Frequently Asked Questions
1
How long does ground venison jerky last?
Properly dehydrated and stored, ground venison jerky can last about 2 weeks at room temperature in an airtight container. For longer preservation, refrigerate for up to 1 month or freeze for up to 6 months, ensuring it’s sealed against moisture and air.


2
Can I make ground venison jerky without a dehydrator?
Yes, you can make ground venison jerky in a conventional oven. Set your oven to the lowest possible temperature (usually 140-170°F or 60-77°C), prop the door open slightly with a wooden spoon for ventilation, and bake for several hours until done.
3
What can I substitute for Worcestershire sauce in this recipe?
If you don’t have Worcestershire sauce, you can create a similar flavor profile. Combine soy sauce, a dash of apple cider vinegar, a pinch of sugar, and a tiny bit of smoked paprika or garlic powder. This will give it a tangy, savory depth.
4
How do I know when ground venison jerky is done?
The jerky is done when it’s firm, dry, and chewy, but still pliable enough to bend without breaking. When you bend a piece, it should crack but not snap completely. There should be no signs of moisture or stickiness on the surface.
5
Can I freeze ground venison jerky?
Absolutely! Freezing is an excellent way to extend the shelf life of your ground venison jerky. Once fully cooled, place it in freezer-safe bags or containers, removing as much air as possible. It can be safely frozen for up to 6 months without significant loss of quality.


Leave a Reply