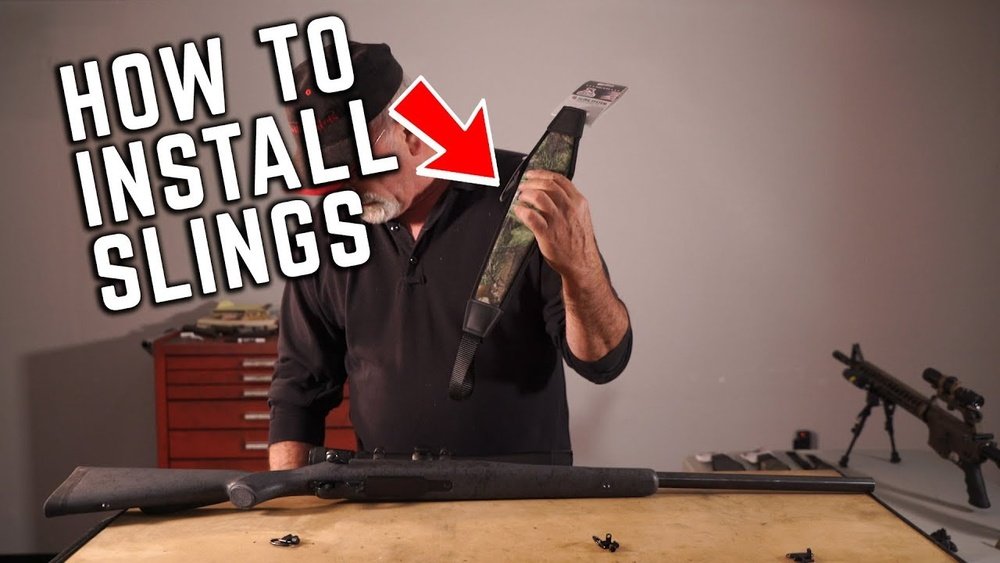
Installing a sling on a rifle may seem simple, but doing it correctly makes a real difference for comfort, safety, and shooting performance. Whether you use your rifle for hunting, target shooting, or home defense, a well-mounted sling helps you carry your firearm for long periods, keeps your hands free, and can even improve your accuracy.
However, the best sling setup depends on your rifle type, your needs, and how you plan to use the sling. In this guide, you’ll learn everything you need to know about choosing, attaching, and adjusting a sling to fit your rifle and your body perfectly.
Understanding Rifle Slings
Before starting the installation, you need to know what a sling does and the types available. A rifle sling is more than just a carrying strap. It serves three main roles: supporting the rifle when shooting, making it easier to carry, and helping you control the firearm during movement.
There are three main types of slings:
- Single-point sling: Attaches at one point, usually near the stock. Offers quick transitions but less stability.
- Two-point sling: Connects at the front and rear of the rifle, providing good support for carrying and shooting.
- Three-point sling: Loops around the body and rifle, offering the most security but can be more complex.
Each type has its pros and cons. For example, a single-point sling allows fast shoulder changes but can let the rifle swing loosely. A two-point sling is best for stability and is the most common for hunting and target rifles.
Choosing The Right Sling For Your Rifle
Your sling should fit your rifle and your purpose. Consider these factors:
- Material: Most modern slings use nylon, which is strong and weather-resistant, or leather for traditional looks and comfort.
- Width: Wider slings distribute weight better and are more comfortable for long carry.
- Adjustability: A good sling allows you to adjust the length quickly.
- Attachment points: Check if your rifle has sling swivels, QD (quick detach) mounts, or you need to add them.
A mistake beginners often make is choosing a sling that is too narrow or too short, which can dig into your shoulder or not fit your body size. Test different slings if possible before buying.
Tools And Parts Needed
You don’t need many tools, but having the right ones makes the job much easier.
You will need:
- The correct sling for your rifle
- Sling swivels or adapters (if your rifle does not have built-in mounts)
- A screwdriver (often Phillips head)
- Possibly a wrench or Allen key for some mounts
- Needle-nose pliers (for older or stiff sling swivels)
Optional but helpful:
- Small towel (to protect the rifle’s finish)
- Loctite or thread locker (for screws)
Before starting, clear your rifle and remove any ammunition. Safety is always first.
Installing Sling Swivels Or Attachment Points
Many rifles come with sling swivels, but some do not. If your rifle lacks these, you must install them first. Here’s how to do it safely.
For Wood Stock Rifles
- Choose placement: Standard locations are under the buttstock and at the fore-end.
- Mark the spots: Use a pencil to mark where the screws will go.
- Drill pilot holes: Use a drill bit slightly smaller than your swivel screws.
- Attach the swivels: Screw them in by hand or with pliers, being careful not to over-tighten and crack the wood.
For Synthetic Or Modern Rifles
- Many have pre-molded sling mounts or rails. You may only need to attach a QD mount or a rail adapter using the correct screws or Allen keys.
For Ar-15s And Tactical Rifles
- Use QD sockets or end-plate adapters, which often install with a single screw or snap into place.
A common beginner error is drilling too large a hole or overtightening screws, which damages the stock. Always go slowly and check fit often.
Attaching The Sling To Your Rifle
Once you have secure attachment points, you can connect the sling itself. The process depends on the type of sling you use.
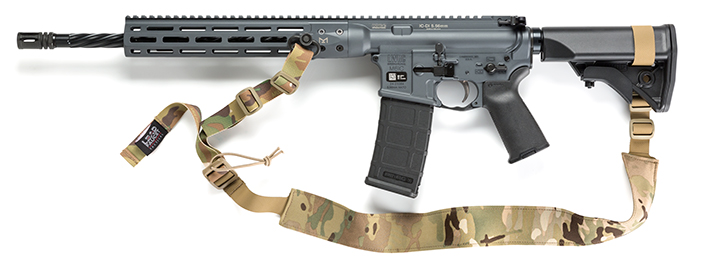
Two-point Sling (most Common)
- Thread the rear sling end through the buttstock swivel or mount. Secure with the buckle or clip.
- Attach the front end to the fore-end swivel or mount.
- Adjust the length so the rifle hangs comfortably at your side or across your chest.
Single-point Sling
- Connect the sling to the single mount, usually near the back of the receiver or buffer tube. This is common for tactical rifles.
- Adjust the strap so the rifle hangs at chest level for quick access.
Three-point Sling
- Loop the main strap around your body.
- Attach the rifle to the sling at two points, often with quick-release buckles.
- Fine-tune the fit so you can shoulder the rifle smoothly.
Make sure all clips and buckles are securely fastened. Weak attachment is a common mistake and can lead to accidents.
Adjusting The Sling For Fit And Comfort
Proper adjustment is critical. A sling that is too loose or too tight will be uncomfortable and can even affect your shooting.
- Length: The sling should allow you to carry the rifle without hitting your knees or chin when walking.
- Tension: For shooting support, tighten the sling to help steady your aim.
- Quick-adjust: Many modern slings have a pull tab or slider for instant adjustment on the move.
You may need to adjust the sling several times to find what feels best. Try walking, kneeling, and shouldering your rifle to check comfort.
Special Tips For Different Rifle Types
Bolt-action Hunting Rifles
- Use a padded sling for long hunts.
- Attach the rear swivel near the heel of the stock for balance.
- Practice quick transitions from carry to shooting.
Tactical Rifles (ar-15, Ak, Etc.)
- Use a two-point or single-point sling for fast transitions.
- QD mounts allow you to remove the sling quickly when needed.
- Consider a bungee section for extra comfort during movement.
Shotguns
- Slings are often attached at the magazine cap and the buttstock.
- Use a wide, non-slip sling for heavy shotguns.
Air Rifles Or .22 Rimfire
- Lightweight slings are sufficient.
- Attach to existing swivels or use a simple paracord loop for small stocks.
Comparing Sling Attachment Types
Here’s a quick comparison of the most common attachment types for rifle slings.
| Attachment Type | Pros | Cons |
|---|---|---|
| Sling Swivel Studs | Traditional, secure, fits most hunting rifles | Requires drilling for some stocks, less quick to detach |
| QD (Quick Detach) Mounts | Fast to attach/remove, common on tactical rifles | Can be expensive, needs compatible sling |
| Paracord Loops | Cheap, easy DIY solution | Not as strong, less professional look |

Common Mistakes To Avoid
- Skipping safety checks: Always clear your rifle before working on it.
- Over-tightening screws: Can damage wood or plastic stocks.
- Poor sling placement: Leads to uncomfortable carry or poor shooting position.
- Using incompatible slings: Not all slings fit all attachment points.
- Neglecting regular inspection: Slings wear out and can fail if not checked.
Many new shooters forget to check the fit after adding gear like scopes or bipods. Always re-adjust your sling if you change your rifle setup.
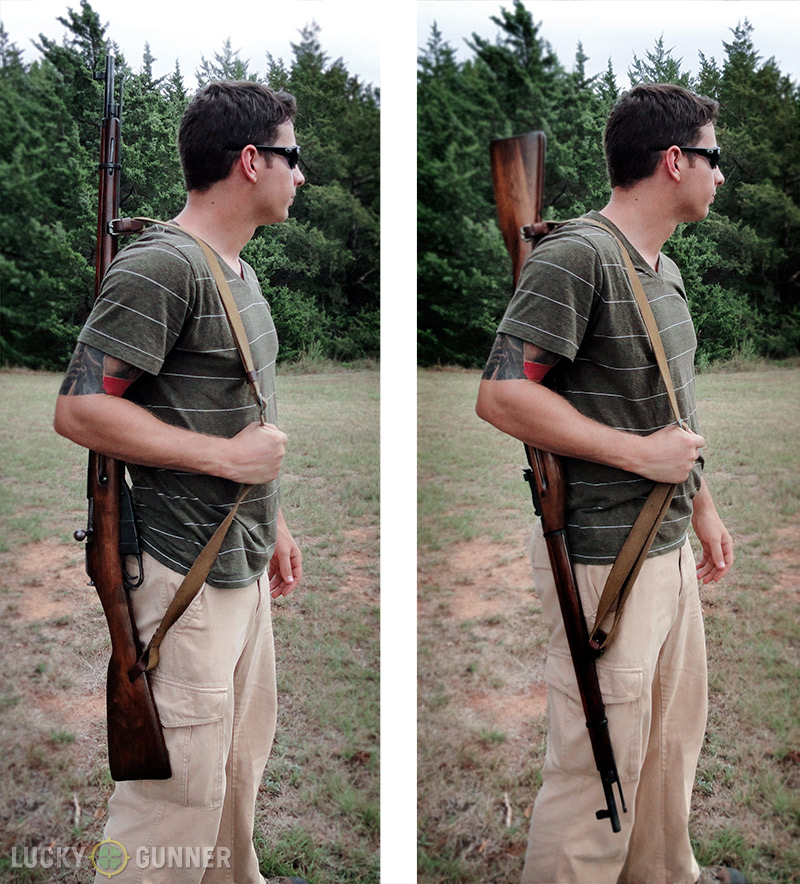
How A Proper Sling Setup Improves Performance
A well-installed sling is more than a carrying tool. Here’s how it helps:
- Stability: A tight two-point sling can brace your shot, especially in standing or kneeling positions.
- Endurance: Carry your rifle for hours without fatigue.
- Safety: Keeps the muzzle pointed safely and your hands free for climbing or glassing.
- Speed: Quick-adjust slings let you move from carry to ready position in a second.
Professional shooters use slings to steady their aim, especially in competitions where every small movement matters. Hunters rely on slings for safe, hands-free carry in the field.
Sling Materials Compared
Here’s a look at the most common materials used for rifle slings.
| Material | Advantages | Disadvantages |
|---|---|---|
| Nylon | Lightweight, weather-resistant, affordable | Can be slippery, less traditional look |
| Leather | Classic appearance, very durable, comfortable | Heavier, can absorb water, more expensive |
| Neoprene/Padded | Extra comfort, absorbs shock, good for heavy rifles | Bulky, can trap moisture |
Practical Examples: Installing A Sling
Let’s look at two specific examples.
Example 1: Installing A Two-point Sling On A Bolt-action Rifle
- Ensure the rifle is unloaded and safe.
- Install sling swivels under the buttstock and fore-end if not already present.
- Thread the sling through the rear swivel and secure with the buckle.
- Thread the front through the fore-end swivel.
- Adjust the length for comfort when carrying.
- Test by walking and shouldering the rifle. Make fine adjustments.
Example 2: Attaching A Qd Sling To An Ar-15
- Check that the AR-15 is clear and safe.
- Install QD mounts at the receiver endplate and handguard if not present.
- Push in the QD buttons and snap the sling into place.
- Adjust length for patrol carry or tactical use.
- Practice switching shoulders and quick transitions.
Maintenance And Inspection
A sling is a working part of your rifle. Check it every few months, especially if you use your rifle often outdoors.
- Inspect for fraying, stretching, or damaged buckles
- Check attachment points for loose screws or worn swivels
- Clean leather slings with proper conditioner to prevent cracking
- Wash nylon slings with mild soap and water if dirty
Replacing a worn sling is much cheaper than repairing a dropped rifle or suffering an accident.
Safety Reminders
Always follow these rules when working with firearms and accessories:
- Unload your rifle and remove the magazine before installation.
- Point the muzzle in a safe direction at all times.
- Work in a well-lit area with no distractions.
- Double-check all attachments before carrying the rifle.
A little caution goes a long way in preventing accidents.
Where To Learn More
If you’re new to rifles or want to see installation in action, many trusted gun organizations and manufacturers offer video guides. For more information on firearm safety and sling use, visit Wikipedia’s Sling (Firearm) page.
Frequently Asked Questions
How Do I Know If My Rifle Can Accept A Sling?
Most modern rifles have some form of sling attachment, either built-in or ready for installation. Look for sling swivels, QD sockets, or pre-drilled holes on the stock. If your rifle lacks these, you can often add aftermarket hardware with simple tools.
Can I Use Any Sling With Any Rifle?
Not all slings fit all rifles. Check the attachment type (swivel, QD, or loop) and make sure your sling matches your rifle’s mounts. Some tactical slings only fit certain sockets. Always test fit before use.
How Tight Should I Adjust My Sling?
The right tension depends on your use. For carrying, the rifle should rest comfortably without banging your knees or swinging freely. For shooting support, some shooters tighten the sling to brace their arm. Adjust until you find a balance of comfort and control.
Are There Legal Rules About Slings On Rifles?
In most countries, slings are legal and considered a safety accessory. However, some ranges or hunting laws may have rules about open carry or types of slings. Always check your local regulations before heading into the field.
What If My Sling Gets Wet Or Dirty?
Nylon slings can be washed with soap and water and air dried. Leather slings should be wiped dry and treated with a leather conditioner. Never store a wet sling on your rifle, as it can rust metal parts or rot the material.
Installing a sling on your rifle is a simple upgrade that pays off every time you carry or shoot. With the right tools and careful setup, your sling will serve you well for years, adding comfort, safety, and even shooting accuracy to your experience.
Leave a Reply