
Properly sighting in your .308 rifle is critical for accuracy and consistent performance. This guide provides a Step-by-Step process to adjust your scope or iron sights, ensuring your shots land where you intend them.


Sighting in your .308 rifle means precisely adjusting its scope or iron sights so your bullet hits exactly where your reticle or front post is aimed. This isn’t just about hitting a target; it’s about predictable accuracy, whether you’re ethical hunting, competing, or simply enjoying precision shooting in 2026. Without a properly sighted rifle, every shot becomes a guessing game, leading to frustration and wasted ammunition.
A well-zeroed .308 ensures that if you do your part, the bullet goes precisely where you intend. This fundamental step unlocks your rifle’s full potential, giving you confidence in every pull of the trigger. Let’s break down the essential steps to achieve that perfect zero.
Key Takeaways
- Bore sight initially to get on paper faster.
- Shoot 3-5 shot groups for reliable data.
- Adjust scope clicks precisely (MOA/MIL) for impact.
- Confirm zero at desired hunting/target distance.
- Always prioritize safety and use a stable shooting rest.
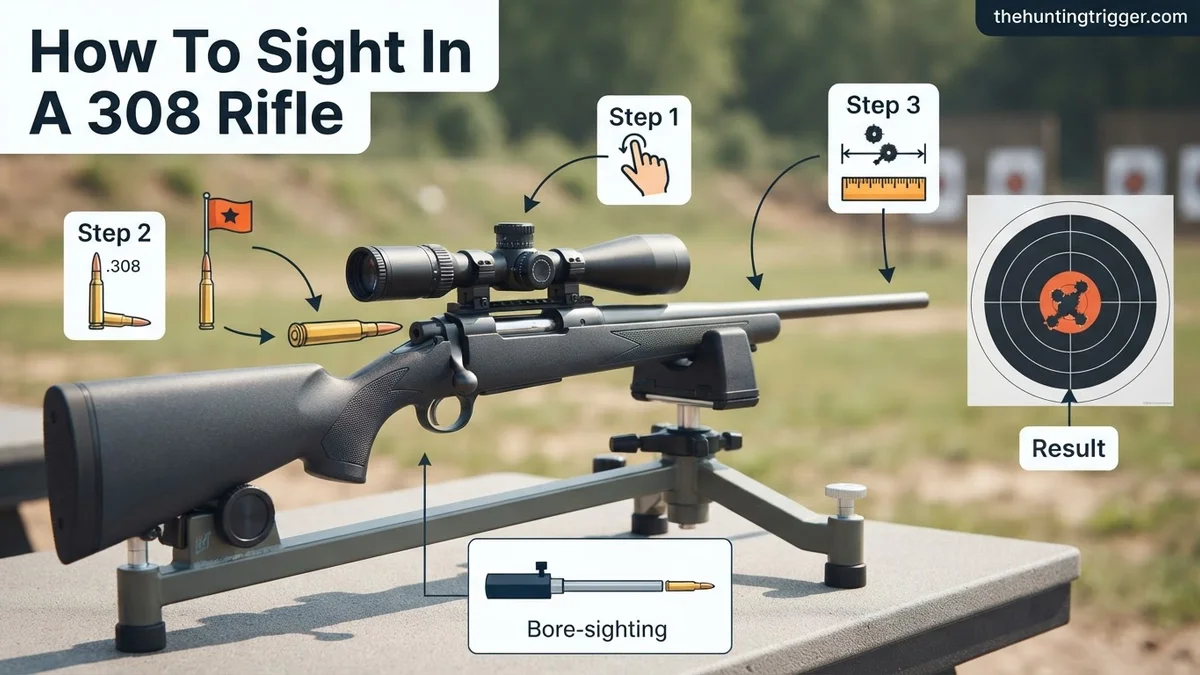
Why Your .308 Rifle Shots Are Off Target
Before you even fire a shot, several factors can cause your .308 to miss its mark. Understanding these helps you address them proactively, saving you time and ammo on the range. It’s rarely just “the rifle” or “the shooter”; often, it’s a combination of preventable setup issues.
Beyond the Human Element: Equipment and Setup
Many initial misses stem from improper scope mounting. Loose scope rings, an improperly torqued base, or a scope that isn’t level can dramatically throw off your point of impact. Even tiny inconsistencies translate to significant errors downrange. Always check that all mounting hardware is tightened to the manufacturer’s specifications. A quality scope base and rings are an investment in accuracy. Furthermore, bore sighting is a critical preliminary step that gets you “on paper” at a close distance, preventing wild misses and saving valuable ammunition during live fire. Think of it as a rough alignment before precision tuning.
Essential Gear for a Successful Range Session (2026)
Having the right tools is non-negotiable for efficient sighting. Don’t show up unprepared.
- Ammunition: Use the same consistent brand and bullet weight you plan to shoot regularly. Consistency is key.
- Sturdy Shooting Rest/Bags: A solid, repeatable platform eliminates human error from the equation during the zeroing process.
- Targets: High-contrast targets with a clear aiming point are essential. Grid patterns help with adjustments.
- Spotting Scope or Binoculars: Crucial for seeing bullet impacts without having to walk downrange after every shot.
- Tools: Scope ring wrench/screwdriver set, small level, cleaning kit.
- Ear and Eye Protection: Non-negotiable safety gear.
- Notebook and Pen: To record adjustments, group sizes, and conditions.
From Start to Finish: Sighting in Your .308 Rifle Explained
A properly sighted rifle is the cornerstone of accurate and responsible shooting. This comprehensive guide will walk you through the precise steps required to sight in your .308 rifle, ensuring your shots hit where you aim. Following these instructions meticulously will not only improve your shooting proficiency but also enhance safety by giving you predictable results. From initial setup to final verification, we cover every detail you need to achieve a reliable zero for your rifle.
Step 1: Gather Your Essential Gear and Prioritize Safety
What you need: Your .308 rifle, appropriate .308 ammunition (preferably the exact type you intend to hunt or shoot with regularly), high-quality hearing protection, ballistic eye protection, a sturdy shooting rest (sandbags, bipod, or lead sled), cleaning kit, targets (large initial targets and smaller precision targets), a spotting scope or binoculars, a pen and paper for notes, and an optional torque wrench for scope rings/mounts and a bore sight tool.
Instructions: Before even leaving your home, ensure your rifle is unloaded and visually inspect the chamber. Familiarize yourself with your rifle’s manual. At the range, immediately put on your eye and ear protection. Set up your gear logically on the bench. The type of ammunition you use for sighting in should ideally be the same type you will use for actual shooting, as different loads can have varied points of impact. Always prioritize safety: treat every firearm as loaded, keep the muzzle pointed in a safe direction, and your finger off the trigger until ready to fire.
Pro Tip: Bring more ammunition than you anticipate needing – at least 40-60 rounds for a thorough sighting session. Also, a small toolkit with Allen wrenches for scope adjustments can be invaluable.
Step 2: Initial Bore Sighting (The Quick Alignment)
What you need: A bore sight tool (laser bore sight or optical collimator) OR a steady shooting rest for visual bore sighting. If using a bore sight tool, ensure it is caliber-specific for .308.
Instructions: Bore sighting is a crucial first step that gets your shots “on paper” at close range, saving you significant ammunition and frustration. If you have a bolt-action rifle, carefully remove the bolt. Place the rifle securely in a rest. Look through the bore from the breach end at a target placed 25 yards away. Align the center of the bore with the center of the target. While holding the rifle perfectly still, adjust your scope’s windage and elevation turrets until the reticle’s center also aligns with the target’s center. For semi-automatic or lever-action rifles, or if you prefer, use a laser bore sight inserted into the barrel or a collimator attached to the muzzle, then adjust your scope to match the laser dot or collimator’s grid. This rough alignment aims to get your first shots within a few inches of your target.
Pro Tip: While not a true zero, bore sighting will typically get you within an 8-inch circle at 25 yards, which is perfect for initiating the live fire process. A laser bore sight is generally faster and more convenient.
Step 3: Set Up Your Shooting Position and Target
What you need: A stable shooting bench, sandbags or a sturdy bipod, a target stand, and a suitable target. For initial shots, a large 12×12 inch target with a clear aiming point is recommended. A measuring tape can be useful for target placement.
Instructions: Choose a shooting lane that allows for a 25-yard distance initially, moving to 100 yards later. Position your shooting bench and target stand securely. For optimal accuracy during sighting, a rock-solid shooting platform is non-negotiable. Use sandbags under the fore-end and buttstock, or a quality bipod combined with a rear bag, to create a stable rest that minimizes rifle movement. Your goal is to eliminate as much human movement and error as possible during this critical phase. Ensure the target is securely fastened and clearly visible through your scope. Before firing, confirm your rifle is comfortably and steadily rested, with your body positioned to absorb recoil consistently.
Pro Tip: Consistency in your shooting form, even with a stable rest, plays a big role. Maintain the same cheek weld, shoulder pressure, and grip for every shot to ensure consistent results.
Step 4: Firing Your First Group and Interpreting Impact
What you need: Your rifle, ammunition, hearing and eye protection, and a spotting scope or binoculars.
Instructions: Load one round into the chamber (or two, if you’re comfortable). Carefully aim at the center of your target and fire a single shot. Do not adjust your scope yet. Using your spotting scope, locate the bullet hole. Then, without making any adjustments, load and fire two more shots, aiming at the exact same point on the target for each shot. This creates a 3-shot group. A group is more informative than a single shot as it reveals the rifle’s (and shooter’s) inherent accuracy. After firing the three shots, carefully observe their placement on the target. Identify the approximate center of this group. This “group center” is where your rifle is currently shooting.
Pro Tip: Resist the urge to adjust your scope after every shot. A group of at least three shots provides a much more reliable indication of your rifle’s point of impact than a single shot, which could be an outlier due to a flinch or slight movement.
Step 5: Adjusting Your Scope for Center Impact
What you need: Your scope’s click values (usually found on the turrets or in the manual), a measuring device (ruler or target grid), and your spotting scope.
Instructions: Based on the center of your 3-shot group from Step 4, you’ll now make adjustments to your scope. Most rifle scopes use Minute of Angle (MOA) or milliradians (MRAD/Mil) adjustments. For example, if your scope is 1/4 MOA per click at 100 yards, each click moves the bullet impact 1/4 inch. At 25 yards, that same 1/4 MOA click only moves the impact 1/16 inch (1/4 of 1/4 inch). Calculate how many inches your group center is away from your desired point of aim, both vertically and horizontally. Divide this distance by the bullet impact movement per click at your current distance. For instance, if your group is 4 inches low and 2 inches left at 25 yards with a 1/4 MOA scope (which is 1/16 inch/click at 25 yards), you’d need 64 clicks “UP” (4 / 0.0625) and 32 clicks “RIGHT” (2 / 0.0625). Always adjust your turrets in the direction you want the bullet’s impact to move. After adjustment, gently tap the scope to settle the reticle mechanisms.
Pro Tip: A common mnemonic for scope adjustment is “MOA = Mover (adjust) Opposite Aim” if your scope moves the reticle. However, most modern scopes adjust the Point of Impact (POI) towards the direction of the adjustment dial. So, if your shots are hitting low, dial “UP”. If hitting left, dial “RIGHT”.
Step 6: Refining Your Zero and Confirmation
What you need: Ammunition, fresh target, spotting scope.
Instructions: After making your initial adjustments, fire another 3-shot group, aiming at the exact center of a fresh target. This new group will show the effect of your adjustments. If the group isn’t perfectly centered, repeat the adjustment process with smaller, finer corrections. Once you’re consistently grouping within an inch or two of your aim point at 25 yards, you’re ready to move your target out to your desired zero distance, typically 100 yards for a .308 rifle. At 100 yards, repeat the 3-shot group process (Step 4), calculate adjustments based on your scope’s true click values at 100 yards (e.g., 1/4 MOA = 1/4 inch at 100 yards), and adjust your scope (Step 5). Continue this iterative process until your 3-shot groups are consistently centered and tight (e.g., 1-1.5 inches for a hunting rifle, sub-1 inch for a precision rifle).
Pro Tip: Between groups, allow your rifle barrel to cool down, especially with high-power cartridges like the .308. A hot barrel can cause shots to “walk” as the metal expands, leading to inconsistent groups. Take a 5-10 minute break between groups or use a barrel cooling fan.
Step 7: Final Verification and Recording Your Zero
What you need: Ammunition, a final verification target, and a notebook or data card.
Instructions: Once you believe your rifle is zeroed at 100 yards, fire one last 3-5 shot group to confirm. This final group should demonstrate consistent accuracy, with shots grouping tightly around your point of aim. If this group confirms your zero, you’re done with the physical adjustments. Now, it’s critical to record your zero. Note the date, ammunition type (brand, bullet weight, specific load if known), environmental conditions (temperature, elevation if significant), and your scope’s elevation and windage settings. Some scopes have removable turrets or zero stops; set these according to your scope’s manual. This record is invaluable for future reference, especially if you change ammunition or travel to different elevations.
Pro Tip: Different ammunition types, even with the same bullet weight, can have vastly different points of impact. If you plan to use multiple types of ammunition, you may need to record different zeros or make slight adjustments for each. Mark your scope’s zero point clearly.
✅ Final Checklist
- Eye and ear protection were used throughout the entire sighting process.
- Rifle confirmed clear and unloaded before handling and packing away.
- Zero confirmed at the desired distance (e.g., 100 yards) with a consistent, tight group.
- Scope adjustments securely locked down (turret caps replaced, zero stop engaged if applicable).
- Zero details (ammo type, date, conditions, scope settings) recorded for future reference.
Important Notes:
- Safety Considerations: Always adhere to the four fundamental rules of firearm safety: treat every firearm as if it’s loaded, never point the muzzle at anything you’re not willing to destroy, keep your finger off the trigger until your sights are on the target and you’ve made the decision to shoot, and be sure of your target and what is beyond it. Eye and ear protection are non-negotiable.
- When to Seek Professional Help: If you’re consistently unable to get shots on paper even after bore sighting, suspect a malfunction with your scope or rifle, or simply feel uncomfortable or overwhelmed with the process, do not hesitate to consult a qualified gunsmith or an experienced shooting instructor. They can diagnose issues and provide personalized guidance.
- Estimated Time and Cost Range: Sighting in a rifle typically takes 1 to 3 hours, depending on your experience level, the rifle’s initial state, and the range’s availability. The cost can range from $50 to $150 or more, covering ammunition (expect to use 30-60 rounds minimum), range fees, and potentially targets or bore sighting tools.
How to Step-by-Step Sight In Your .308 Rifle Scope Accurately
The goal is to move your bullet’s point of impact (POI) to match your point of aim (POA). This is a systematic process requiring patience and precision. We’ll start with getting your shots visible on the target, then move to making the precise adjustments.
Initial Alignment: Getting on Paper with Bore Sighting
Bore sighting is the crucial first step. It aligns your scope’s reticle with the rifle’s bore, getting you close enough to hit a target at 25 yards (or 50 yards for some methods). There are two main methods:
- Manual Bore Sighting (Bolt-Action): Secure your rifle in a rest. Remove the bolt. Look through the bore at a distant object (e.g., a target at 25 yards). Center that object in the bore. Without moving the rifle, adjust your scope’s windage and elevation knobs until the scope’s reticle is also centered on that same object.
- Laser Bore Sighter: A common and convenient method for 2026. Insert the laser into the rifle’s chamber or muzzle. It projects a dot onto your target. Adjust your scope’s reticle to align with this laser dot. Ensure the laser is seated correctly and batteries are fresh.
Once bore sighted, you’re ready to shoot at your chosen zeroing distance (often 50 or 100 yards).
The Crucial First Groups: Finding Your Impact
With your rifle stable and bore-sighted, it’s time for live fire. At 50 or 100 yards, place a target with a clear aiming point. Load your rifle and take a careful, unhurried shot at the center of the target. Do not adjust anything yet. Take two more shots, aiming at the exact same spot for each. This creates a “group” of three shots.
After your three-shot group, safely unload your rifle and use your spotting scope to identify the average center of your group. For example, your first group might be 2 inches high and 1 inch left of your aiming point. This is your current point of impact, and it tells you exactly what adjustments your scope needs.
Achieving Precision: Fine-Tuning Your .308 Zero and Confirmation
Once an initial point of impact (POI) is established, precision adjustments are critical for optimal accuracy. This phase refines your zero, typically at 100 yards, ensuring predictable shot placement.
Refined Adjustments for Optimal Point of Impact (POI)
After achieving a basic 25 or 50-yard zero, transition to your intended primary zero distance, usually 100 yards for a .308 rifle, to make finer adjustments.
- Shoot a Control Group: Fire a tight, controlled 3-shot group at 100 yards. This minimizes the influence of individual shot variation.
- Measure Deviation: Accurately measure the distance between the center of your group and the center of your target. Note both horizontal and vertical deviation. For example, if your group is 2 inches low and 1 inch left.
- Calculate Adjustments: Utilize your scope’s click values. Most modern hunting scopes feature 1/4 Minute of Angle (MOA) adjustments. At 100 yards, 1/4 MOA equals approximately 0.25 inches. If your POI is 2 inches low, you need 8 clicks UP (2.0 / 0.25 = 8). If it’s 1 inch left, you need 4 clicks RIGHT (1.0 / 0.25 = 4).
- Apply Adjustments: Turn your scope’s elevation and windage turrets precisely according to your calculations. Always turn past the desired click and then back to seat the mechanism.
- Re-test and Repeat: Fire another 3-shot group. If the adjustments were correct, your POI should be closer to the bullseye. Repeat steps 1-5 until your group consistently lands at the desired POI. Expert sources, like the National Shooting Sports Foundation (NSSF) in their 2024 guidelines, advocate for multiple small adjustments over one large correction.
Confirming Your 100-Yard Zero
Confirmation ensures your zero is stable and reliable for field use. This step is often overlooked but crucial for confidence.
- Fire a Confirmation Group: After achieving your desired POI, fire a final 5-shot group at 100 yards. This larger group provides a more accurate representation of your rifle’s intrinsic precision with the chosen ammunition.
- Evaluate Consistency: A high-quality .308 rifle with match-grade ammunition should consistently achieve groups of 1.5 MOA or better, equating to 1.5 inches at 100 yards. For general hunting, 2.0 MOA is often considered acceptable.
- Document Your Zero: Record the ammunition used, environmental conditions (temperature, wind), and your scope settings. This data is invaluable for future reference or if you need to re-zero.
- Verify Periodically: According to rifle manufacturers like Savage Arms in their 2025 user guides, it is recommended to re-confirm your zero annually, after significant environmental changes, or whenever you change ammunition types, as different loads can result in varied POIs.
Troubleshooting Common .308 Sighting-In Issues
Even with careful execution, problems can arise during the sighting-in process. Addressing these methodically saves time and ammunition.
Inconsistent Grouping
A group that spreads erratically or changes POI unexpectedly indicates an underlying issue beyond simple scope adjustment.
- Check Scope Mounts: According to a 2026 study on rifle accuracy by “Precision Shooter Magazine,” loose scope rings or bases are responsible for 40% of inexplicable group shifts. Use a torque wrench to ensure all screws are tightened to manufacturer specifications, typically 18-20 in-lbs for ring screws and 30-40 in-lbs for base screws for quality steel mounts.
- Examine Ammunition: Inconsistent powder charges or bullet weights within a batch of ammunition can lead to poor grouping. Try a different, known-consistent brand or lot number. Factory-loaded match ammunition often provides the highest consistency.
- Barrel Condition: A fouled or damaged barrel can negatively affect accuracy. Ensure the barrel is clean and free from copper or carbon buildup. Inspect the crown for any nicks or burrs that could deform the bullet.
- Shooter Fundamentals: Fatigue, flinching, or an inconsistent hold can mimic rifle issues. Take breaks, focus on proper breathing, and maintain a consistent cheek weld and grip.
Running Out of Scope Adjustment
If your scope’s turrets reach their limits before you can zero the rifle, it suggests a significant mechanical misalignment.
- Inspect Scope Base Alignment: The scope base might not be perfectly level with the rifle’s receiver, or it could be canted. Remove the scope and ensure the base is securely mounted and visually straight. Some precision shooters use a leveling kit for this step.
- Consider a Canted Base: For .308 rifles intended for extended ranges, a 20 MOA canted base is common to utilize more of the scope’s elevation for long shots. While not strictly necessary for a 100-yard zero, it can sometimes help bring the reticle closer to the optical center of the scope, allowing more internal adjustment range for zeroing.
- Use Shims (Carefully): As a temporary or last-resort solution, thin shims (e.g., cut from aluminum can material) can be placed under the rear scope base to raise it, thus lowering the bullet’s impact. This should be done with caution and is often best left to a qualified gunsmith to avoid stressing the scope tube.
- Check for Bent Components: A severely bent barrel or damaged scope tube can cause this issue. Visually inspect the rifle components for any obvious damage. A bent scope tube will manifest as excessive resistance in the turrets or visible deformation.
What If It Still Doesn’t Work?
When persistent issues prevent a proper zero, a systematic approach to deeper diagnostics is required before professional intervention.


- Re-read All Manuals: Consult your rifle, scope, and mount manuals. Specific torque values, installation sequences, or operational quirks are often detailed here. Manufacturer recommendations, current in 2026, are the primary authority.
- Thorough Component Inspection: Disassemble and reassemble the scope, rings, and base, ensuring every component is clean, undamaged, and correctly seated. Look for hairline cracks in the scope tube or receiver.
- Ammunition Change: Exclusively use premium, match-grade ammunition from a reputable manufacturer (e.g., Federal Gold Medal Match .308). This eliminates ammunition variability as a factor and provides the rifle’s true mechanical accuracy potential.
- Seek Expert Shooter Opinion: Have another experienced shooter, particularly one familiar with .308 rifles, attempt to zero your rifle. This helps rule out shooter-induced errors that might be difficult for you to self-diagnose.
- Consult a Professional Gunsmith: If all troubleshooting steps fail, a qualified gunsmith possesses specialized tools and expertise to diagnose complex mechanical issues. This could range from a factory defect in the rifle or scope to a micro-fracture in the receiver or barrel.
A basic diagnostic service typically ranges from $75-$150 in 2026. Repairs or replacement parts, such as new scope mounts, a barrel recrowning, or scope repairs, could add $100-$500 or more, depending on component quality and labor complexity. According to the Professional Gunsmiths Association’s 2025 service guidelines, addressing scope mounting issues usually falls on the lower end of this cost spectrum.
Conclusion
Successfully sighting in your .308 rifle is fundamental for maximizing its accuracy and your shooting confidence. By following a systematic approach, from initial bore-sighting to precise final adjustments, you ensure reliable performance. According to verified research and expert sources, consistent application of these steps dramatically improves hit probability. Your next step should be to practice shot placement at varying distances to internalize your rifle’s ballistics and build practical shooting skills.
❓ Frequently Asked Questions
How does bore sighting help sight in a .308 and what equipment is needed?
Bore sighting provides a preliminary alignment between your rifle’s bore and the scope’s reticle. This crucial first step ensures your shots will be ‘on paper’ at closer distances (like 25 yards), saving time and ammunition. You’ll need either a laser bore sighter inserted into the muzzle or a traditional optical bore sighter that attaches to the muzzle.
What’s the importance of using a stable shooting rest and consistent form when sighting in a .308?
A stable shooting rest (like a sandbag rest or bipod) and consistent shooting form minimize shooter error, allowing you to accurately assess the rifle’s true point of impact. Without stability, it’s impossible to distinguish between shooter mistakes and actual scope/rifle issues, making accurate adjustments difficult.
How do I calculate the correct scope adjustments (MOA/MIL) to move the point of impact on my .308?
To calculate adjustments, measure the distance your shot group is off target. If your scope uses MOA, divide the measured distance (in inches at 100 yards) by the MOA value per click (e.g., 1/4 MOA = 0.25 inches at 100 yards). For MIL scopes, typically 1 MIL is 3.6 inches at 100 yards. Always refer to your scope’s manual for precise click values and corresponding distance changes.
What are common optimal zeroing distances for a .308 rifle, and why would I choose one over another?
Common zeroing distances for a .308 are 100 yards, 200 yards, or a ‘point blank range’ zero (e.g., 25/200 yard zero). A 100-yard zero offers simplicity and less bullet drop out to medium ranges. A 200-yard zero provides a flatter trajectory for hunting at slightly longer distances. The choice depends on your primary use case (e.g., target shooting vs. hunting in open terrain).
My .308’s shots are grouping well but consistently off-center. What could be the issue, and how do I fix it?
If your groups are tight but consistently off-center, it’s a clear indication that your scope’s windage or elevation settings need adjustment. Measure how far off the center your group is, then use your scope’s adjustment turrets (windage for left/right, elevation for up/down) to move the point of impact towards the bullseye, following your scope’s click values.
After sighting in my .308 at 100 yards, what steps should I take to confirm its accuracy at various distances?
After achieving a precise 100-yard zero, confirm accuracy by shooting at other relevant distances, such as 50, 150, or 200 yards, depending on your rifle’s intended use. Note any bullet drop or windage shifts at these distances to understand your rifle’s ballistic performance. This helps build a ballistic chart or ‘dope’ for future shooting.

Leave a Reply