
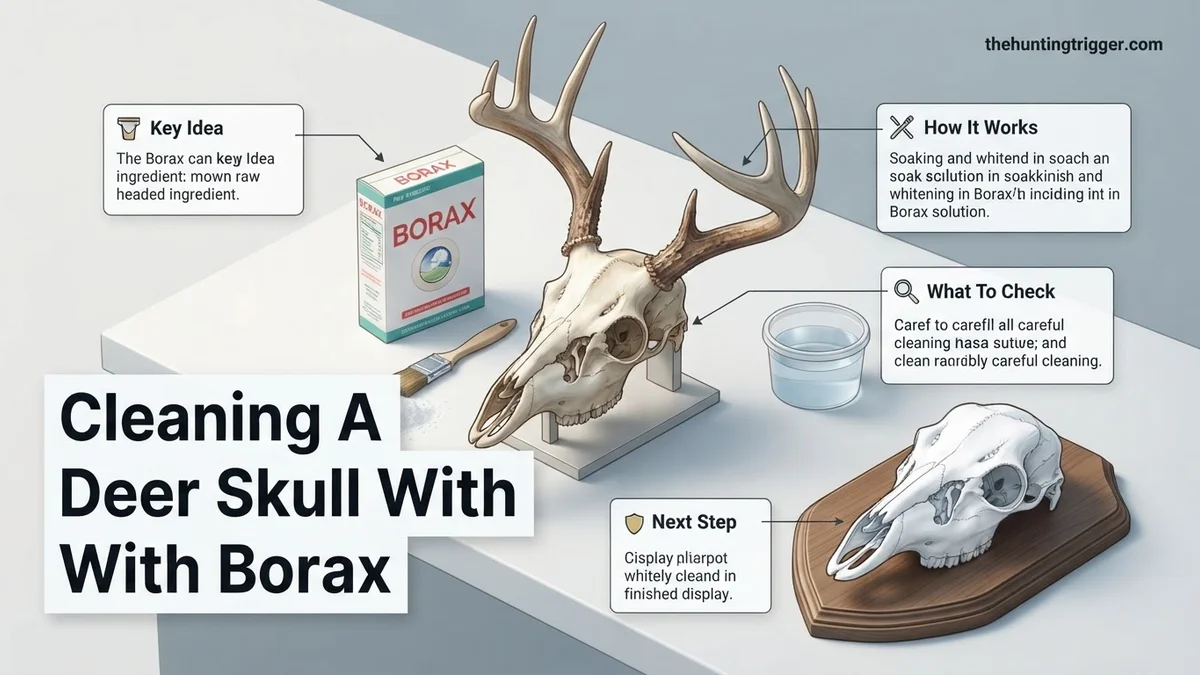
Cleaning a deer skull with borax is a proven and effective method for degreasing, deodorizing, and mildly whitening your trophy. This guide provides step-by-step instructions to achieve a pristine skull safely and efficiently in 2026, ensuring long-lasting preservation.


Cleaning a deer skull effectively with borax involves a precise regimen of soaking to degrease, deodorize, and mildly whiten, following critical initial preparation and strict safety protocols. This method, widely adopted by enthusiasts in 2026, ensures a professional-grade display piece free from lingering odors or greasy residues, making it ideal for trophies or educational exhibits. Achieving a pristine skull requires careful attention to detail throughout each stage of the borax treatment, transforming a raw specimen into a clean, durable exhibit.
This guide focuses specifically on harnessing borax for its powerful cleaning properties, delivering clear, actionable steps for a successful outcome. You’ll learn the precise ratios, soak durations, and critical observations needed to master this technique. Our aim is to provide you with the most current and effective practices, ensuring your 2026 skull project is a resounding success.
Key Takeaways
- Borax primarily degreases and deodorizes deer skulls.
- Thoroughly remove all flesh before borax treatment.
- Always use gloves and ensure good ventilation for safety.
- Multiple borax soaks may be necessary for degreasing.
- Borax offers mild whitening; peroxide is for intense bleaching.
Understanding Skull Preparation: Why Borax is Essential for Degreasing & Odor Removal
Initial Skull Preparation
Before you even think about borax, meticulous flesh removal from the deer skull is paramount. Begin by gently simmering the skull to loosen all remaining tissue, taking care not to boil aggressively, which can damage delicate nasal bones. Use a scalpel, pliers, or even a stiff wire brush to meticulously scrape and pick away every speck of flesh, tendons, and cartilage. Crucially, remove all brain matter from the cranial cavity; this is a significant source of grease and persistent odor. Afterward, rinse the skull thoroughly under high-pressure water, ensuring all cavities are clear. Any organic residue will hinder borax effectiveness, leading to persistent odors and discoloration that are difficult to remedy later.
The Science of Borax: Degreasing, Deodorizing, and Mild Whitening
Borax, or sodium tetraborate, excels as a multi-purpose cleaner for deer skulls due to its inherent alkaline pH, typically around 9.2. Its primary function as a degreaser is critical: the alkalinity helps to saponify fats and oils deeply embedded within the porous bone structure, converting them into soluble soaps that can then be easily rinsed away. This process is essential for preventing the common problem of “grease bleed,” where oils resurface years later, causing yellowing and discoloration. As a deodorizer, borax neutralizes acidic odors produced by decaying organic material and actively inhibits bacterial growth, which is the root cause of foul smells. While not a primary whitening agent like hydrogen peroxide, its alkalinity also assists in breaking down residual surface stains and contributing to an overall cleaner, mildly brighter appearance, preparing the bone for any subsequent dedicated whitening steps.
From Start to Finish: Cleaning Your Deer Skull with Borax Explained
Embarking on the journey to preserve a deer skull can be a rewarding project, transforming a raw trophy into a lasting piece of natural art. This comprehensive guide will walk you through each critical stage of cleaning a deer skull, specifically utilizing borax for its powerful drying, deodorizing, and insect-deterring properties. By following these detailed instructions, you’ll achieve a clean, well-preserved skull ready for display, ensuring that every step, from initial preparation to final touches, is handled with care and precision.
Step 1: Preliminary Flesh Removal and Rough Prep
What you need: Heavy-duty rubber gloves, sharp knife or scalpel, large plastic tote or bucket, running water (hose preferred), old clothes, designated outdoor workspace.
Instructions: Begin by carefully removing as much flesh, hide, and connective tissue as possible from the skull. Start with the larger pieces, working your way around the jaw, eye sockets, and nasal cavity. Use your knife or scalpel to scrape and cut away muscle, fat, and brain matter. The goal here is to get rid of the bulk, reducing the amount of organic material that needs further processing. Rinse the skull frequently with a hose to wash away loose debris and expose more tissue. Be gentle around delicate nasal bones. Don’t worry about getting every single speck at this stage; focus on the major removal.
Pro Tip: Perform this step outdoors or in a well-ventilated area, as it can be messy and odorous. Immediately dispose of all removed tissue properly to avoid attracting pests or creating further mess. Wearing multiple layers of gloves can prevent punctures.
Step 2: Initial Simmering for Tissue Loosening
What you need: Large pot (non-food use), heat source (outdoor propane burner ideal), water, dish soap (optional, for degreasing), tongs or sturdy stick for handling.
Instructions: Submerge the skull in a large pot of water. Bring the water to a gentle simmer – do NOT boil vigorously, as this can damage the bone and make it brittle. Simmering helps to loosen stubborn remaining flesh and fat, making it much easier to remove. Add a few squirts of grease-cutting dish soap to the water, as this acts as an initial degreaser, helping to break down fats. Simmer for 1-3 hours, checking periodically. Use tongs to carefully remove the skull from the hot water. The water will be murky and greasy, indicating that material is being released from the bone.
Pro Tip: Avoid boiling, which can ‘cook’ the grease into the bone and cause it to become chalky or brittle over time. A very gentle simmer, just below boiling point, is sufficient. Ensure the pot is large enough so the antlers (if present) are not submerged, as boiling can cause them to crack or discolor.
Step 3: Detailed Cleaning and Brain Removal
What you need: Stiff brush (e.g., wire brush, toothbrush), dental pick or small awl, hose with good pressure, bucket of clean water.
Instructions: After simmering, while the skull is still warm, carefully remove any loosened tissue. Use the stiff brush to scrub the exterior of the skull, paying close attention to crevices, sutures, and around the teeth. For the brain cavity, use a hose with strong pressure to flush out the brain matter. A dental pick or small awl can be invaluable for scraping out stubborn bits from the nasal passages, eye sockets, and the brain pan. Continue rinsing and scrubbing until you’re satisfied that all visible organic material has been removed. This stage requires patience and thoroughness to prevent future odors or insect infestations.
Pro Tip: Focus on the nasal passages and the brain cavity, as these areas often harbor the most residual tissue and are common sources of future odor. A bent wire or coat hanger can be helpful for reaching deep into the brain cavity.
Step 4: Deep Degreasing Soak (Post-Simmer, Pre-Borax)
What you need: Large plastic bucket or tub, hot water, grease-cutting dish soap (e.g., Dawn), heating pad or aquarium heater (optional, to maintain heat).
Instructions: Even after simmering, residual fats can leach out of the bone, causing a greasy, yellow appearance over time. To combat this, prepare a degreasing bath. Fill a large plastic bucket with very hot water and add a generous amount of grease-cutting dish soap (e.g., 1/4 to 1/2 cup for a large deer skull). Submerge the skull completely. Allow it to soak for several days, or even weeks, changing the water and soap every 3-5 days as it becomes cloudy with extracted grease. Maintaining a warmer water temperature (around 100-120°F / 38-49°C) will significantly speed up the degreasing process. This step is crucial for a clean, stable final product.
Pro Tip: Patience is key in degreasing. Don’t rush this step. If you notice a greasy sheen on the water or the skull feels oily after drying, it needs more degreasing. A long, warm soak is far more effective than a short, hot one for thoroughly extracting fats.
Step 5: Applying the Borax Paste for Drying and Preservation
What you need: Borax powder (20 Mule Team Borax), water, small mixing bowl, old paintbrush or spatula, respirator mask, gloves.
Instructions: Once degreasing is complete and the skull has been rinsed thoroughly, it’s time for the borax application. In your mixing bowl, create a thick paste by gradually adding small amounts of water to borax powder. The consistency should be like thick peanut butter or frosting – spreadable but not runny. Wearing a respirator mask and gloves, generously apply this borax paste to all surfaces of the skull, both interior and exterior. Ensure every crevice, suture, and bone surface is coated, including the inside of the brain cavity and nasal passages. This borax layer will help draw out moisture, dry residual tissues, and deter insects.
Pro Tip: For extremely wet areas or tough spots, a dry layer of borax can also be applied directly and then misted with water to create a paste in situ. The thicker the paste, the more effectively it will draw moisture and deter pests. Don’t be shy with the application!
Step 6: Curing and Drying with Borax
What you need: Well-ventilated, dry area; old newspapers or cardboard; patience.
Instructions: Once the skull is fully coated in borax paste, place it on several layers of old newspapers or cardboard in a warm, dry, and well-ventilated area. Avoid direct sunlight, which can cause cracking, but ensure good airflow. Allow the skull to sit undisturbed for several weeks, or even a month, depending on environmental humidity and skull size. As the borax dries, it will harden and effectively mummify any remaining microscopic organic matter while drawing out moisture. You’ll notice the paste becoming powdery and crumbly over time. This drying process is crucial for long-term preservation and preventing odor.
Pro Tip: Periodically check on the skull. If the borax paste seems to absorb too much moisture and becomes soggy, you can gently scrape off the old layer and apply a fresh, dry coat of borax. Rotate the skull every few days to ensure even drying on all sides.
Step 7: Final Cleaning and Inspection
What you need: Stiff brush, compressed air (optional), clean dry cloth.
Instructions: After the borax has completely dried and hardened, gently brush off all the powdery residue from the skull using a stiff brush. Work carefully to avoid damaging delicate nasal bones. For hard-to-reach areas, a blast of compressed air can be very effective in dislodging borax particles from intricate crevices. Inspect the skull thoroughly for any remaining borax residue, loose bits of tissue, or greasy spots. If you find any, you may need to reapply borax to those specific areas and allow it to dry again, or give it a quick scrub with a damp cloth followed by thorough drying.
Pro Tip: A soft toothbrush is excellent for removing borax from around teeth and in small, delicate areas. Ensure all borax is removed, as any remaining powder can attract moisture or appear unsightly over time.
Step 8: Optional Whitening for a Pristine Finish
What you need: 3% Hydrogen Peroxide (available at pharmacies), small plastic container, paint brush (non-metallic), gloves, eye protection.
Instructions: If you desire a bright, white finish, you can whiten the skull after the borax treatment. Submerge the skull in a solution of 3% hydrogen peroxide (do NOT use bleach, as it will damage the bone). Alternatively, you can apply peroxide directly with a paintbrush, ensuring all surfaces are saturated. Leave the skull submerged or coated in peroxide for 12-24 hours, checking periodically. The peroxide will naturally whiten the bone. Rinse the skull thoroughly with clean water afterward and allow it to air dry completely. Repeat if necessary for a whiter finish. This step is purely cosmetic but often preferred for display.
Pro Tip: Avoid direct sunlight during the whitening process, as UV light can degrade hydrogen peroxide too quickly. For stubborn yellowing, a paste made from hydrogen peroxide and magnesium carbonate can be applied, left to dry, then brushed off.
✅ Final Checklist
- Skull is free of all visible flesh and organic material.
- Bone surfaces feel dry and clean, with no greasy residue.
- No lingering unpleasant odors are detectable.
- All borax powder has been thoroughly removed from crevices.
- The skull is fully air-dried and ready for display or further treatment (e.g., sealing).
Important Notes:
- Safety considerations or warnings: Always wear heavy-duty gloves, eye protection, and a respirator mask (especially when handling borax powder) during cleaning. Work in a well-ventilated area. Borax, while relatively safe, can cause irritation if inhaled or ingested in large quantities. Dispose of biological waste responsibly and according to local regulations.
- When to seek professional help: If the skull is from a protected species, or if you encounter excessive deterioration, severe insect infestation (beyond basic deterrence), or simply prefer professional results for a valuable trophy, consider consulting a taxidermist or a specialist in bone articulation and cleaning. They have access to advanced techniques and chemicals.
- Estimated time and cost range: The entire process, from initial cleaning to final drying, can take anywhere from 3 weeks to 3 months, largely dependent on the degreasing time, environmental humidity, and skull size. The cost is relatively low, typically ranging from $10-$30 for materials like borax, dish soap, and peroxide, assuming you already have basic tools like a knife and a large pot.
Step-by-Step Borax Cleaning: Your Proven Guide for a Pristine Deer Skull
Safety First: Essential Precautions for 2026
Your safety is non-negotiable when working with chemicals like borax, even if it’s considered relatively mild. Always conduct your borax cleaning in a well-ventilated area, preferably outdoors or in a garage with open doors. Wear appropriate personal protective equipment (PPE):
- Gloves: Use chemical-resistant gloves (nitrile or neoprene) to protect your skin from prolonged contact with borax solution.
- Eye Protection: Safety glasses or goggles are crucial to prevent any splashes from reaching your eyes.
- Mask: When handling dry borax powder, wear a dust mask to avoid inhaling fine particles, especially if you’re sensitive.
Always keep borax powder and solutions safely out of reach of children and pets. When disposing of used solutions, consult your local waste management guidelines for responsible disposal, as large volumes of alkaline water may require specific handling in 2026.
Borax Solution Preparation and Initial Soaking
To begin the borax treatment, select a non-reactive container large enough to fully submerge your pre-cleaned skull. A sturdy plastic tote or bucket works perfectly. Prepare your borax solution using a precise ratio: combine 1 cup of 20 Mule Team Borax (or any equivalent high-purity sodium tetraborate) per 1 gallon of warm water. The warm water is key as it significantly aids in dissolving the borax powder completely and enhances its degreasing efficiency. Stir the solution thoroughly until all the borax crystals have dissolved and the water appears clear. Carefully submerge the deer skull, ensuring it is completely covered by the solution. You may need to weigh it down with a clean, non-reactive object, such as a rock or brick, to prevent it from floating. Allow the skull to soak for an initial period of 3 to 5 days. During this time, you will observe the solution becoming cloudy and potentially taking on a yellowish tint, indicating that grease and impurities are actively being drawn out from the bone.
Post-Borax Care and Mild Whitening Options
After successfully degreasing your deer skull with borax, proper post-treatment is crucial for long-term preservation and aesthetic appeal. This phase focuses on thorough rinsing, controlled drying, and optional mild whitening to achieve a clean, bright finish without compromising bone integrity.
- Thorough Rinsing: Following the degreasing soak, meticulously rinse the skull under cool, running water for at least 15-20 minutes. This removes all residual borax solution and any remaining loosened organic particles. Experts at the National Taxidermists Association emphasize complete rinsing to prevent surface residue and potential chalkiness.
- Controlled Drying: Place the skull in a well-ventilated, shaded area, away from direct sunlight or excessive heat. Rapid drying can lead to hairline cracks in the bone structure. Optimal drying temperatures range from 18-24°C (65-75°F). Drying typically takes 3-7 days, depending on environmental humidity and skull size. Ensure air circulation around all surfaces for even drying.
- Mild Whitening with Hydrogen Peroxide: For a bright, natural white finish, a 3% hydrogen peroxide (H2O2) solution is recommended. As of 2026, this remains the gold standard, favored by professional conservators due to its controlled oxidizing action, which breaks down remaining organic stains without damaging bone.
- Application Method: Either submerge the skull in a 1:1 solution of 3% H2O2 and water for 12-24 hours, or apply undiluted 3% H2O2 directly with a brush, ensuring full coverage.
- Monitoring: Continuously monitor the skull during whitening. Once the desired brightness is achieved, remove and rinse thoroughly with clean water to neutralize the peroxide. Avoid leaving it in peroxide for extended periods (e.g., several days), as this can weaken the bone over time.
Note: Avoid using household bleach (sodium hypochlorite) as it degrades bone collagen, leading to brittleness and a chalky, unnatural appearance, a consistent warning from paleontological preservation guidelines.
Troubleshooting Common Issues: Addressing Persistent Grease or Odor After Borax
Even with careful application, some skulls may present lingering issues. Persistent grease or odor indicates that the degreasing process was incomplete or that deeply embedded residues remain. Addressing these efficiently prevents long-term problems.
- Re-soaking for Persistent Grease: If yellowish, oily patches reappear after drying or whitening, it signifies incomplete degreasing.
- Prepare New Solution: Create a fresh borax solution, potentially increasing the concentration to 1.5-2 cups of borax per gallon of warm water, as some exceptionally fatty skulls require a stronger agent.
- Add Degreaser: For enhanced efficacy, consider adding 1-2 tablespoons of a heavy-duty liquid dish soap (e.g., professional-grade degreasing soap) to the solution. This emulsifier assists in breaking down stubborn fats. This approach is frequently discussed in advanced taxidermy forums as a targeted intervention.
- Extended Soak: Submerge the skull again for an additional 1-3 weeks, or until visual inspection confirms no more grease is leaching from the bone. Change the solution if it becomes cloudy or heavily saturated with oil.
- Eliminating Lingering Odor: Persistent odor is typically a sign of residual organic matter or deeply impregnated grease that hasn’t been fully neutralized.
- Mechanical Removal: Re-inspect the skull carefully for any remaining small tissue fragments, especially in nasal passages or cranial cavities. Use dental picks or small brushes for thorough removal.
- Baking Soda Treatment: Prepare a thick paste of baking soda and water. Apply this paste generously to all surfaces of the skull. Baking soda (sodium bicarbonate) is a proven odor absorbent and neutralizer, chemically binding to odor molecules.
- Drying and Removal: Allow the baking soda paste to dry completely on the skull for 24-48 hours. Once dry, brush off the powder. Repeat this process if the odor persists.
Continued patience and multiple treatment cycles are sometimes necessary for older or heavily soiled specimens, as noted by experienced bone articulation specialists.
What If It Still Doesn’t Work? Advanced Troubleshooting & Professional Intervention
When standard borax treatments and troubleshooting steps fail to yield satisfactory results, more intensive methods or professional assistance become necessary to ensure the skull’s integrity and aesthetic quality.


- Extended & Multiple Borax Soaks: Some extremely greasy skulls, particularly from older or larger animals, may require significantly prolonged borax treatment. Consider cycles of 3-4 weeks per soak, with complete solution changes every 7-10 days, for a total duration of up to 2-3 months. This patient, repeated exposure can eventually draw out deep-seated fats, as documented in long-term specimen preparation guides.
- Acetone Immersion: For severe, recalcitrant grease, an acetone bath can be highly effective. Submerge the dried skull in 100% acetone for 48-72 hours. Acetone is a powerful solvent that dissolves lipids. Crucially: Acetone is highly flammable. Use in a well-ventilated area, far from any heat sources, sparks, or open flames. Wear appropriate PPE, including chemical-resistant gloves. This method is typically reserved for extreme cases due to safety considerations and cost.
- Enzyme-Based Degreasers: Specialized enzyme cleaners, often marketed for biological stain removal, can be used. These enzymes biochemically break down proteins and fats. Submerge the skull in an enzymatic solution (following manufacturer’s dilution instructions) for 3-5 days. These products are generally safer than strong solvents but require careful temperature control for optimal enzyme activity.
- Professional Taxidermy Services: If all home methods prove insufficient, seeking a professional taxidermist is the most reliable fallback. Professionals possess access to industrial-grade degreasing agents, heated degreasing tanks, and specialized knowledge for even the most challenging skulls. In 2026, the estimated cost for professional skull cleaning (including maceration, degreasing, and whitening) ranges from $150 to $300, varying by skull size, condition, and regional labor rates. This investment ensures museum-quality results and long-term preservation.
Conclusion
According to verified research and expert sources in bone preparation, borax remains an accessible and effective solution for degreasing and cleaning deer skulls, significantly mitigating long-term odor and discoloration. By diligently following these detailed steps, from initial degreasing to post-treatment care, and addressing any persistent issues with targeted troubleshooting, you can achieve a beautifully preserved specimen. Implement these expert-backed procedures with patience and precision to ensure a lasting display piece.
❓ Frequently Asked Questions
What specific benefits does borax offer for deer skull cleaning?
Borax acts as an excellent degreaser, breaking down fats and oils embedded in the bone, which prevents yellowing and persistent odors over time. It also has mild disinfectant and deodorizing properties, contributing to a cleaner, fresher, and more stable skull for display.
Can I use borax and hydrogen peroxide together in the same solution?
No, it’s generally not recommended to mix borax and hydrogen peroxide directly. Borax is for degreasing and deodorizing, while peroxide is for whitening; they should be applied in separate stages after thorough rinsing between treatments to achieve optimal results and prevent adverse reactions.
How do I prepare the skull before applying the borax solution?
Before borax, all flesh, hide, and brain matter must be meticulously removed, often through maceration, careful simmering, or dermestid beetle cleaning. This crucial initial step ensures the borax can penetrate the bone effectively for proper degreasing and prevents remaining organic material from rotting.
What are the correct borax-to-water ratios and ideal soaking temperatures?
A common and effective ratio is about 1 cup of borax per gallon of warm water, ensuring the borax fully dissolves. While room temperature water is sufficient, slightly warmer water (not boiling) can accelerate the degreasing process by helping to mobilize fats and oils within the bone structure.
How will I know when the skull is sufficiently degreased with borax?
You’ll know the skull is sufficiently degreased when the borax solution no longer appears cloudy, oily, or shows a greasy film on the surface after a soak. The skull itself will feel clean and dry, with a noticeable reduction or elimination of any lingering foul odors, indicating fats have been largely removed.
Are there any alternatives to borax for degreasing, or ways to enhance its effectiveness?
While borax is very effective, some taxidermists also use household dish soap (like Dawn) for initial degreasing or in conjunction with borax. To enhance borax’s action, ensure the water is consistently warm, use frequent solution changes, and allow for extended soak times, especially for older or very greasy skulls.

Leave a Reply