Sighting in a red dot on a shotgun can feel tricky for beginners, but it’s a skill that transforms your shooting experience. A well-sighted red dot helps you shoot faster and more accurately, whether you’re hunting, shooting clay, or using your shotgun for home defense.
Many shooters make mistakes during sight-in—like using the wrong ammo, ignoring mounting issues, or adjusting too quickly. This guide will walk you through everything you need to know, from choosing the right red dot to dialing in your aim and avoiding common pitfalls.
Table of Contents
Why Red Dot Sights Make A Difference On Shotguns?
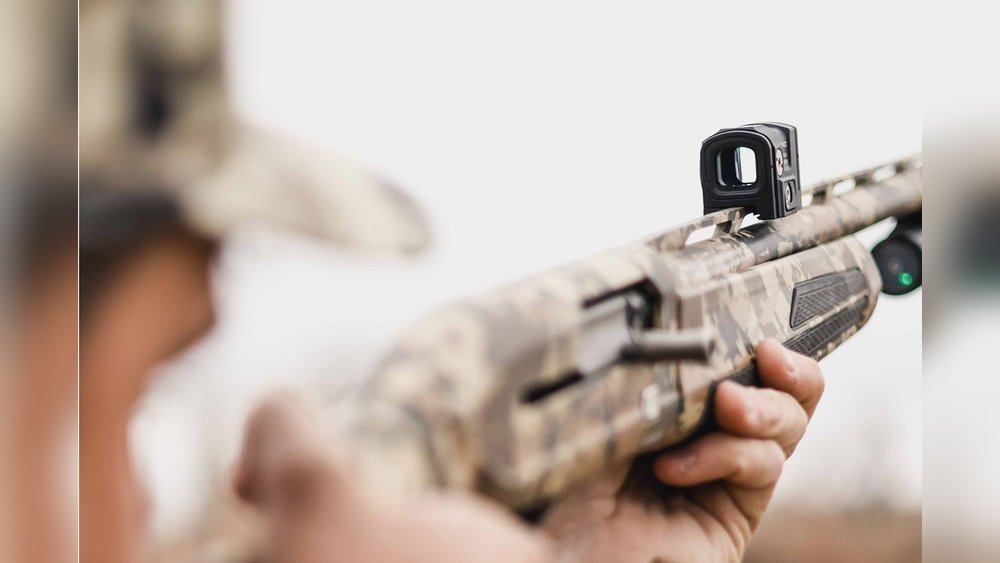
Traditional shotgun beads work well for moving targets, but as shooting sports and home defense change, more people want precision. A red dot sight gives you a clear aiming point, especially in low light or when speed matters. It also helps shooters with weak eyesight or those who struggle to focus on iron sights. With a red dot, you keep both eyes open, improving your awareness and target acquisition.
Some shooters worry that a red dot adds weight or makes the gun complicated. But modern red dots are light, compact, and rugged. Law enforcement and competitive shooters trust them every day. If you want to hit your target with confidence, learning to sight in your red dot is the first big step.
Essential Gear And Preparation
Before you start, gather the right tools and check your equipment. Here’s what you’ll need:
- Shotgun: Make sure it’s clean and safe.
- Red dot sight: Choose a model designed for shotguns. It should withstand recoil and have adjustable brightness.
- Mounting system: Most shotguns need a rail or special mount. Check compatibility.
- Ammunition: Use the type you plan to shoot most often (birdshot, buckshot, or slugs).
- Tools: Screwdrivers, torque wrench, and possibly thread locker.
- Targets: Paper targets with a bold center dot work best for zeroing.
- Shooting rest: A sandbag or shotgun rest reduces human error.
- Eye and ear protection: Always prioritize safety.
Practical tip: Use the same ammo for sighting in and for real use. Different loads shoot to different points of impact.
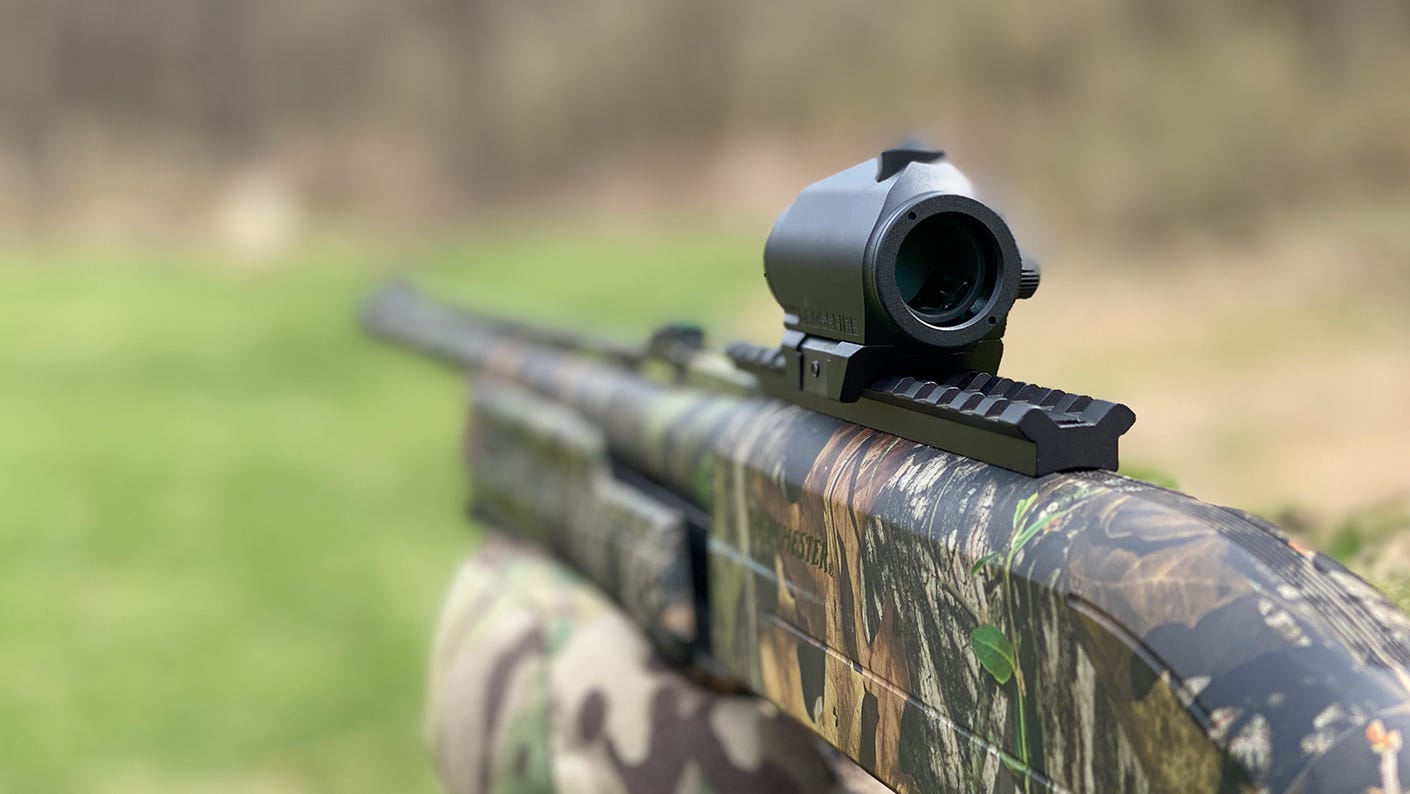
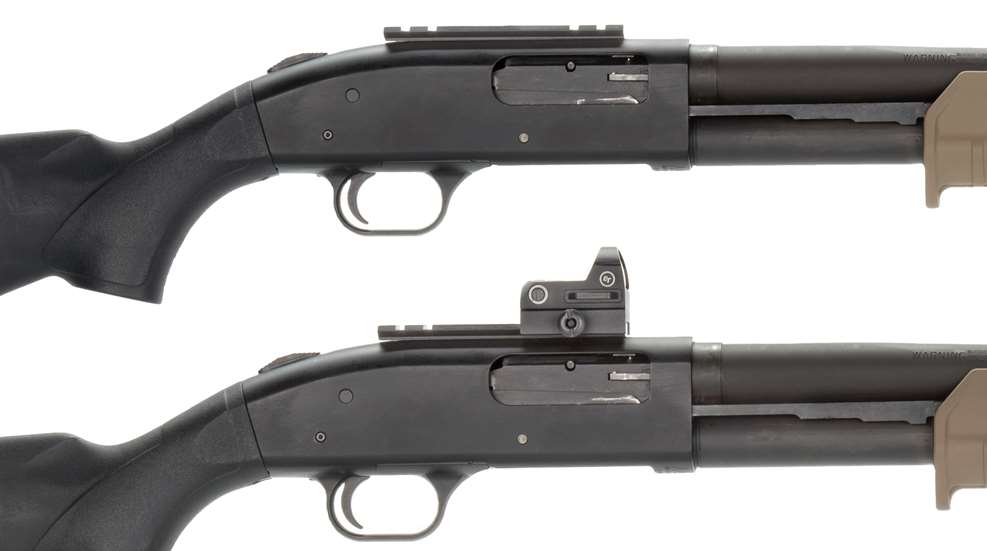
Mounting The Red Dot Sight Correctly
A secure mount is critical. If your red dot moves under recoil, you’ll never stay zeroed. Here’s how to do it right:
- Unload your shotgun and double-check it’s safe.
- Install the mount or rail if your shotgun doesn’t have one. Follow the manufacturer’s instructions closely.
- Attach the red dot to the rail. Make sure it’s sitting flat and straight.
- Tighten screws to the recommended torque. Don’t overtighten, or you may strip threads.
- Apply thread locker if needed, but use only a small amount to avoid future trouble.
- Check alignment by shouldering the shotgun. The dot should appear naturally when you point the gun.
Many beginners rush this step. Take your time—mounting mistakes lead to endless frustration later.
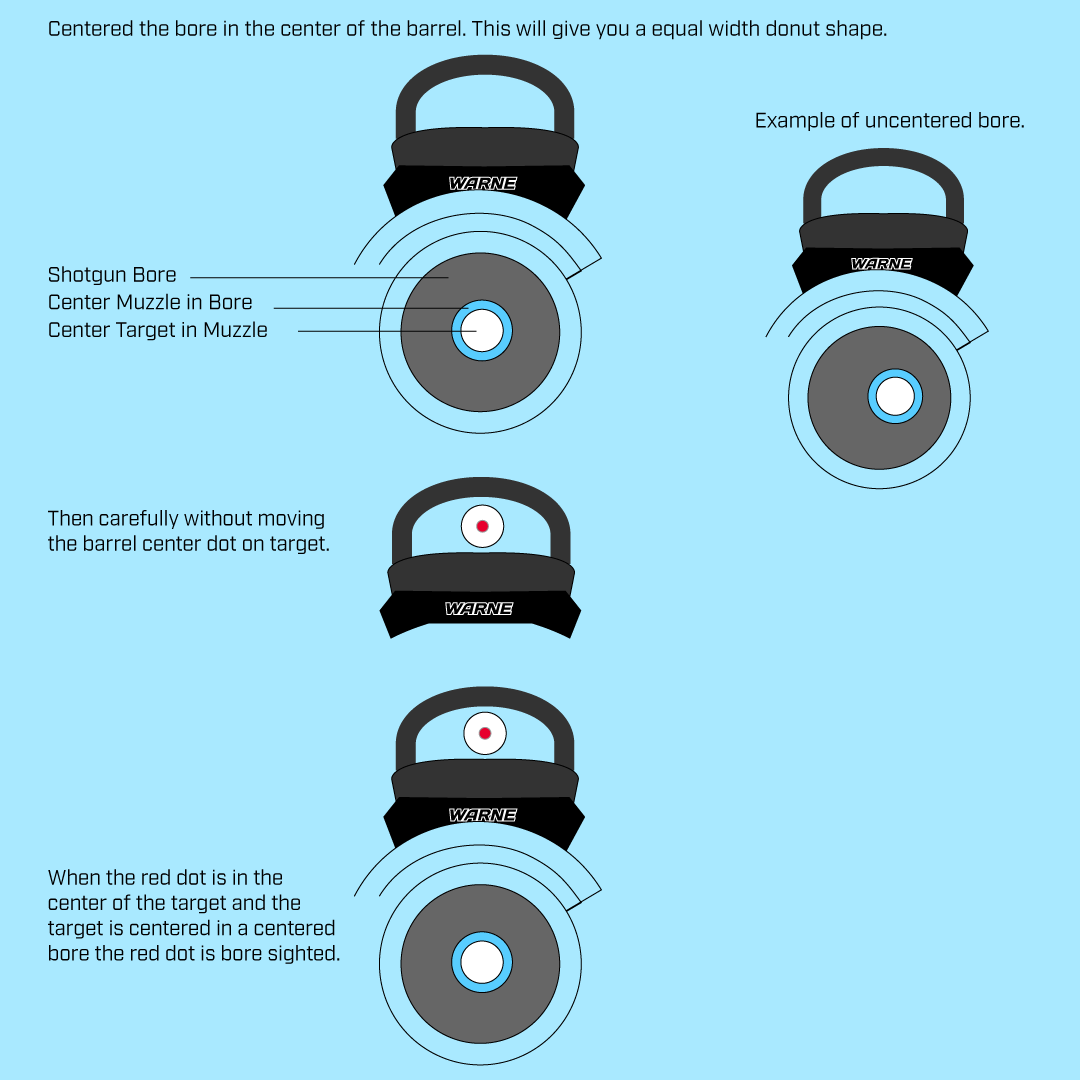
Basic Understanding: Zeroing A Red Dot
Zeroing means adjusting your sight so the red dot lines up with where your shot hits. Shotgun patterns can be wide, but slugs and tight chokes allow for precise aiming. Decide your zero distance before you start. For home defense, 15-25 yards is common. For hunting, you might choose 40-50 yards. If you use slugs, a 50-yard zero is typical.
Step-by-step: How To Sight In A Red Dot On A Shotgun
Let’s break the process into clear steps. Use slugs for the best accuracy when zeroing, even if you’ll later shoot buckshot. Here’s a straightforward approach:
1. Set Up Your Shooting Position
- Use a stable bench or rest. This reduces human error.
- Place your target at your chosen zero distance.
- Make sure the area behind the target is safe.
2. Fire Your First Group
- Load three shells (preferably slugs).
- Aim at the center of your target using the red dot.
- Fire slowly, keeping the shotgun steady for each shot.
3. Analyze The Shot Pattern
- Walk to the target and look for your group.
- Mark the center of the group. Ignore fliers (shots that are way off).
- Measure how far the group center is from the bullseye (up/down, left/right).
4. Adjust The Red Dot
Most red dots have two turrets: one for windage (left/right) and one for elevation (up/down). Each click moves the dot a small amount—check your manual for details.
- Move the dot toward the center of your group. If your shots landed low and right, move the dot down and right.
- Return to your shooting position.
5. Fire Another Group
- Shoot three more rounds at the same spot.
- Check the new group. Did the point of impact move as expected?
- Repeat adjustments if needed.
6. Confirm And Finalize
- Once your group is centered, fire a final group to confirm.
- If you plan to shoot buckshot or different ammo, test those as well. Some loads hit higher or lower.
- Record your final settings in case you need to re-zero later.
Non-obvious insight: Many shooters chase the dot after every shot. Don’t adjust after a single round; always shoot a group to see the average impact.
Special Considerations For Buckshot And Birdshot
Zeroing with slugs gives the most precise results, but many shotgun users rely on buckshot or birdshot. These loads spread out and may not hit exactly where the dot is aimed.
- Buckshot: At close range, the pattern is tight. Zero with slugs, then check with buckshot. Adjust only if the pattern consistently shifts.
- Birdshot: Not recommended for zeroing, but useful for checking pattern spread at different distances.
- Patterning board: At 10, 20, and 30 yards, fire a shot with your intended load. See how the pattern aligns with your red dot.
Some red dots have a large MOA (Minute of Angle) dot, making precision tricky beyond 50 yards. Choose a dot size that matches your needs.
How Red Dot Sights Compare To Bead Sights?
Understanding the difference helps you trust your gear. Here’s a comparison:
| Feature | Red Dot Sight | Bead Sight |
|---|---|---|
| Speed | Very fast for target acquisition | Fast, but requires more practice |
| Low Light Use | Excellent with illumination | Poor |
| Precision | High, especially with slugs | Moderate, best for moving targets |
| Learning Curve | Quick for most shooters | Requires technique |
Non-obvious insight: Red dots can help left-eye dominant shooters who struggle with traditional beads.
Troubleshooting: Common Problems And Solutions
Even experienced shooters run into issues. Here’s what to watch for and how to fix it.
- Red dot won’t hold zero: Check your mounting screws. Use a torque wrench and thread locker if needed. If the rail is loose, no adjustment will help.
- Dot disappears under recoil: Some sights can’t handle shotgun recoil. Make sure your red dot is rated for shotguns.
- Big differences with different ammo: Always zero with your main ammo. For critical use (defense, competition), stick to one load.
- Can’t see the dot in bright sunlight: Increase brightness, but avoid maxing out unless necessary—it drains batteries.
- Dot appears blurry: Some people with astigmatism see a fuzzy dot. Try a different sight or use a green dot model.
Advanced Tips For Consistent Accuracy
After you master the basics, small changes can make a big difference.
- Practice shouldering your shotgun so the dot appears instantly.
- Use a shotgun rest for sight-in, then practice off-hand to mimic real-world use.
- Replace batteries before important events. Many shooters forget and lose their dot at the worst time.
- Clean the lens regularly; dust and oil can obscure the dot.
- Record your settings and distances in your range notebook.
Pro tip: If you switch barrels or chokes, re-check your zero. Even small changes can shift your point of impact.
Understanding Moa And Dot Size
MOA stands for Minute of Angle. One MOA is about 1 inch at 100 yards. Most red dots for shotguns use a 3-6 MOA dot, which covers 1.5-3 inches at 50 yards. A bigger dot is faster for close targets, but a smaller dot is better for precision.
| Dot Size (MOA) | Dot Size at 25 yds | Best Use |
|---|---|---|
| 2 MOA | 0.5 inch | Precision, slugs |
| 4 MOA | 1 inch | General use |
| 6 MOA | 1.5 inch | Fast shooting, close range |
If you’re not sure, start with 4 MOA. It’s a balanced choice for most shotguns.
Checking Zero Over Time
Sighting in is not a one-time event. Hard use, temperature changes, and rough handling can all affect your zero. Here’s what to do:
- Check zero after cleaning, travel, or dropping the shotgun.
- At the range, fire one slug at 25 yards. If the impact matches your dot, you’re good to go.
- Schedule a full sight-in every few months if you use your shotgun often.
Extra insight: Even top shooters re-zero regularly. Confidence in your aim comes from knowing your point of impact.
Safety Reminders And Range Etiquette
Always follow basic safety rules:
- Keep your finger off the trigger until ready to shoot.
- Point the muzzle in a safe direction at all times.
- Use eye and ear protection.
- Announce when you’re “going down range” to check targets.
Respect for others at the range keeps everyone safe and makes sighting in less stressful.
Frequently Asked Questions
What Distance Should I Sight In My Red Dot For A Shotgun?
For most home defense or tactical use, 15–25 yards is ideal. Hunters using slugs often zero at 50 yards. Choose a distance that matches your main use. Always test at several distances to understand how your pattern shifts.
Can I Sight In Using Buckshot Or Birdshot?
It’s best to use slugs for sight-in because they are more accurate. After zeroing, check your results with buckshot or birdshot. Adjust only if the pattern center consistently shifts from your red dot.
How Often Should I Check My Zero?
Check your zero after cleaning, travel, or any hard use. Even small bumps can move your sight. Regular shooters should confirm zero every few months, or after changing ammo or shotgun setup.
My Red Dot Is Blurry Or Star-shaped. Why?
Some shooters have astigmatism, which can make the dot appear fuzzy or irregular. Try a green dot or a different optic. Cleaning the lens can also help. If the problem remains, consult an eye doctor.
Are All Red Dots Good For Shotguns?
No. Shotguns have strong recoil, so you need a red dot rated for shotguns or high-recoil rifles. Check the manufacturer’s specs. Using a low-quality red dot can lead to failures and lost zero.
Finally
Mastering the process of sighting in your red dot may take some practice, but the results are worth it. With a steady hand, the right steps, and regular checks, your shotgun will become a far more accurate and reliable tool—ready for whatever challenge you face.
Leave a Reply