
Adjusting a red dot sight can seem confusing if you have never done it before. But with the right guidance, it becomes a simple skill that can greatly improve your shooting accuracy. Whether you use a red dot for hunting, sport shooting, or self-defense, a properly adjusted sight helps you hit your target faster and with more confidence.
Many shooters make mistakes by guessing or rushing the process. This often leads to missed shots and frustration. If you want to get the most out of your red dot sight, learning how to adjust it correctly is essential. This article explains every step, from mounting the sight to fine-tuning it for different distances.
You will also find common errors to avoid, practical examples, and expert tips that even experienced shooters sometimes overlook.
Table of Contents
Understanding Red Dot Sights
Before making adjustments, it’s important to know what a red dot sight is and how it works. A red dot sight is a type of non-magnifying reflector sight. It uses a small LED to project a red dot onto a lens. This dot acts as your aiming point.
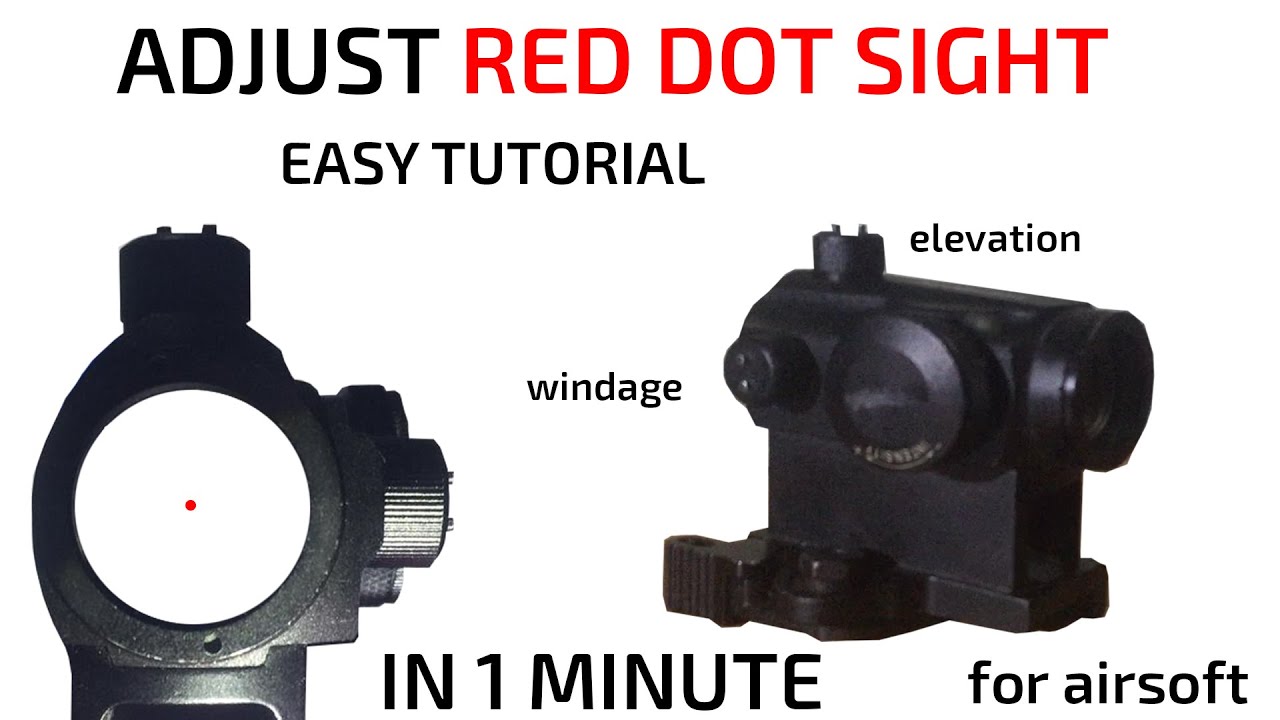
Most red dot sights have two main adjustment features:
- Windage: Moves the dot left or right
- Elevation: Moves the dot up or down
Red dot sights are popular because they allow for quick target acquisition. You do not need to align front and rear sights—just put the dot on the target and shoot. But if the dot is not adjusted (or “zeroed”), your shots will not land where you aim.
Preparing For Adjustment
Proper setup starts before you even touch the sight’s dials. Skipping this stage is a common mistake, and it leads to wasted time and ammo.
Mounting The Red Dot Sight
The sight must be mounted securely. Use the correct tools and follow the manufacturer’s instructions. If the sight is loose, adjustments will not matter because the zero will shift with every shot.
Check that:
- The sight is tight on the rail (no wobble)
- The lens is clean
- You have the correct batteries installed
- The dot is visible and bright enough for your environment
Gathering The Right Tools
Before you begin, make sure you have:
- A stable shooting platform (bench rest or sandbags)
- The right ammunition (the same type you will use most)
- Adjustment tool (often a small screwdriver or a coin)
- Target with clear aiming points
- Rangefinder (optional, for measuring distance)
Having everything ready prevents unnecessary trips and interruptions.
How to set up focus on a new rifle scope
The Basic Steps To Adjust A Red Dot Sight
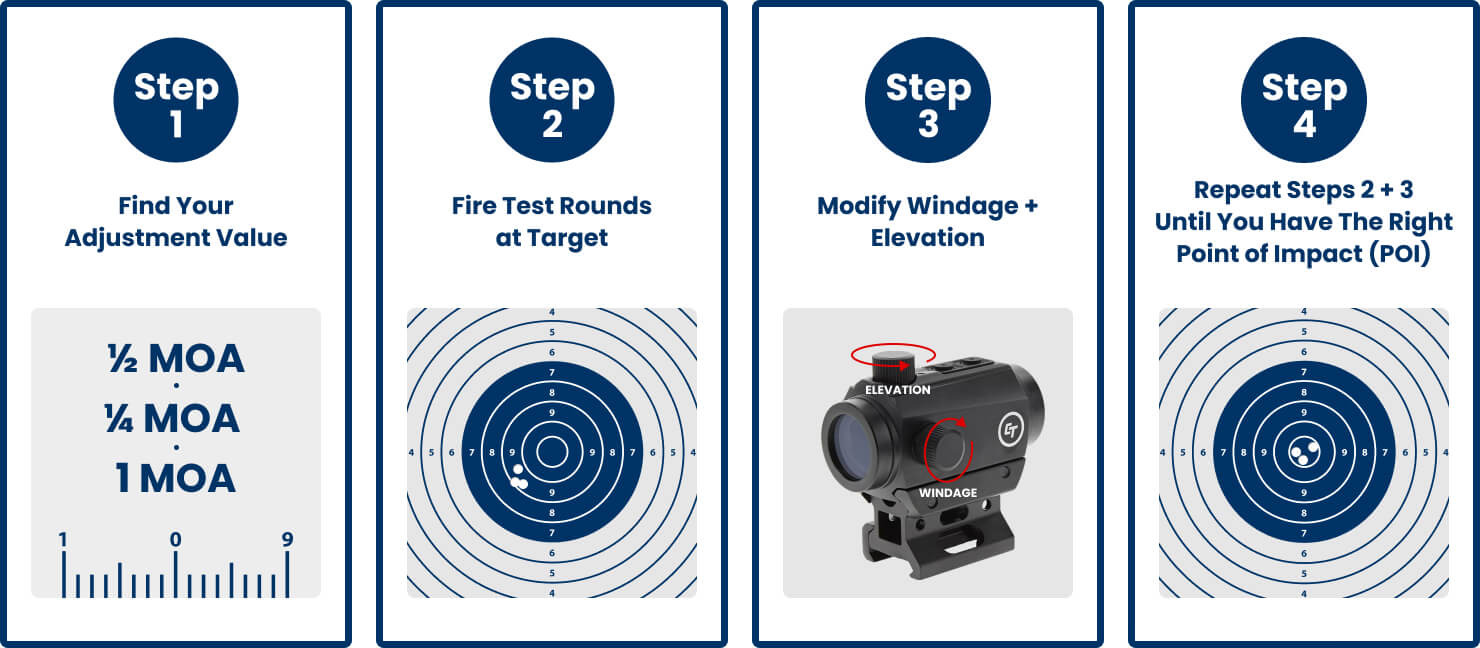
Adjusting a red dot sight follows a logical process. Each step builds on the previous one. Here is the complete workflow.
1. Set Your Distance
Most red dot sights are zeroed at 25 yards (22.86 meters) or 50 yards (45.72 meters). For handguns, 15-25 yards is common. For rifles, 50 yards is standard.
Pick a distance that matches your main use. If you only shoot at 10 yards, adjust for that. But if you want a “battle zero” for home defense, use 25 or 50 yards.
2. Shoot A Group
Place your target at the chosen distance. Take 3-5 careful shots using your normal shooting stance. Aim at the same point each time. This first group tells you where your shots are landing in relation to your aiming dot.
Tip beginners miss: Do not adjust after each shot. Always shoot a group first—single shots can be affected by small mistakes.
3. Observe The Impact
Look at the group on the target. Measure how far the center of the group is from your aiming point—both up/down and left/right.
For best results, use a ruler or caliper for accuracy. Most adjustment dials move the dot in MOA (Minute of Angle). One MOA equals about 1 inch at 100 yards, 0.5 inch at 50 yards, or 0.25 inch at 25 yards.
4. Make Adjustments
Turn the windage and elevation dials to move the dot toward the group. For example, if your shots are hitting low and left:
- Turn the elevation dial “up” (usually marked with an arrow)
- Turn the windage dial “right”
Most dials click as you turn them. Each click usually moves the impact by 0. 5 MOA or 1 MOA (check your manual).
Example Calculation:
If your shots are 2 inches low at 50 yards, and your sight adjusts 0. 5 MOA per click (0. 25 inch at 50 yards), you need 8 clicks up (2 inches ÷ 0. 25 inch per click).
5. Fire Another Group
Shoot another group using the same process. Check if your shots are closer to the target center. If not, repeat the adjustments.
Continue this “shoot–adjust–shoot” process until your group is centered on the target.
6. Confirm And Fine-tune
Once you are close, fire a final group of 5 shots. Make minor adjustments if needed, but avoid chasing single stray shots. When your group is consistently on target, your red dot sight is zeroed.
The best way to calibrate a red dot sight
Advanced Tips For Accurate Adjustment
Many shooters stop after basic zeroing, but a few extra steps can make your sight even more reliable.
Parallax And Eye Position
Some red dot sights are advertised as “parallax-free,” but almost all have slight parallax at very close or far distances. This means the dot may move a little if your eye shifts position.
Non-obvious insight: Always keep your head and eye position consistent when zeroing. If you change your cheek weld or sight picture, your point of impact may shift.
Adjusting For Different Ammo
Different bullets can hit at different points, even from the same gun. Always zero your sight using the exact ammunition you plan to use most. If you switch ammo, check your zero again.
Understanding Holdover
If you zero at 25 yards but sometimes shoot at 100 yards, the bullet’s path changes. The red dot will not be “dead on” at all distances. Learn your gun’s trajectory or use a ballistics calculator for reference.
Troubleshooting Common Problems
Even experienced shooters face issues when adjusting a red dot sight. Here are practical solutions for typical problems.
Red Dot Not Holding Zero
If your sight keeps losing zero, check:
- Mount tightness: Re-tighten screws to the recommended torque
- Battery health: Replace old or weak batteries
- Sight quality: Low-cost sights can shift zero more easily
Dot Not Moving With Adjustments
Sometimes, you turn the dials and the dot does not seem to move. Possible reasons:
- You are moving the dot, not the impact: Remember, turning the dials moves the dot, not your group. Always adjust the dot toward your group.
- Internal damage or defective sight: If nothing works, your sight may be faulty.
Group Size Is Too Large
If your shots are scattered, zeroing is impossible. Focus on:
- Stable shooting position: Use a rest or sandbags
- Consistent trigger control
- Proper ammunition: Cheap or mismatched ammo can cause wide groups
Comparing Red Dot Sight Features
Not all red dot sights adjust the same way. Some have tool-less dials, others need a screwdriver. Some are waterproof and shockproof, others are not. Here is a comparison to help you understand the differences:
| Feature | Budget Red Dot | Mid-Range Red Dot | Premium Red Dot |
|---|---|---|---|
| Adjustment Type | Requires tool | Tool-less dials | Tool-less & locking dials |
| Shockproof | No | Partial | Yes |
| Battery Life | 100-500 hours | 1000-5000 hours | 10,000+ hours |
| Waterproof | No | Yes | Yes |
| Warranty | 1 year | 5 years | Lifetime |
What To Avoid When Adjusting A Red Dot Sight?
Many shooters repeat the same errors. Here are mistakes to watch for:
- Rushing the process: Take your time. Quick fixes rarely work.
- Adjusting after every shot: Use groups, not single shots, for adjustment.
- Using mixed ammo: Different brands or loads give different results.
- Forgetting to lock dials: Some sights have locking rings. Use them.
- Zeroing at the wrong distance: Pick a distance that fits your shooting needs.
How Red Dot Sights Compare To Iron Sights?
Understanding the difference between red dot and iron sights helps you appreciate proper adjustment. Here’s a quick comparison:
| Aspect | Red Dot Sight | Iron Sights |
|---|---|---|
| Ease of Use | Very easy | Requires alignment |
| Speed | Fast target acquisition | Slower |
| Low Light Performance | Excellent | Poor |
| Battery Dependency | Yes | No |
| Adjustment Simplicity | Simple dials | Manual drift |
Maintaining Your Zero
Once your red dot is adjusted, you want it to stay that way. Here’s how to protect your zero:
- Check tightness regularly: After every range session, check the mount.
- Avoid drops and impacts: Even shockproof sights can shift after a hard drop.
- Store in a padded case: This prevents damage during transport.
- Recheck zero after cleaning: Occasionally, disassembly can affect alignment.
Pro tip: Mark your sight’s position with a small dab of nail polish or marker where the mount meets the rail. If it shifts, you will see it instantly.
Practical Example: Adjusting A Red Dot On An Ar-15
Suppose you have mounted a red dot on your AR-15 and want to zero at 50 yards. Here’s how you do it:
- Set up your target at 50 yards.
- Use a sandbag rest for stability.
- Fire 5 shots at the center dot.
- Your group lands 1.5 inches low and 1 inch right.
- Your sight adjusts 0.5 MOA per click (0.25 inch at 50 yards).
- To correct 1.5 inches up: 1.5 ÷ 0.25 = 6 clicks up.
- To correct 1 inch left: 1 ÷ 0.25 = 4 clicks left (if your shots hit right, move dot left).
- Fire another 5-shot group.
- Repeat adjustments until the group is centered.
Non-obvious insight: Many shooters forget to factor in their own “shooter error.” If your groups are inconsistent, work on your fundamentals before blaming the sight.
Frequently Asked Questions
What Is The Best Distance To Zero A Red Dot Sight?
The ideal distance depends on your needs. For most rifles, 50 yards is a good all-around zero. For pistols or short-range firearms, 15-25 yards is common. If you mainly shoot at one specific distance, zero for that.
How Often Should I Check My Red Dot Zero?
Check your zero every time you mount or re-mount your sight, after hard impacts, or if you change ammunition. Regular shooters should recheck zero every few months.
Can I Zero A Red Dot Sight Without Shooting?
No. While you can “bore sight” to get close, you must fire live rounds to confirm and fine-tune your zero. Dry adjustments alone are not reliable.
What If My Red Dot Sight Will Not Adjust Enough?
If you run out of adjustment range, your sight or mount may be installed incorrectly, or you may need a riser or different base. Double-check your installation and consult the manufacturer.
Do Red Dot Sights Work In Low Light?
Yes, red dot sights are excellent in low light. The illuminated dot is easy to see when iron sights are hard to use. Some models have night vision settings for even darker conditions.
Lastly
Adjusting a red dot sight is not difficult, but it does require patience and attention to detail. By following the steps in this guide, you will be able to zero your sight confidently and enjoy more accurate shooting. Remember, the key is consistency—both in your adjustments and your shooting technique.
With your red dot properly adjusted, every shot counts. Take your time, avoid shortcuts, and you will see real improvement at the range or in the field.
Leave a Reply