Calibrating a scope is an essential skill for any shooter who wants to hit targets accurately, whether you use a rifle for hunting, target shooting, or competitions. Many people think mounting a scope is enough, but if you skip calibration, your shots can land far off the mark—even if you have a high-quality scope.
In this guide, you’ll learn exactly how to calibrate a scope, step by step, and understand why each part of the process matters. You’ll also discover tips that even experienced shooters sometimes overlook.
Table of Contents
What Does Calibrating A Scope Mean?
Calibrating, or zeroing a scope, means adjusting it so that where your crosshairs point is where your bullet actually hits at a certain distance. Without calibration, even the best scope cannot help you shoot straight.
When you calibrate, you line up the scope’s reticle with the rifle’s barrel. This process accounts for factors like bullet drop, wind, and even how you mount the scope. Proper calibration means you can trust your shots, whether aiming close or far.
Tools And Preparation
Before you start, gather the right tools. Skipping any of these can make your calibration less accurate.
- Rifle with mounted scope: Ensure the scope is securely attached.
- Ammunition: Use the same type you’ll use in actual shooting.
- Boresighter: Optional but helpful for initial alignment.
- Targets: Paper targets with clear bullseyes work best.
- Shooting rest or sandbags: To stabilize your rifle.
- Screwdriver or turret tool: For adjusting windage and elevation.
- Rangefinder: To measure exact distances.
- Pen and notepad: For recording results.
Before heading to the range, check that your rifle and scope are clean and in good working order. A dirty lens or loose screws can ruin the process.
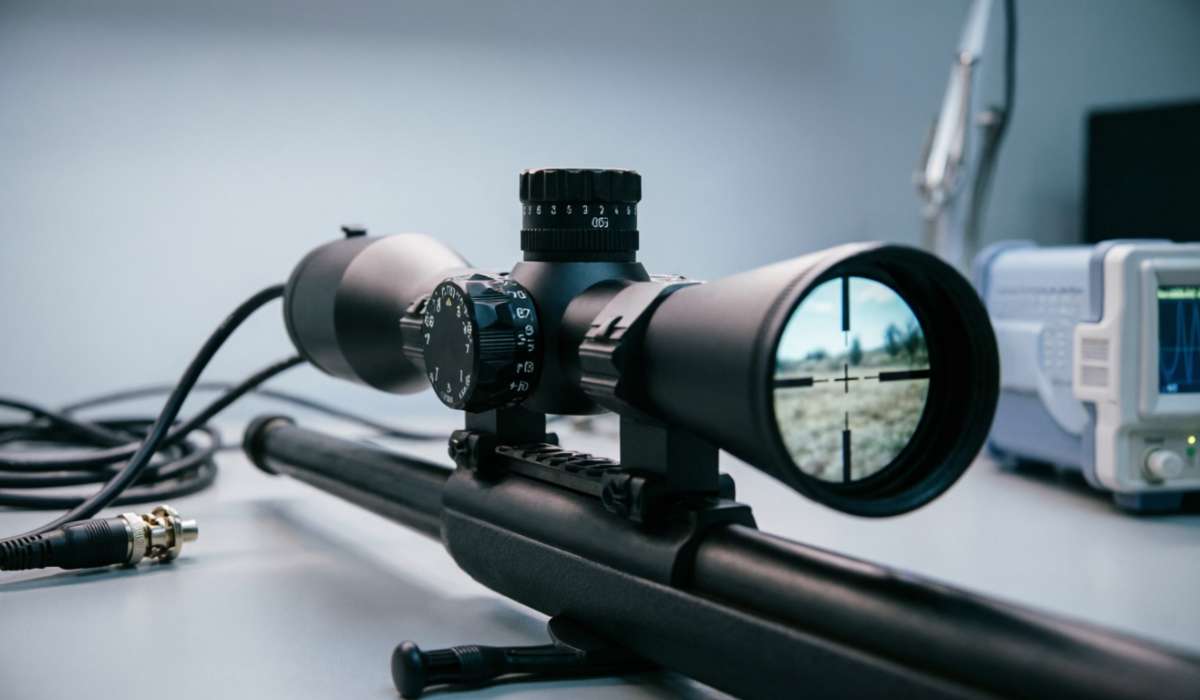
Mounting The Scope Correctly
A scope that’s not mounted right cannot be calibrated well. Here’s what to focus on:
- Level the rifle: Place the rifle on a stable surface using a rest or sandbags.
- Align the scope: The reticle should be perfectly horizontal and vertical when you look through it.
- Tighten mounting screws: Secure, but don’t overtighten. Uneven pressure can twist the scope.
- Set eye relief: Move the scope forward or back until you see a clear image without straining.
A common mistake is ignoring the level. If your scope is tilted, your adjustments will always be off.
Boresighting: The First Alignment
Boresighting is a quick way to get your scope roughly aligned with your barrel before you shoot.
How To Boresight
- If you have a bolt-action rifle, remove the bolt, and look down the barrel at a target.
- Center the target in the barrel, then adjust the scope so the crosshairs also point at the target.
- If you use a laser boresighter, insert it into the barrel. Adjust the scope until the reticle matches the laser dot.
Boresighting does not replace live-fire calibration but saves time and ammo.
Choosing The Right Distance
Most shooters zero their scope at 100 yards (about 91 meters). For air rifles or small calibers, 25 or 50 yards may be better. The distance you choose depends on your typical shooting range.
For hunters who shoot at longer ranges, you might calibrate for 200 yards. Always use a measured distance, not a rough guess.
Typical Zeroing Distances
| Caliber / Use | Recommended Zero Distance |
|---|---|
| Small caliber (e.g., .22 LR) | 25-50 yards |
| Standard hunting rifle | 100 yards |
| Long-range shooting | 200 yards |
| Air rifle | 20-30 yards |
Choosing the right distance is important because bullet drop changes as distance increases.
Making The First Shots
Once your scope is mounted and boresighted, set up your target at the chosen distance. Use a rest or sandbags to keep the rifle steady.
- Load three rounds and shoot a group, aiming at the bullseye each time.
- Check where the shots land on the target.
- Measure the distance from the center of your group to the bullseye—both horizontally and vertically.
Tip: Use a spotting scope or binoculars to see your hits without walking each time.
Adjusting Windage And Elevation
Scopes have two main adjustment dials, called turrets:
- Windage: Moves the reticle left or right.
- Elevation: Moves the reticle up or down.
Each click of the turret moves your point of impact a set amount (often 1/4 inch at 100 yards, called 1/4 MOA).
How To Adjust
- If your shots are left of the bullseye, turn the windage turret to move the impact right.
- If your shots are low, turn the elevation turret to move the impact up.
- Make small adjustments, then shoot another group to check.
Non-obvious insight: Always adjust the scope in the direction you want your bullet to go on the target.
Understanding Moa And Click Values
MOA stands for Minute of Angle. One MOA is about 1 inch at 100 yards. Most scopes adjust in fractions of MOA per click.
Moa Conversion Table
| Distance | 1 MOA (inches) | 1/4 MOA (inches) |
|---|---|---|
| 100 yards | 1.05 | 0.26 |
| 200 yards | 2.09 | 0.52 |
| 300 yards | 3.14 | 0.78 |
Knowing your scope’s click value helps you adjust accurately.
Shooting And Adjusting: Step-by-step
- Fire a group of three shots at the center of your target.
- Identify the center of your group.
- Calculate the adjustment needed. For example, if your group is 2 inches low and 1 inch right at 100 yards, and your scope is 1/4 MOA per click, turn the elevation turret up 8 clicks and the windage turret left 4 clicks.
- Shoot another group to confirm.
- Repeat as needed until your shots hit the bullseye.
Practical tip: Always use groups, not single shots, for adjustments. One shot can be an outlier.
Environmental Factors
Wind, temperature, and even humidity can affect your shots. For best results:
- Calibrate on a calm day.
- Use the same ammunition every time.
- Avoid shooting directly into the sun, which can affect your sight picture.
Advanced tip: If you shoot at different locations, recalibrate each time. Even altitude changes can shift your zero.
Parallax And Focus Adjustments
Many scopes have a parallax adjustment, especially at higher magnification. If your reticle seems to move when you shift your head, adjust the parallax until the reticle stays on target. This ensures accuracy, especially for precision shooting.
Some scopes have a fast-focus eyepiece to sharpen the reticle. Use it until the crosshairs are clear and crisp.
Recording Your Zero
Once you’re zeroed, write down your scope settings and the environmental conditions. If you need to remove and remount your scope, you can return to your zero quickly using these notes.
Non-obvious insight: Mark your scope turrets with a paint pen or tape after zeroing. This makes it easy to see if anything shifts.
Troubleshooting Common Problems
Problem: Shots Are Inconsistent
- Check if the scope is loose.
- Use the same ammo for all shots.
- Make sure you hold the rifle the same way every time.
Problem: Shots Won’t Group
- Clean your barrel.
- Try a different brand of ammunition.
- Check for damaged scope mounts.
Problem: Adjustments Don’t Seem To Work
- Confirm you are turning the turrets in the correct direction.
- Some scopes have “zero stop” features—reset if needed.
Advanced Tips For Consistent Calibration
- Always use a shooting rest for calibration, not just your hands.
- Let the barrel cool between groups; a hot barrel can throw off accuracy.
- If you change ammo type, recalibrate. Different bullets can hit in different places.
- Consider using a ballistic calculator for long-range shooting.

Safety Reminders
- Always keep your rifle pointed in a safe direction.
- Use eye and ear protection.
- Check that your range is clear before firing.
When To Recalibrate?
You should recalibrate your scope if:
- You drop your rifle or scope.
- You change ammunition.
- You shoot at a very different altitude or temperature.
- You remove and remount your scope.
Even the best scopes can lose zero over time, so regular checks keep you accurate.
Comparing Scope Types And Their Calibration Needs
Not all scopes require the same calibration process. Here is a quick comparison.
| Scope Type | Calibration Complexity | Common Use |
|---|---|---|
| Fixed-power scope | Simple | Hunting, basic target shooting |
| Variable-power scope | Moderate | Long-range, tactical |
| Red dot sight | Very simple | Short range, fast shooting |
| High magnification scope | Complex (needs parallax adjustment) | Precision, competition |
Choose a scope that matches your needs and skill level. More complex scopes give more control but demand more careful calibration.
Final Checks And Maintenance
After you have finished calibrating:
- Take a final group of shots to confirm your zero.
- Tighten all screws one last time.
- Store your rifle and scope in a safe, dry place.
Maintenance tip: Check your calibration before any important hunt or match. Transport and bumps can shift your zero.
Frequently Asked Questions
How Often Should I Calibrate My Scope?
Check your zero every time you use your rifle, especially if you travel or change ammunition. At a minimum, recalibrate at the start of each shooting season.
Can I Calibrate A Scope Without Firing Shots?
You can boresight a scope without firing, but live-fire calibration is essential for accuracy. Boresighting just gets you close.
What Does “resetting To Zero” Mean?
This means adjusting your scope turrets so the current zero point is set as the reference. Some scopes have a “zero stop” feature for this.
Lastly
Calibrating a scope is a process that pays off every time you shoot. With careful steps and attention to detail, your accuracy will improve. Remember, even small mistakes can lead to big misses—so take your time, record your results, and enjoy hitting your mark with confidence.
Leave a Reply